Wednesday, February 28, 2007

Aluminum Under Shoulder Details, Meet at Mike's

Ryan's excellent aluminum under shoulder details arrived today. Right now I have Keith's resin parts installed, and they do look very good, but I've wanted this part in aluminum for quite some time. I'm not exactly sure when I will install them however, as I'm driven to get the feet done before I start revisiting other areas on the droid.


Roy Powers, Mike Granek and I had a very impromptu meeting at Mike's tonight. I also had Mike review my current foot shell progress. With just a bit more work, they will get the Senna Seal of Approval™. They should, Mike did most of the work.


Yes, this my way of saying that I got nothing productive done today on my droid.

Monday, February 26, 2007

More of the Same

Just a few minutes of light sanding on the outer foot shells tonight.

I told you this would get tedious.

Sunday, February 25, 2007

Finished Cutting Bottom Strips for Outer Feet, More Finishing Work

Today I completed cutting the strips that go on the bottoms of the outer feet.

I started by making a mark with a razor blade on the strip.


As I did this past Monday, I trimmed the strip down on the miter saw at a 45 degree angle.


Things are looking pretty good. I won't glue these on just yet though...


... because I'm still working on finishing up the rest of the foot shells first. I did some light filling and sanding again today, more primer, and hopefully one more round and I'll be done.

Saturday, February 24, 2007

More Outer Foot Shell Finishing

After spending around five hours in the R2 Builders chat last night, I got back to work on the outer foot shells.

I sanded down the Bondo that I applied Thursday night, again by using sand paper wrapped around the battery box, and running the curved part of the foot shell back and forth.


With so many different colors to look at (gray and white for the PVC, pink for the Bondo), I used some gray primer to help find the remaining flaws.


Things actually look better than I thought they would, but I still have a little more filling and sanding to do. I'm ignoring the middle area where the curve and flat part above the curve meet, since that is going to get cut out for the drive train to fit into the battery boxes.

Thursday, February 22, 2007

Fun with Bondo

Tonight I got reacquainted with my good friend Bondo. Bondo and I first met on July 16th of last year, and we've been buddies ever since. Evidently it's the fumes.


The main areas that needed work were where the curve meets the front/back sides, and where the curve meets the flat part above the curve. A couple of seams also got some attention. Tomorrow I'll sand, hit it with some primer to find the discontinuities, and repeat as necessary.

Wednesday, February 21, 2007

Sanded Second Outer Foot Shell

More of the same from yesterday. A few hours of sanding the other outer foot shell.

This time I used one of Craig's battery boxes to sand the curved area. The profile is a better match than the pipe I used yesterday, but it's harder to use. I actually moved the foot back and forth against the sandpaper on the stationary battery box.


I probably have a little bit more light sanding to do, but it's almost ready for filling here and there.

Tuesday, February 20, 2007

Outer Foot Shell Sanding

Tonight I worked on sanding the edges of one of the outer foot shells smooth.

I found some PVC pipe that's almost 3" outer diameter. It's more like 3.25", so I can't use it to perfectly sand smooth the curve of the feet, but I can get close.


I need to keep in mind that I'm going to be cutting a fairly large chunk of material out of the foot shell, because the drivetrain isn't going to fit completely inside the foot shell. It will actually enter into the battery box, so those will get cut too. There's no sense in finishing certain sections of the foot shells to perfection because of this.

After a few hours of sanding, I have one of the foot shells just about ready for filling (with Bondo, probably) and then... another round of sanding. There's a lot of sanding in my future.


This is going to get tedious over the next few days, but R2 refuses to build himself.

Monday, February 19, 2007

Dremeled & Sanded Outer Foot Shells, Started Trimming Bottom Strips

I love three-day weekends! (Who doesn't??) Today afforded me a chance to make a mess in the garage.

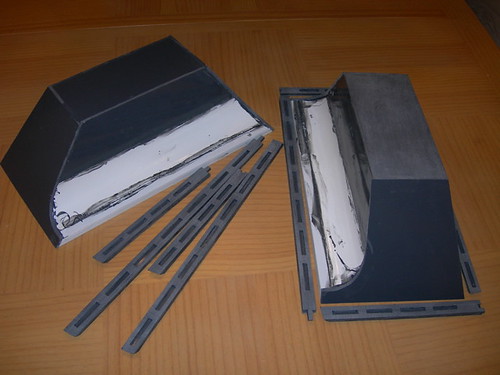
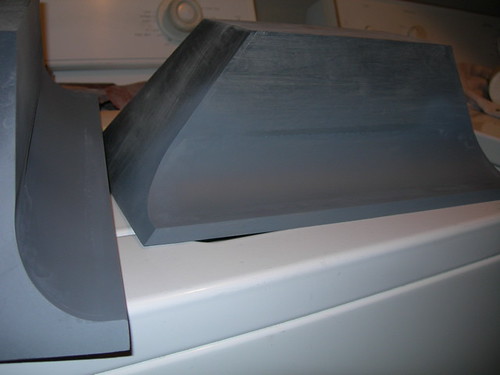
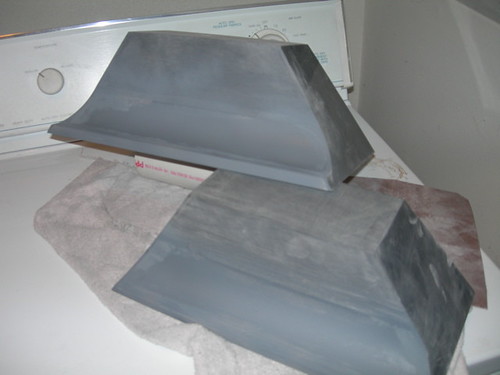
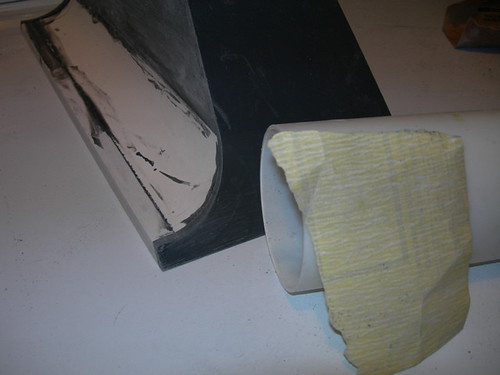
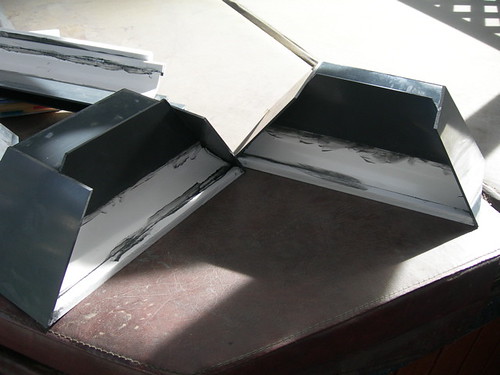
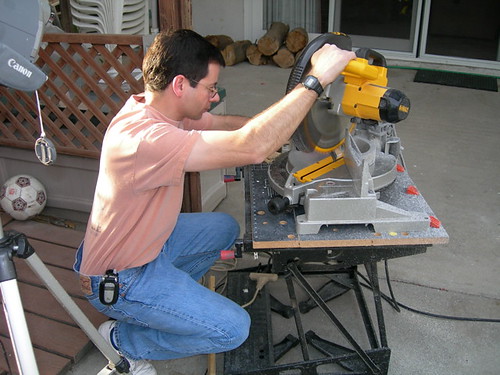
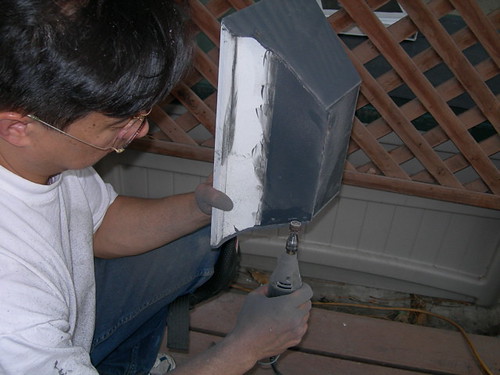
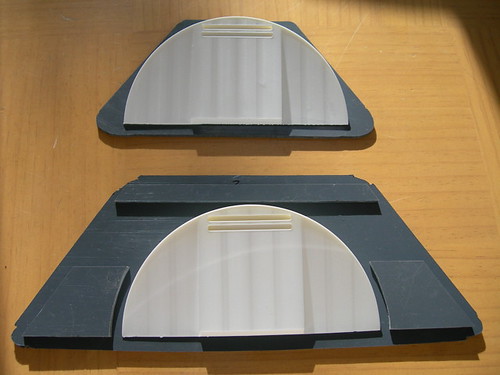
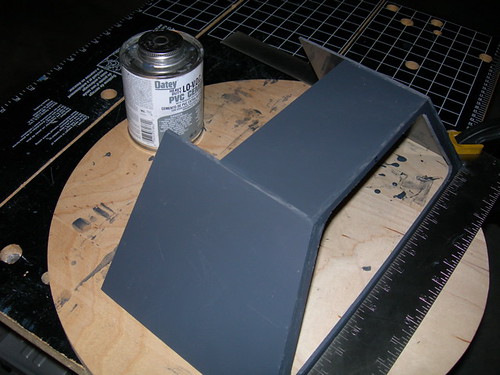
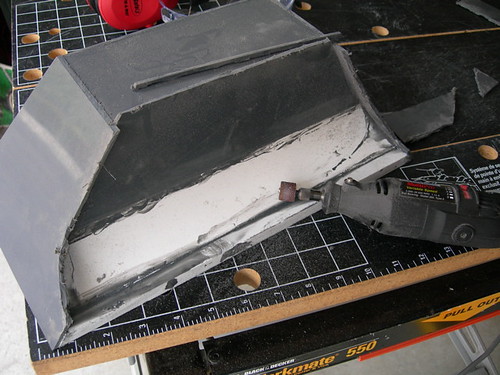
I pretty much picked up where I left off yesterday with the outer feet. The PVC glue had dried overnight, so I used the Dremel with the cutoff wheel to hack down most of the overhang on the edges of the outer feet. Then I used the Dremel drum sander to bring the overhang to a minimal distance so that I can sand off the rest by hand.


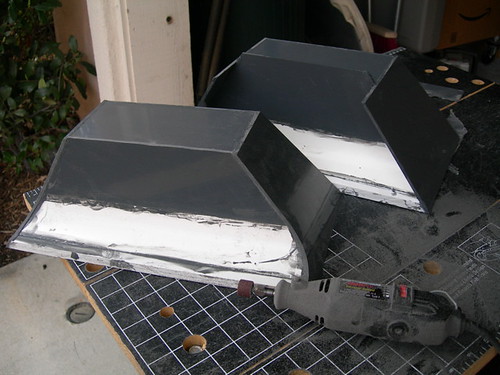
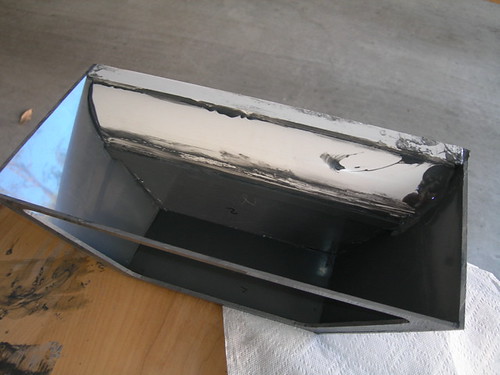
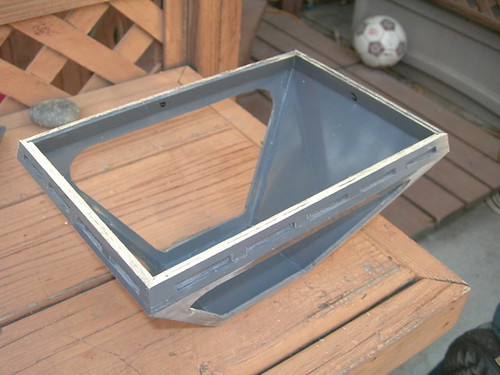
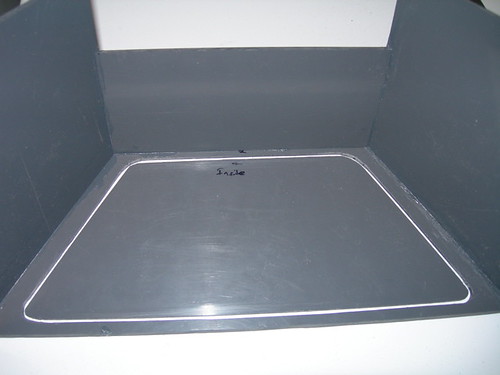
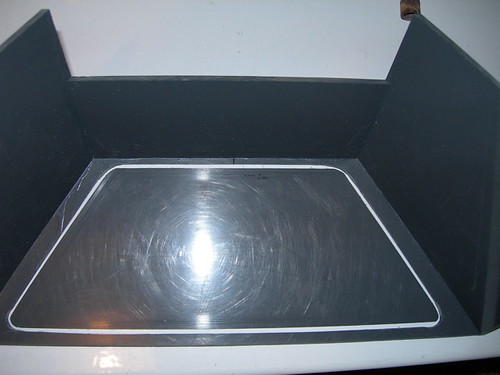
After the trimming, I sanded the top side of one of the outer foot shells nice and flat. I also sanded the flat edges on the bottom of the curved side on both foot shells, so that I could be sure that the lengths of the bottom strips could be measured accurately.


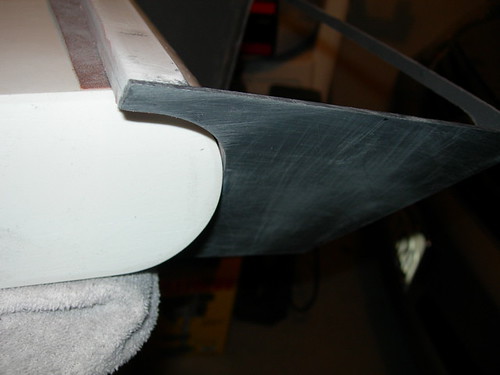
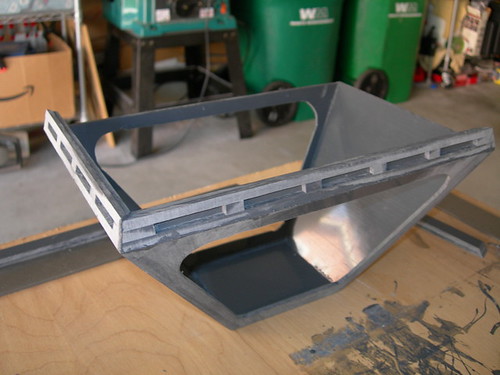
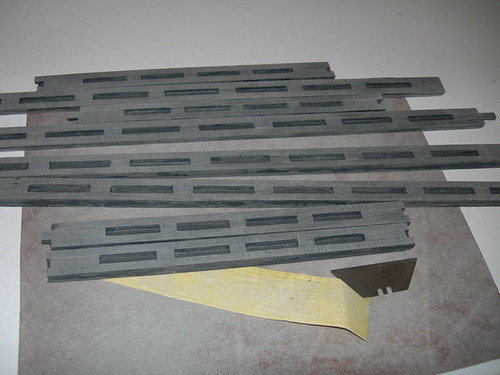
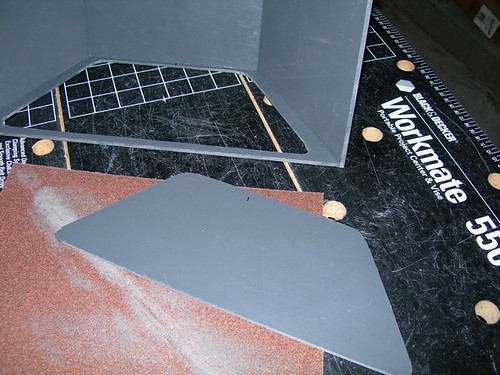
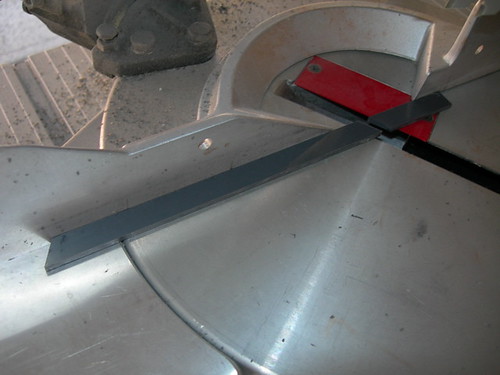
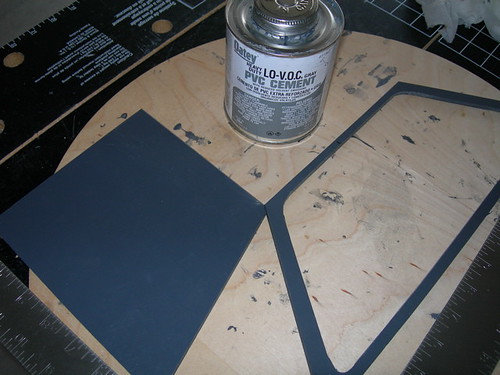
Recall that the bottom strips were cut too long intentionally, and now is the time to cut them to the correct length.

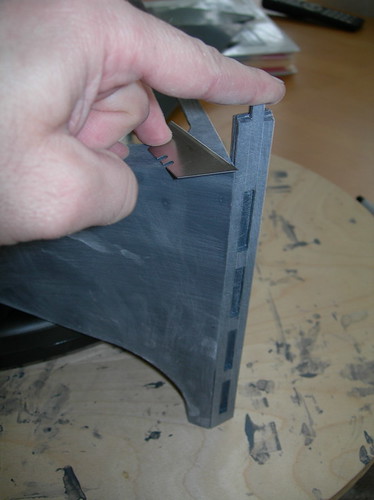
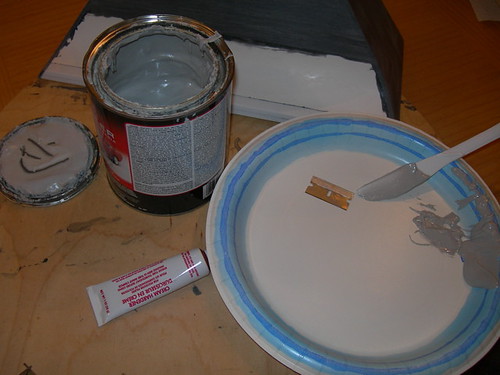
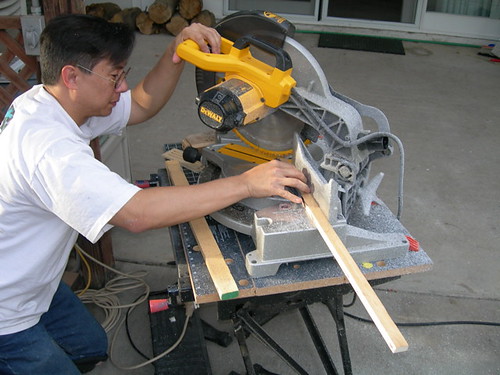
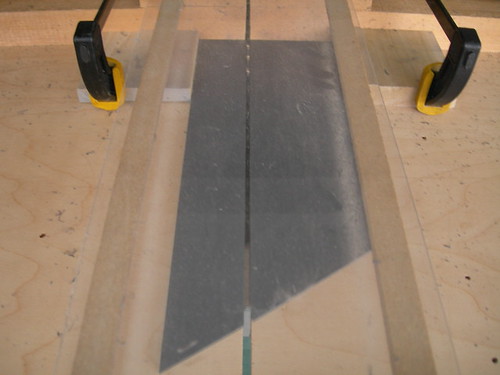
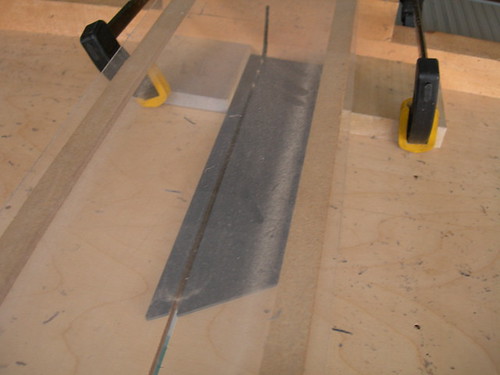
As Mike showed me on Saturday, the idea is to locate the midpoint of a bottom strip, and the midpoint of the corresponding edge of the foot shell. These two points will line up when the strip is glued to the foot. Once the centers are lined up, I then used a razor blade to lightly mark only the left edge on the bottom strip to trim. (The strips were trimmed upside-down, so the cut itself appears on the right.)

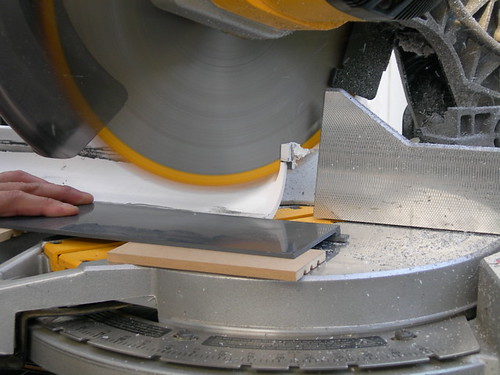
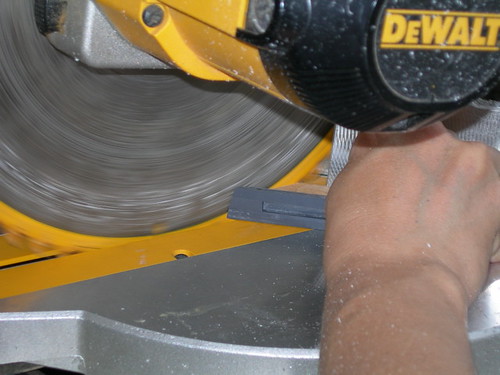
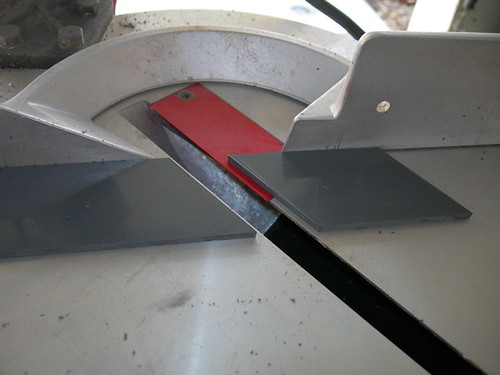
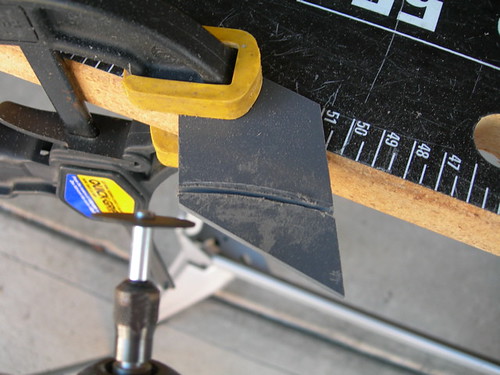
The top and bottom edges of the bottom strips have a 12 degree beveled edge, so I used a strip of wood that Mike cut on Saturday that also had the 12 degree tilt, to rest the PVC strip on. This helps to prevent the PVC from chipping as the cut is being made. I trimmed the strip down at a 45 degree angle a little at a time, until I hit my mark.


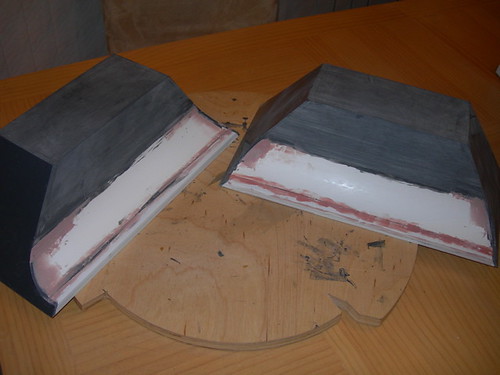
With the left sides trimmed, later I can again match the bottom strip to the corresponding foot shell edge, and make another notch for the right end, and trim. This time, I should have a match at both the left and center points on both the bottom strips and the foot shell edges, but the important thing is to align the left edges before marking the right edge. This ensures the correct length. (I ran out of daylight, otherwise I would have done it today.)

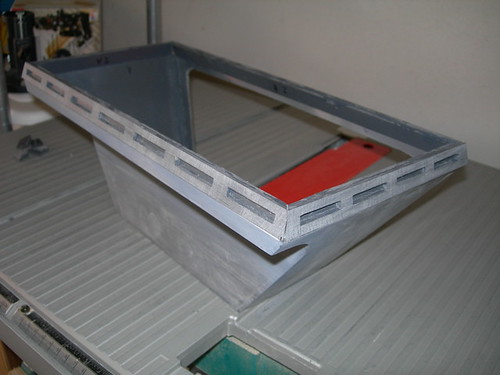
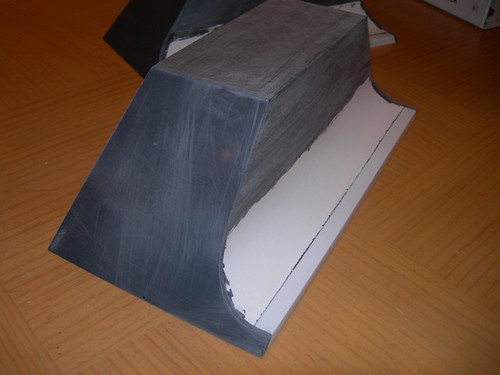
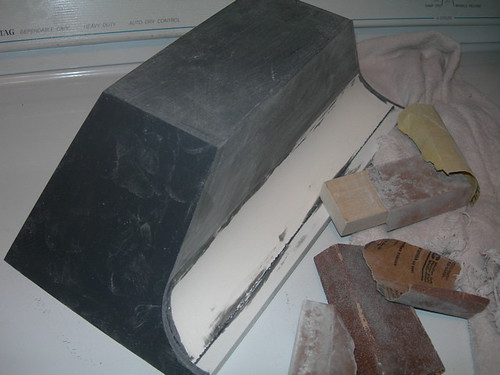
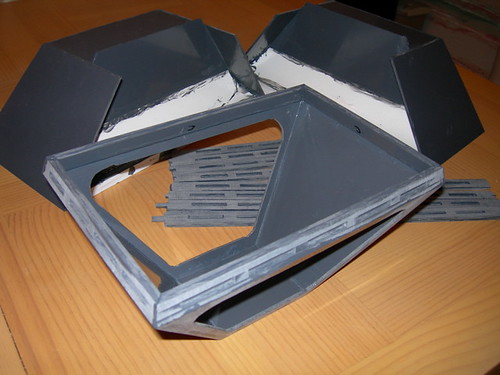
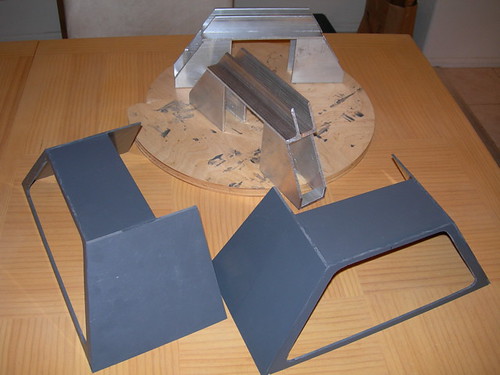
There's still a fair amount of work left on these foot shells, but they are definitely taking shape.

Sunday, February 18, 2007

Foot Shell Gluing, Lower Strips Prepped

Today I glued up some of the cuts from yesterday.

First I glued in the curved sides of the outer foot shells. These were actually glued in right-side up, but after the PVC glue had dried, I turned the foot shells over and oozed some more PVC glue on the seams from the inside, for further reinforcement.


Next, I glued down the bottom strips on the center foot.


Last up was sanding smooth the outer faces of the bottom strips for the outer feet. I also cleaned up the little "windows" in the strips as much as I could. This actually took longer than all the gluing combined.


Tomorrow I plan to trim the bottom strips for the outer foot shells to size. I also plan to trim off the overhang on the outer feet. After that, I should be able to glue the bottom strips onto them. Then those outer foot shells will really start to look real!

Saturday, February 17, 2007

More Foot Shell Work at Mike's

Today was a pretty exciting day, things are starting to come together for the foot shells.

Mike showed me the current state of his outer foot shells. He has trimmed the curved sides and glued them in place.


The first item of business for my foot shells was to trim the curved sides to size. This was an iterative process; trim, fit, trim, fit. Mike cut them perfectly to size.


Next up was cutting the bottom strips to size for center foot shell. These are simple 45 degree cuts with no beveled edge (yea!).


I made a practice cut, as I plan to cut the bottom strips for the outer feet during this three-day weekend.


Mike cut these perfectly too, ready for sanding and gluing.


Mike trimmed down the overhang of some of the edges on the outer foot shells with the Dremel cutoff wheel, followed by the drum sander, to wrap up the day.


I hope to glue up and trim the rest of my outer foot shells too here at home during this weekend. I can feel the momentum starting to build again, it's a good feeling.

Friday, February 16, 2007

Added Volume Control

Tonight I decided to add a volume control to my CFSound III system.

Unlike the CFSound II, the CFSound III has no volume knob. Instead, there are two physical push buttons for volume-up and volume-down. These aren't too useful when the sound system is buttoned up inside R2.

Fortunately, there is a three-pin header on the board that can also be used to control the volume. One of the outer pins is volume-up, the other is volume-down. When ground is jumpered between an outside pin and the middle pin, the volume adjusts accordingly.

I connected a three-pin cable (like the kind used for a computer fan) to the three-pin connector on the CFSound III board. I had to trim the beige plastic on the connector down a bit, in order for the Contact Sense 24 card that sits above the connector to fit properly. I also had to trim about 1mm off one corner of a green connector on the Contact Sense 24.


I drilled a 1/4" hole in the side of the box for the cable to fit through. After drilling the hole, I cut a small slot for the wires to slide through as well.


It works! Once I get my remote control system (which I'm still waiting for), I'll connect the wires so that I can control the volume via the remote.

Wednesday, February 14, 2007

Started Sanding Second Outer Foot Shell Door

My two other gears from McMaster-Carr arrived today. I still think it's weird that they shipped separately, but what do I know?

More exciting sanding of foot shell doors tonight. It looks unsurprisingly similar to last night's effort. I'm sure I'll have to do a little finish-sanding on these doors still, but it's a start.

Tuesday, February 13, 2007

More Drivetrain Parts Arrive, Started Sanding Doors for Outer Feet

My order from McMaster-Carr arrived today. This pretty much rounds out the remaining parts I need for the drivetrain. For some strange reason, two of the 11-tooth gears are being shipped from Chicago, while the other four were part of today's shipment. Must be an inventory issue or something.

The screws and nuts only come in bulk packages, but they are relatively inexpensive, compared to the gears and chain at least.


I started sanding down the edges of the doors that go on the outer foot shells tonight.


There's supposed to be a 1/8" gap between the door and the foot shell. I'm just about there with the first door, I probably need to sand a bit more.


This is almost as glamorous as when I sanded the resin eye.

Sunday, February 11, 2007

Cut Side Details & Strips for Outer Feet

Before I forget to mention it, blogger.com allows users to search its blogs. You can look up something like "wedges" and find any page that might be dealing with the ankle wedges. Now, back to our regularly scheduled blog entry.

For the first time in a while, I was able to work on a very easy part of the build, the details and strips that adorn the doors of the outer feet. Like the rest of the foot shells, these are made from 1/8" thick PVC.

I cut some PVC scrap that I had sitting around for these parts. First I cut a strip for the width of the side detail, and then another for the side strip.


Next I cut the required angles with the a miter saw.


At this point, the side strips are done, but the side details have a curve that needs to be cut from one side. I started the curve with the Dremel using the cutoff wheel attachment, and I finished it with the drum sander attachment.


As mentioned above, these parts go on the outer doors, along with the half-moons. I still need to trim the door edges. I should have done that today, but I forgot(!). The center door looks like a baby door when compared to the outer door.

Saturday, February 10, 2007

More Drivetrain Cuts, Started Gluing Outer Foot Shells

Today was fairly productive, I had a chance to work on a couple of areas on the feet.

The first order of business was to drop by Kelvin's, and use his band saw yet again. I needed to chop the corners off the square pieces that will house the wheels.


The L channel also needed to be trimmed. One pair is 1.500"x1.000", the other is 1.500"x1.188", per the H&A blueprints.


A 55 degree angle is cut on the L channel as well.


Back at home, I used a jigsaw to open up the area where the wheel will go.


After all those cuts, I cleaned everything up with a file.

Turning to the outer foot shells, I started gluing up three of the sides, and the top.


The overhang on the front and back sides will be trimmed, probably the next time I visit with Mike.

All in all, a reasonably productive day. I still need to drill a lot of holes for screws on the drivetrain, but first I need to order and receive the screws, nuts, chain, etc. from McMaster-Carr.