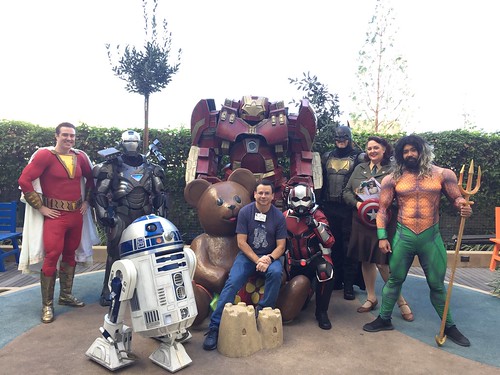
Today R2 returned to Childrens Hospital Orange County for their annual Halloween party, where we were joined by various superheroes from the DC and Marvel universes. This was also R2's first event with his new drivetrains with the bearings.
Once the characters changed into costume, we took a quick photo before venturing out to meet the young patients, families and staff.
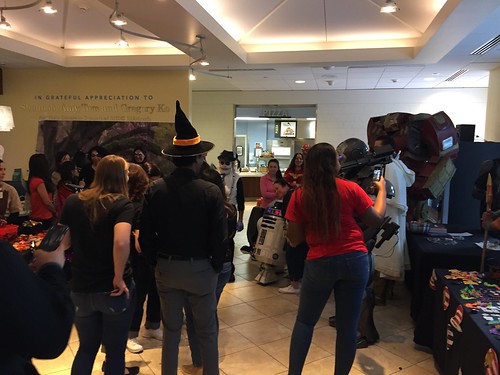
The kids are stuck in the hospital so they don't get to go trick-or-treating around the neighborhood, so we bring the neighborhood to them.
No pictures with the kids are allowed, but the staff enjoyed their photo ops.
One last group picture, and that's a wrap!
Hopefully we'll all be back next year. Oh, and I'm happy to report that the new drivetrains performed very well.
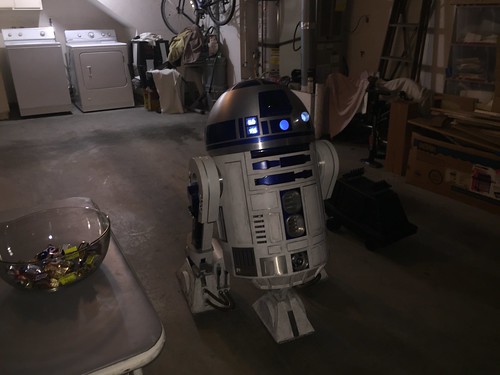
Tonight I was able to wrap up what little work was left on the new drivetrain body effort, where I installed bearings in place of flanges for the drivetrain axels.
All that remained was to fit the foot shells and battery boxes in place. This was a bit suspenseful for me, since if they didn't fit over the drivetrain bodies and motors, it would have meant having to relocated the motors. Thankfully, everything fit fine.
Droid #1 is back together now and ready for his next event to try out his new feet. That's scheduled a couple weeks from now, so in the meantime, we wait.
Today I was able to complete work on the left drivetrain body that uses bearings instead of flanges to hold the drivetrain axels in place.
I had to build a new chain for the side opposite the motor. I pulled out the old left over chain to measure out how much is needed.
I explain the basics of building chain here, and I followed those steps again. I placed an add-and-connect link and a connecting link in place on one end of the new chain and wrapped the chain around the gears and added some slack for the idler gear, to identify where to break the chain.
I used my chain breaking tool to remove the pin on the identified link. Note that it matters which pin to remove; with the pin removed I need the inside part of the chain link to be exposed.
With the chain now back together, I can place it on the gears to determine where to locate the idler gear. Slack on the chain is intentional, so as to not have the chain be over-taut. The slack shown is not enough to cause the chain to slip on the gears.
I marked where to drill with my punch, and drilled the hole for the idler gear at the proper location.
I then transplanted the hacked off piece of axel from the motor from the old drivetrain body to the new one, and installed the gears and chain on the non-motor side of the drivetrain.
I then reinstalled the motor mount and motor, and did a test of the drivetrain on the battery. Things ran nice and smoothly.
Next it was time to try both the updated drivetrains on the droid, and I'm happy to report that things seemed to work well.
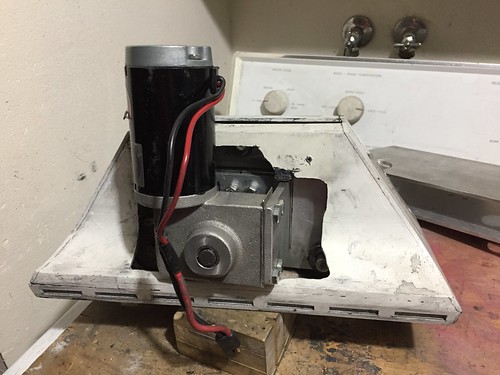
The last item of business for the evening was to remove the right drivetrain and use JB Weld to secure the three bearings that were press-fit in place (the fourth is already JB Welded in place). Almost done.
Tonight I was able to wrap up work (mostly) on the new drivetrain body that uses bearings instead of flanges for the axels on the right foot.
The JB Weld that I used to secure one of the bearings had cured, so I was able to do final assembly.
I then hooked up a battery and ran the drivetrain both upside down and upside up to check its operation. (It's easier to test upside down when the wheels are pointed upward, but obviously this needs to run correctly upside up.) Both orientations seemed to operate smoothly with both wheels being driven.
The next moment of truth was to try it on the droid. I transplanted the foot channel and give it a go, and things seemed to work well.
With that out of the way, it was time to turn to the left drivetrain. I pulled that one off the droid.
And exploded it.
I fit the axels in, and they seemed to be ok.
But as I got ready to place the gears and chain opposite the motor side, I realized I had a problem. The new drivetrain body has the wheel base slightly wider than the old one, and the existing chain won't reach.
I will need to build a new chain that is one link longer. I'll deal with that later.
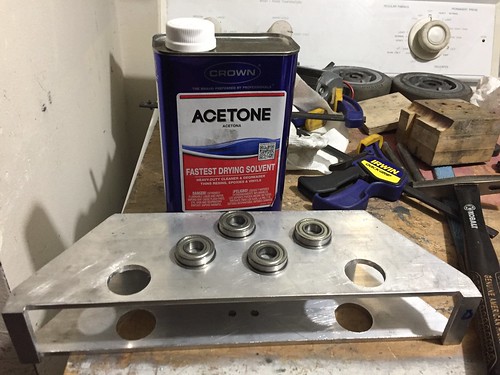
I decided I'd take this opportunity to install the four bearings on the left drivetrain. So far I've only JB Welded one of the bearings in place on the right drivetrain, and the other three are press-fitted snugly. However, I've decided I'm going to JB Weld all of the bearings in place on both drives, so I lightly sanded and cleaned up the bearings, and cleaned the holes for them with acetone on the left drive train.
I then applied JB Weld to the holes and pressed the bearings in place.
I'll let that dry overnight and then work on building chain for the wider wheelbase.
Tonight I was able to get a little further in my effort to replace the drivetrain bodies for droid #1 so that I can use bearings instead of flanges to house the axels. Tonight's work was on the new right drivetrain body.
After getting R2 back together late last week, I had to explode things again.
I had paused on installing the bearings into the new drivetrain bodies because I wanted to ensure that the wheel would fit. It does, with just a little room to spare.
Confident now that there'd be room for everything, I placed some wood on the inside of the drivetrain body to avoid deforming it, as I used a mallet to tap on a piece of wood on top of the bearings to fit them into place.
Once I had the first pair in, I tried to fit an axel through, to make sure things lined up properly, and they did.
Then I fitted the wheel in as well.
Next, I transferred the drive wheel gear and the motor mount from the old drive train to the new one.
And finally, the motor, as I prepared to test everything. I also used the old chain and the 1/32" steel shim between the motor and the motor mount. The fit seemed pretty much perfect!
I ran the motor both with the drivetrain upside down and rightside up, and it ran fine. Through the magic of backdating and editing, I can show how this turns out.
I also took care of a couple nagging issues. Ever since I first installed this motor, one of the holes that receives a mounting bolt had its threads slightly stripped. I decided thoroughly clean the hole with acetone (along with its corresponding bolt) and line the threads with JB Weld.
I also applied JB to the the threads of the bolt, and screwed it into the hole as far as it would go, to let it dry overnight. The JB Weld isn’t so strong that I won’t be able to unscrew the bolt.
Finally, one of the new bearings isn't sitting very tightly, so I cleaned the hole with acetone as well, and applied JB Weld along the circumference of the hole in the drivetrain.
Then I pressed in the bearing, and I'll let it set overnight. Hopefully it's in there to stay now.
Still lots more to do, like the other wheel, the rest of the gears, and drilling the hole for the idler gear. Oh, and the left drivetrain.
Today was the only day R2 and I attended LA Comicon, at the Los Angeles Convention Center. The main reason why I didn't go on Friday and Saturday is that for the first time ever, we weren't provided a booth on the show floor. Instead, they located the droid builders in a gaming room far from the show floor, far enough that I could tell it would get no visitors and there was no point in going. Instead, I went today because our R2 Builders panel was scheduled for noon.
Here's the room a little before show opening.
Since we had exhibitor badges, Michael McMaster and Mike and Amy Senna and I decided to do a quick walk-through of the show floor.
I should have yelled down to the people waiting to get in where they could find the droids.
This is the room the droids were in after the show opened. Pretty much the same thing as the before-picture; just us and a few other poor souls manning fan club booths.
David Annetta designed and 3D-printed this little figurine of Chris Romines, and Ed Perello painted it in minute detail, down to an accurate portrayal of Chris' tattoos. They had planned on presenting it to Chris at R2LA, but Chris wasn't able to make it, so Ed gave it to him today.
This was one of two visitors I saw at our booth.
Finally noon rolled around, so we went upstairs to do our panel. It too was lightly attended, because it too was way off the beaten path.
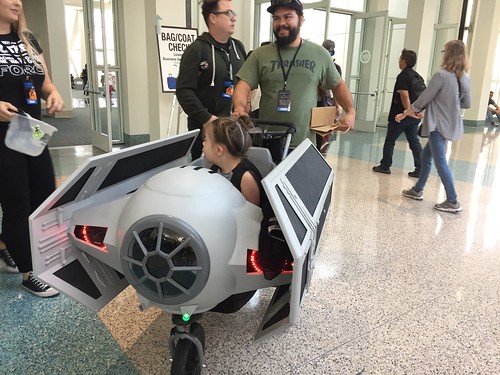
On our way out, I saw this neat Darth Vader TIE fighter for a man's daughter with Down Syndrome. It was very impressive.
And there was this as well (it was actually driving around under remote control and playing music).
Hopefully LA Comicon will have a better booth situation next year, we'll see.