Sunday, December 31, 2006

Looking Forward, Looking Back

Every time I glance over at R2 these days, he seems to be looking back at me saying, "Please finish me!"


I'm trying, I'm trying. (I'll let you know if I start hearing voices next.)

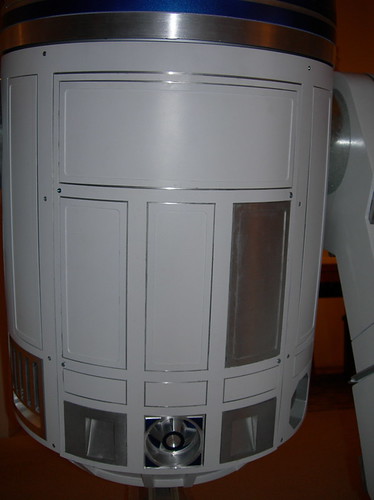
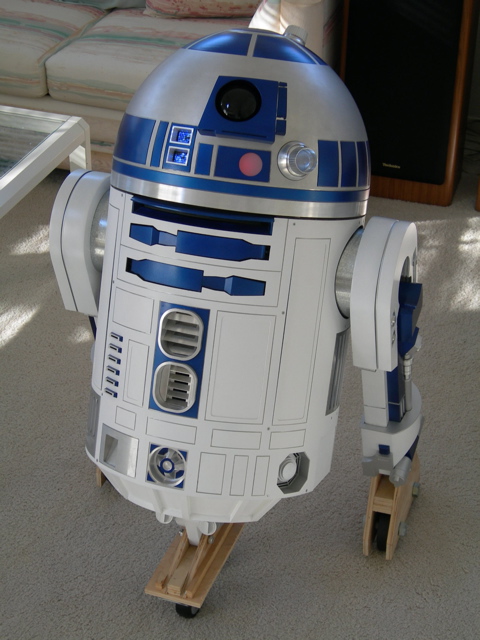
R2 is pretty much done from the ankles on up. Things left to finish for the static version, before I move straight on to the remote control capabilities, include:

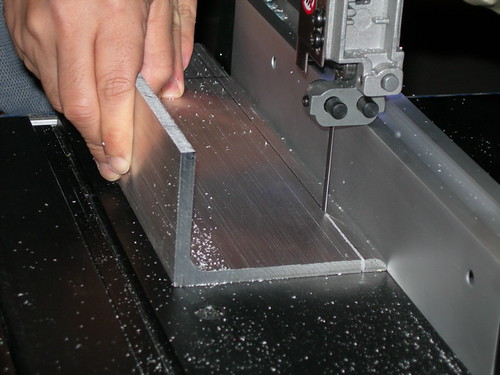
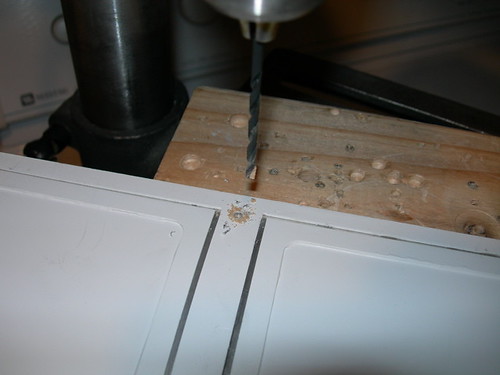
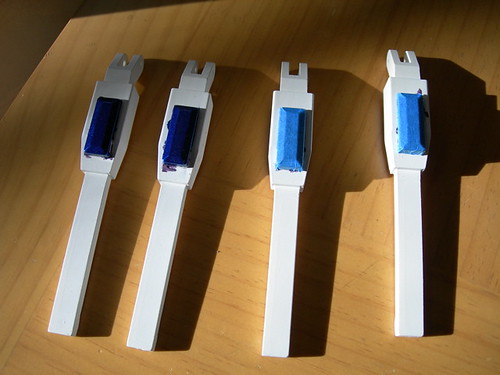
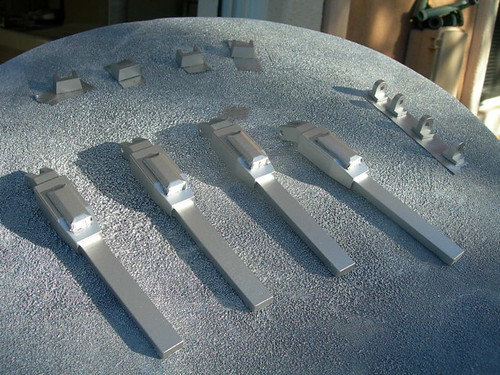
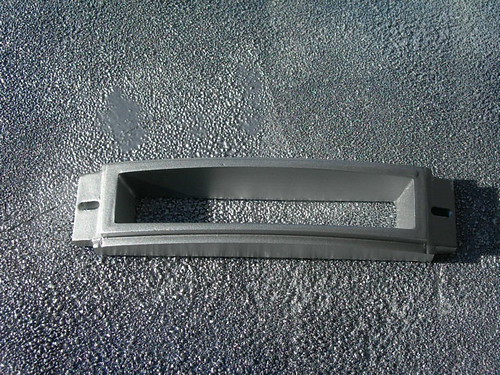
- Foot shell construction
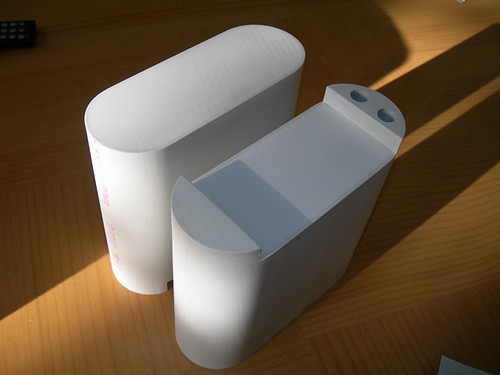
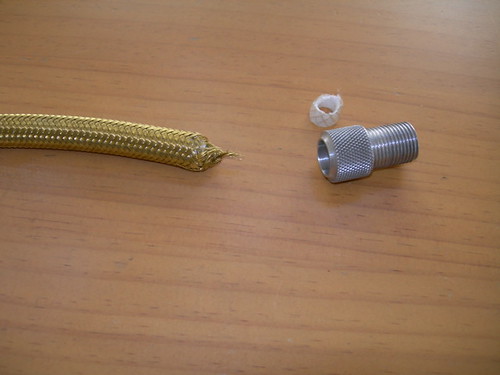
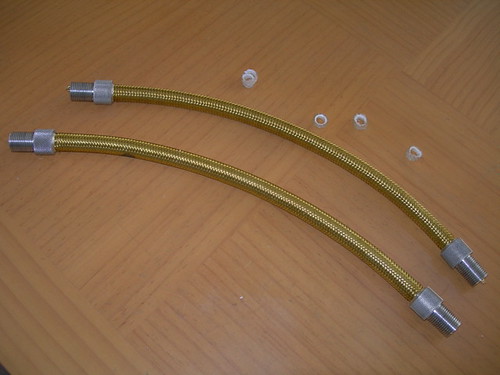
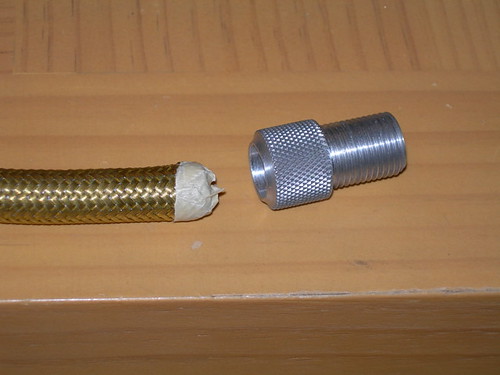
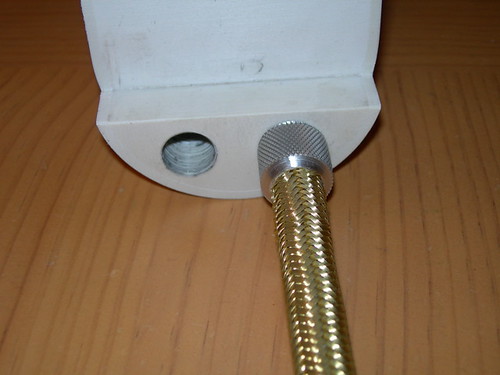
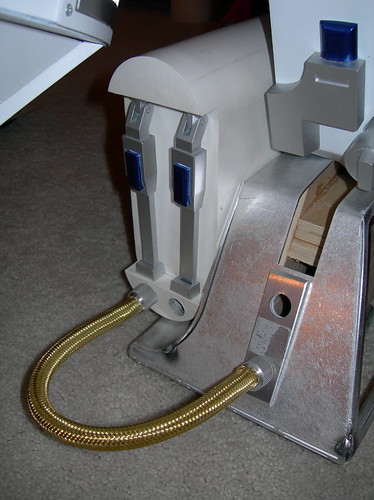
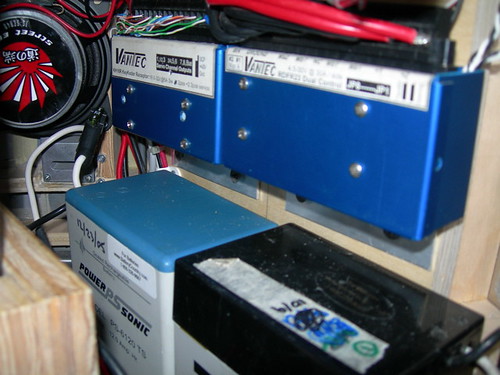
- Battery box painting and installation (plus harnesses, knurled fittings and hoses)
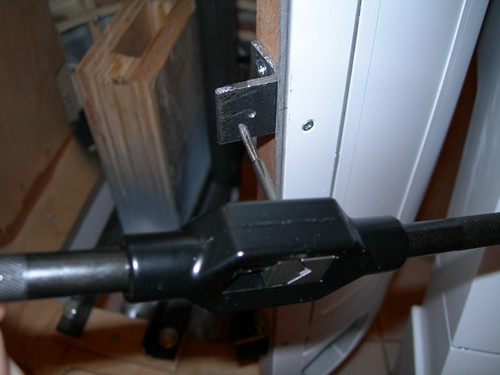
- Rear power coupler installation

And then there is the drivetrain for the remote controlled version, which is probably the most involved area left to finish.

I was hoping to be all done by now, but that was no doubt wishful thinking. If I can finish by February 2007 (which is still aggressive, given all that is left to do), that will still put my total build time at just about a year-and-a-half.

2006 was my first full calendar year of droid-building. My droid has come a long way from one year ago. Some of the building milestones that I accomplished this year include:

-Finishing and mounting the skins in January
-Getting a skeletal R2 up on three legs in February
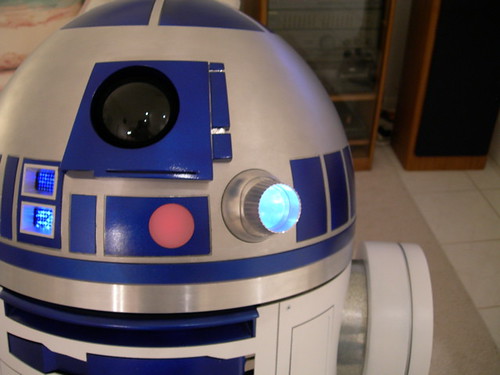
-Getting most of the dome done in March
-Scratch-building the horseshoes in April
-Scratch-building the booster covers in May
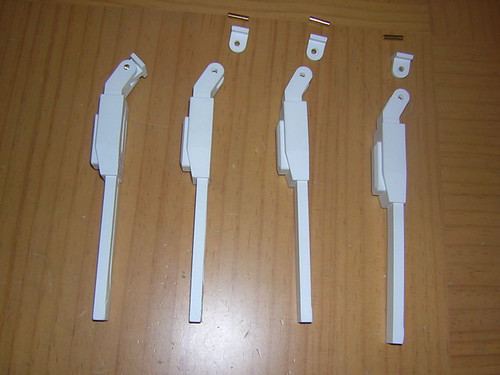
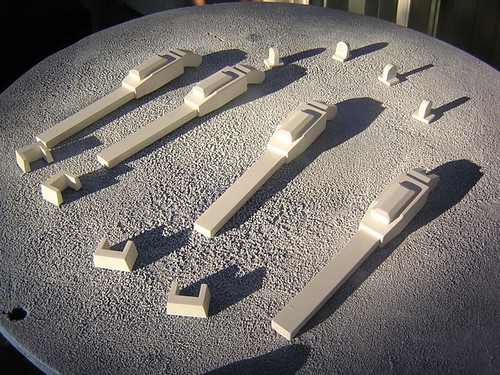
-Finishing the main part of the legs in July/August
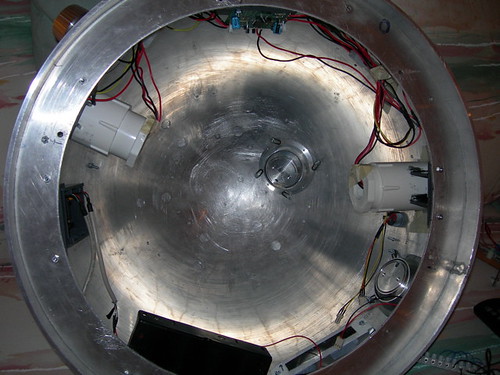
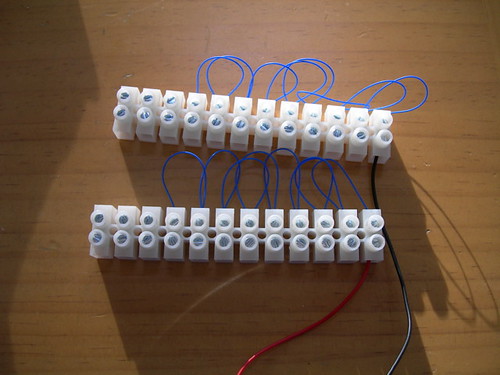
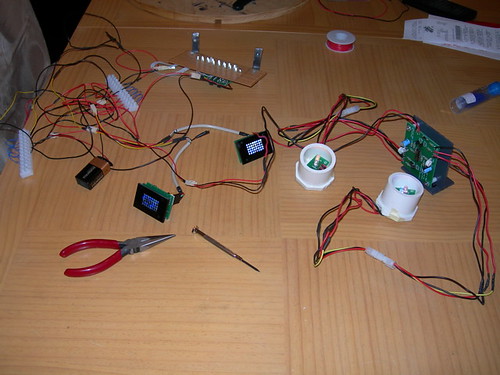
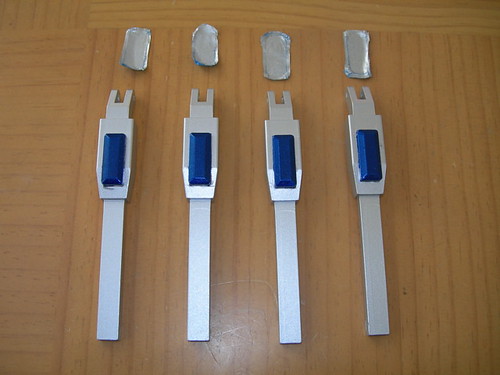
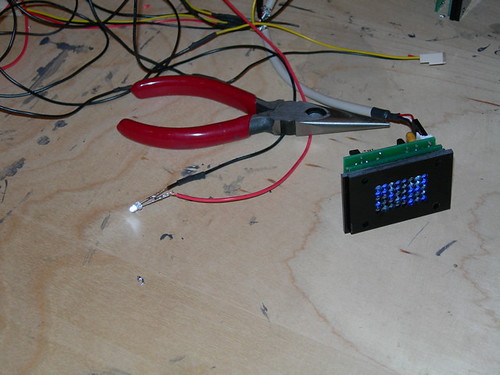
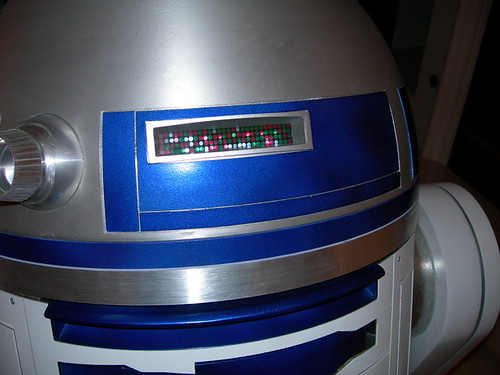
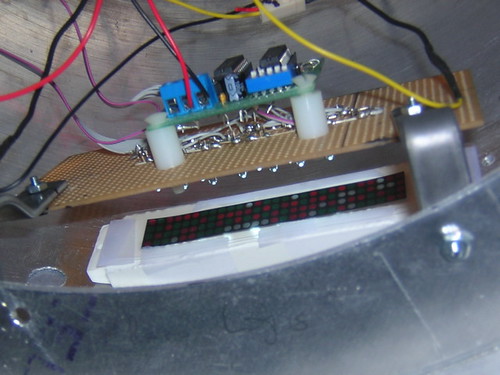
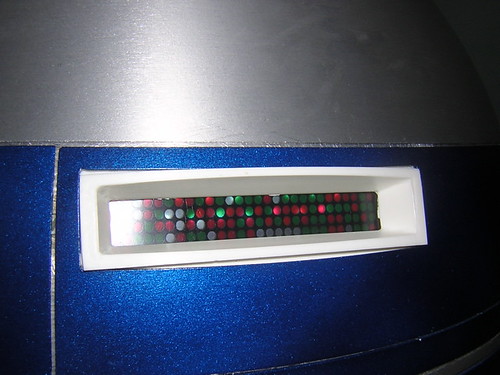
-Dome electronics in September-December
-Starting the foot shell build, finishing filling in holes in body in October
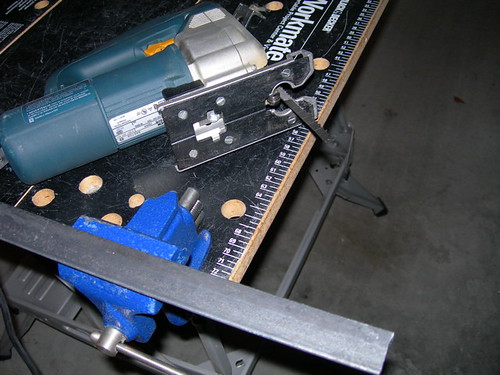
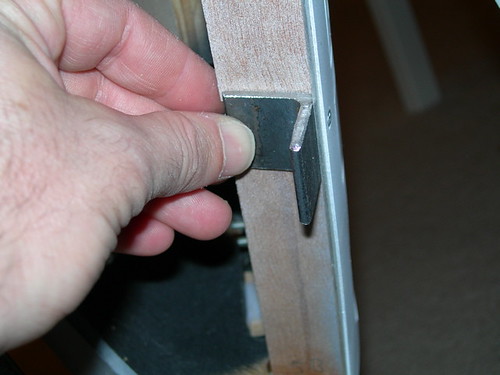
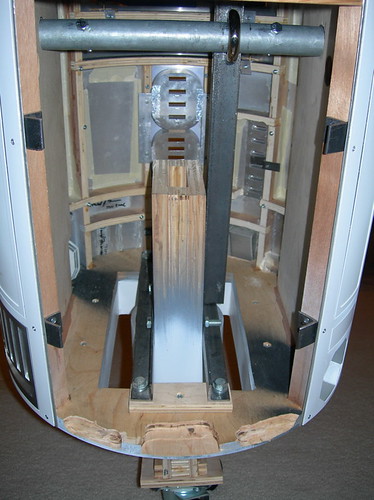
-Starting the drivetrain build in December

I also had some unexpected adventures, like being backstage at the Jules Verne Awards with George Lucas in October, and meeting Ralph McQuarrie in November.

2007 should be a fun year. I anticipate finishing the build soon, and Celebration 4 is just around the corner in May. I hope to meet many of the R2 Builders from around the country and around the world. Who knows what other unanticipated events may occur in the next year?

Finally, a slight change to this weblog. I've been posting the most recent 30 days' worth of entries on the main page, but I realize that this takes a long time to load, and it's probably interminable for dial-up users. In addition, regular visitors to this blog almost certainly don't care about what happened 15 days ago (let alone yesterday).

Therefore, I'm cutting down the number of days displayed on the main page to seven. You can always click on the monthly links toward the upper right of the page, to view more entries. Please feel free to comment (click on "Comments" below) to let me know what you think about this change. Once R2 is all done, I hope to make the blog more useful, and I also hope to make the blog contents into a more readable PDF file one day.

To wrap up, thank you to all the visitors to my blog, especially the regulars. I really appreciate the interest and feedback. Have a safe, healthy and happy 2007!

-Victor

Sanded Battery Boxes

Today I sanded smooth the PVC battery boxes I purchased from Craig Smith. First I lightly dry-sanded the fronts and backs with 400 grit sand paper, and then I went back and wet-sanded with Gator Grit.


I tell you, the more I work with these, the more I appreciate what a work of art they are. Thank you Craig!

Saturday, December 30, 2006

More Knurled Cable Fittings

I didn't get much done today. I did what one does with knurled cable fittings -- I fitted them.

Like I did a few days ago, I trimmed the plastic out of the end of the inside of the brass hose, and worked the cables into the fittings.


I may redo the other two cables that I did the other day, as they don't fit as well. I think I need to buy a couple more brass hoses and start over again on those.

Friday, December 29, 2006

Continued Drivetrain Cuts on the Band Saw

More fun with the band saw at Kelvin's.

I purchased additional aluminum stock at IMS for the "supporting players" in the drivetrain, and Kelvin helped out with the cutting of it in the evening.


I loosely piled it together for a sloppy preview.


I still need to acquire all sorts of details, like screws, nuts, gears, chain, etc. I also need to find a machine shop to drill out the holes for the axles and such.

Thursday, December 28, 2006

More Metal for Drivetrain

Today I went to Industrial Metal Supply here in Irvine. I picked up some aluminum stock for more areas of the drivetrain, including the 3/4" rod that will serve as axles for the wheels and gears. I had them cut the rod to various sizes, as called out by the H&A Drivetrain blueprints.

Wednesday, December 27, 2006

Ordered Remote Control, Cut Drivetrain Frame

Today was a long-awaited day, I ordered my remote control from Vantec. I ordered product numbers KH916 (Futaba 9 channel remote + Keycoder 16 switch Hitchhiker for controlling sounds) and RDFR23 (the dual front/rear speed controller). The radio is retuned for ground frequencies by Vantec. I was told the wait for the radio is about three weeks, but that's just a blip on the R2-building time scale. The equipment cost a pretty penny, but nothing but the best for R2. :)

Today I also started scratch-building my drivetrain. Thanks to my friend Kelvin and his band saw, what would otherwise have been a difficult portion of the build was made much less so.

Kelvin and I took turns cutting on the dotted lines of my aluminum tubing, forming the main frame of the drivetrain.


The band saw did a very good job of cutting through the aluminum 2x4, even on some of the longer cuts.


The parts turned out exactly how I hoped they would. (My only concern is that what I hoped for, and what I actually need won't be one and the same.)


There is still a long way to go on these, more metal to cut and holes to drill. But it's a start.

Tuesday, December 26, 2006

Tested Band Saw, Countersunk Door Screw Holes, Marked Up Aluminum Tubing

Tomorrow (Wednesday) I'm planning to start work on the drivetrain. My friend Kelvin, whose tools I've been borrowing, just purchased a band saw (lucky me!). He's agreed to help me try cutting the aluminum tubing for the drivetrain at his house. Today we did a test cut just to make sure the band saw could handle it. It seemed to work great.


Back home, I countersunk the four holes in the back door, so that the screws holding the door onto the body will sit flush with the back door's surface.


Later in the evening, I started marking up the aluminum tubing for tomorrow's cuts. This drivetrain will be based on the Heath and Alex drivetrain design.


I really hope I don't mess this up. I've already realized I have one problem - the wheels I purchased are too wide for the tube. I'm hoping I can Dremel out some material from the aluminum tube to get the wheels to fit.

Monday, December 25, 2006

Attached Back Door

This evening I attached R2's back door, thereby closing the tin can that is my droid.

First I taped the back door as tightly to the skins as possible, centered in the proper position. Then I drilled four holes through the skins, and through the brackets behind the skins, using a #43 drill bit for tapping a #4-40 screw. Two holes are on the left side of the door, and two are on the right side.


Next, I tapped the holes in the brackets with a #4-40 tap.


After that, I took the back door to the drill press, and widened the holes with a slightly larger drill bit that allows the #4 screw to pass through. Note that I still need to countersink these holes.


Finally, I did a test fit of the door, with the rear power coupler loosely fitted at the center-bottom. The door fits pretty well, except the top still bows out a little bit from the body. :(


I'm not entirely sure how I'm going to address the problem of the top of the door not sitting flush against the body. I may add another screw or two at the top, or I may just live with it, as it's not that bad. I also managed to knock out both of my rear coin returns when I was trying to bend the door to fit the body. I'm not too heartbroken about this, since I have a set of Wayne's coin returns on order, and I may just use those instead. For now, mine are taped back in place.

Sunday, December 24, 2006

Started Working on Battery Box Cable & Knurled Fittings

Today I worked on getting the brass hose I purchased at Lowe's last year to fit into the knurled cable fittings that I purchased from Jerry Greene recently.

First, I used tin snips to cut the ends off of the hose. Then I cut a small amount of the rubber and plastic out of the inside of the hose to allow the brass braid to flex inward, and I then wrapped the end with masking tape.


I worked the hose into the fitting as best I could, and screwed the fitting into the battery box for looks.


Then, as a total cheat, I set the whole thing up with my budget feet and battery harnesses on my droid. I'm not planning to use the budget feet on this droid because a) I don't have easy access to a welding machine to undo the tack welds and weld everything properly (nor have I ever used a welder), and b) I prefer PVC foot shells, which are on hold until Mike and I can find time to resume work on them.

Saturday, December 23, 2006

Installed Back Door Brackets

Today I installed brackets on the frame that will help attach the back door. To illustrate that even the most trivial of tasks takes some effort, I'll go into a bit more detail today.

First, I took my L-bracket channel, tightened it in the vise, and then used a jigsaw to cut small 1" pieces.


Once four pieces were cut, I filed them smooth.


Next, I matched each bracket to the area on the frame that they will be installed. The brackets line up with an aesthetically pleasing area on the back door that will have a screw hole drilled into it at a later date.

I used a marker to mark two dots for two #4 screw holes that will be drilled into each piece.


I took the work over to the drill press, and drilled the holes for the #4 screws.


After drilling, I countersunk the holes.


I used a hammer to put a slight bend in the L-bracket, so that the curve of the door won't bump into the bracket.


Finally, it was time to screw the brackets onto the frame. Here's the lower-right bracket. The #4 screws are 1/2" long.


There are four brackets in all.


Soon I will mount the door to the brackets. This will involve holding/taping the door to the body, and drilling one hole per bracket, through both the door and bracket as a pair. This hole will be the proper size to tap a #4 machine screw. Then, each bracket will be tapped, while the hole in the door will be widened slightly and countersunk to accommodate the #4 screw.

There is a problem I must resolve first, however. The radius of the curve on the back door for my droid is slightly smaller than it should be (I'm not 100% sure why, I may have accidentally bent it). So I'll have to carefully bend the door to be "wider" before I can mount it. I'm obviously worried some harm may come to the door or the panels that are JB-Welded in, but I have to do it. Nothing's ever easy.

Friday, December 22, 2006

Visited Mike, More Dome Wiring Cleanup

This afternoon I dropped by Mike Senna's house to talk about my upcoming drivetrain build, and how to properly mount the back door. The drivetrain sounds like it is going to be quite a challenge. I will need help from a machine shop to have some of the holes drilled.

We also discussed the remote control and receivers. I took a good look at what Mike has in his droid, and I plan to order the same equipment sometime in the near future.


In the evening I returned to my task of tidying up the dome wiring. It's getting better, I'm almost done.

Thursday, December 21, 2006

Started Reworking Dome Wiring

Until today, my dome wiring had a main "power bus," consisting of a pair of power and ground lines, to which each electronic component of the dome was connected. The problem with that was lots of solder points that were prone to failure.

Today I picked up some terminal blocks to replace the power and ground lines. These terminals have two screws per connection, that allow me to daisy-chain each port to a common line (power or ground) on one side of the terminal block, and the corresponding line out to the component on the other. (Hopefully I'm not broadcasting or inhibiting radio signals with this...)


I tried hooking up each dome component to the terminal blocks, and everything seems to work pretty well, and the whole setup is a bit neater.


Hopefully once this is all back in the dome, it will work solidly and be much less of a mess. I should know shortly.

Wednesday, December 20, 2006

Unmasked Battery Harnesses, Added LED to front HP

Today I removed the masking tape from the battery harnesses. The paint job turned out okay.


In the evening, I decided to add an LED to the front holoprojector wiring.


The photo below was taken without the flash, so the color doesn't appear as white as it really is.


I hate to do it, but the dome wiring is such a mess, I think I'm going to have to redo it again. I need to come up with a clean way of running pairs of wires to each part of the the dome that gets lit. And in the case of my top front logics, I'm running three wires, to toggle the message display. Ugh.

Monday, December 18, 2006

Rear Logic Surround Installed, Dome Exterior Done

The paint had dried on the rear logic surround, so I installed it in the dome.


The outside of the dome is now complete.

Having said that, I reserve the right to repaint the blue panels at some future date. I'm not sure if I will do that before or after the rest of the droid is done (if ever). I will also have to fiddle a bit with the wiring, I already know of one loose connection, and I still need to secure the wires neatly on the inside.

Sunday, December 17, 2006

Finished Painting Battery Harnesses, Painted Rear Logic Surround

I hope I didn't jump the gun, but I pulled the masking tape off the non-blue areas of the battery harnesses, and masked the blue areas, in preparation for the aluminum painting. Some of the blue ran out from under the masking tape yesterday, but that will get painted over anyway.


After the masking, I painted all the remaining battery harness parts.


I also painted the rear logic surround.


If I didn't mess this paint job up, then, like the blue, all my aluminum painting is done for this droid. But if I didn't let the blue paint dry long enough before masking, I may have some more work to do. I should know in the next day or two.

Saturday, December 16, 2006

Painted Blue Areas of Battery Harnesses

I can only paint on the weekends, and of course, it was drizzling today in sunny Southern California. Today was the day to start painting the battery harnesses, so I opened the garage door and gave it my best shot.

I masked the resin parts, and applied the usual Krider formula, starting with Rustoleum Metallic Purple, followed by Duplicolor Anodized Blue.


A final Rustoleum Crystal Clear Enamel clearcoat, and they're done.


This was something of a milestone. This was the last of the blue that remained to be painted (although I may repaint my dome panels since I'm not completely happy with their appearance). I hope to paint the rest of the battery harnesses and the rear logic surround with Krylon Chrome Aluminum tomorrow.

After that, all that's left to paint are the battery boxes and foot shells, once they are done. Those will all be painted with Rustoleum Satin White.

Thursday, December 14, 2006

Minor Rear Logic Adjustment

After a few days of looking at the rear logics in the dome, I decided the board hosting the LEDs and PIC flasher was sitting just a bit too high. It took a couple of tries, but I redrilled the mounting holes on the board to set it at a better height.


Wednesday, December 13, 2006

Battery Harness Pins

Back from another business trip, I was able to get a minimal amount of work done tonight.

I drilled the resin battery harness pieces to accommodate a 1/8" pin that goes through the hinge area.


I also cut a 1/8" diameter metal rod (the same rod used as pivots for the utility arms) to form the pins of the correct length. I tried each of them out for size as they were cut.


I also filled pinholes in the top of the center foot shell, I'll give that a final sanding tomorrow. I can only get piddly stuff like this done on weeknights these days.

Saturday, December 09, 2006

Battery Harness Work, Sanded Top of Center Foot, Prepped Rear Logic Surround

Today I sanded, Bondoed and applied primer to the battery harnesses. It occurred to me after the fact that I may need to drill some of the parts, to install a pin through the hinge at the top. No big deal, though. If I do that, I'll do it before I paint the parts.


I also sanded down the area that I filled last night on the center foot. I need to do one last light pass to fill in pinhole gaps.

Finally, I worked on getting my resin rear logic surround to fit through the corresponding dome hole. I lightly filed the left and right edges of the surround, and eventually it fit.

I cut out a couple of the identical LED patterns I had printed earlier, and taped them together and tried the whole thing out in the dome to see how it looked. It will probably do for now. Obviously I still need to paint the surround silver.


Unfortunately, no planned updates again for a few days, but I hope to be back in the swing of things by mid-week.