Sunday, February 28, 2021

Started Sanding New R5-D4 Utility Arms for Droid #2

I ordered a pair of resin utility arms that will be painted red from resinparts.com to go along with the red framed front panels for droid #2 when he's dressed up as R5-D4. I did the same for droid #1, but the arms aren't interchangeable for a couple of reasons, not the least of which is that the two droids use pivot points of differing diameters.

Most of the surfaces of the arms are in good shape, but there is some roughness and overfill here and there that requies some sanding.


There are some small bubble pits that will need filling.

I'll get to the filling soon enough, but first I want to prepare the pivot points.

Monday, February 22, 2021

Tidied Wiring a Bit on Droid #2 Electronics Panel

I finally got tired of that excess gray wiring, which enables and disables my dome and sound automation circuit. This circuit is documented in the Tutorials Wiki on astromech.net.


Time to unsolder a bunch of connections.


After cutting the gray wiring shorter I resoldered the connections.


That's a litte better, at least.

Sunday, February 21, 2021

Unmasked Painted Panels, Wired Up SSR

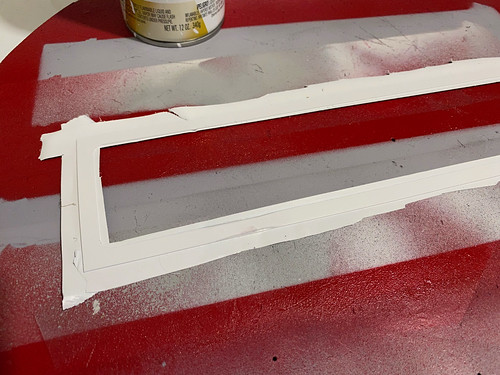
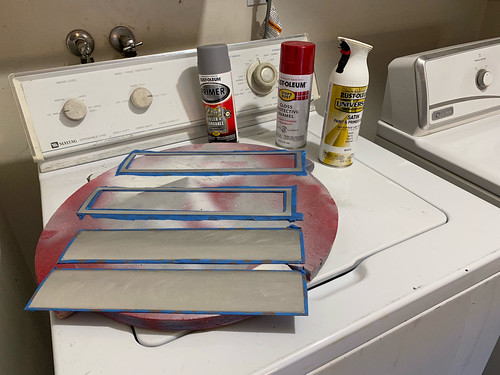
Today I was able to unmask the R5-D4 front door panels for droid #2. I expect that one day droid #2, along with these panels, will all get weathered. For now, they are factory fresh.


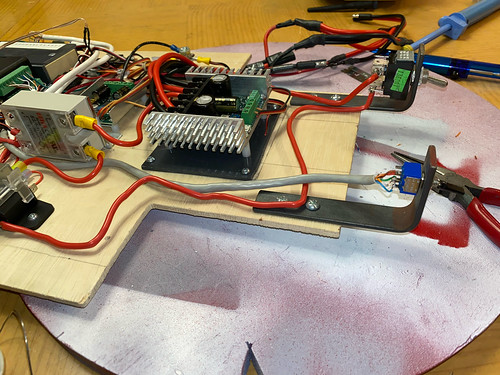
Next, time to wire up the solid state relay. I located where I wanted to place the relay and its mounting bracket on the board.


And then I got to wiring.


I'm getting a bit fancy with the SSR. I want it to be normally closed (allowing current to the speed controller), and if I hit a button on the transmitter, then I want the circuit to be open, killing power to the speed controller. This means that the positive input to the SSR input needs to normally be at +12 volts, so I use a pull-up resister to +12 volts to achieve that. When I want to kill the power to the speed controller, pressing a button on the transmitter grounds that input, turning off the SSR.


Once everything was wired up, I applied some thermal paste to the SSR side of the mounting bracket. I think that's done for now.


That wiring is still a mess. I will tackle that next.

Saturday, February 20, 2021

Touched Up Panels, Cut SSR Holder

Yesterday's painting went pretty well, but I did spot a blemish on one of the white framed panels, and on one of the red rectangular panels.

It's hard to see, but there was a tiny bit of spider-webbing in a small area on the framed panel.


I lightly sanded it in preparation for touch-up painting.


The blemish on the red paint is even harder to see, but I dealt with both.


While that dried, I worked on mounting a solid state relay to the electronics board. I hadn't gotten around to doing this yet for droid #2, so now's the time. This relay will act as a kill-switch to the speed controller, in case I ever want or need to cut power to the foot motors. This particular SSR is a little suspect, I may end up replacing it.


I marked and drilled the bracket that holds the SSR.


And I cut it to size.


More work to do on this, but that's it for today.

Friday, February 19, 2021

Primer and Paint for R5-D4 Panels

Today I primed and painted the R5-D4 panels I've been working on. As a reminder, these are just the red framed panels that are seen on the front of the droid.


Gray primer for the panels that are getting painted red. Mainly because I didn't have any white primer on hand.


The latest Rustoleum Satin White claims it's both primer and paint. Ok, if you say so.


Once the gray primer had dried a bit on the rectangular panels, I applied the Rustoleum Sunrise Red.


I'll let these dry overnight.

Sunday, February 14, 2021

Masked Panels for Painting

Today I worked on masking the panels I cut the other day for painting. The frame panels will be painted white, the rectangular panels will be painted Rustoleum Sunrise Red, to match other red panels I already have.

I taped the pairs of panels together and traced an outline of the framed panels onto the rectangular panels.


I want to mask the edges of the rectangular panels rather than paint them completely red, because I will be using silicone to glue the framed panels to the rectangular panels, and I want the silicone to adhere to the bare aluminum.


Everything is masked and ready for primer. I masked the underside of the framed panels just to keep them clean.

Monday, February 08, 2021

Cut R5-D4 Front Panels for Droid #2

Thus far, when I've wanted one of my droids to appear as R5-D4, I've used red overlays on top of the white panels on the front of the body. Those panels are removable (they are held in with masking tape), which means they are swappable. While the overlays work reasonably well, the droid in the movies has the inner skin panel painted red, rather than an overlay, so I decided to cut some spare panels for this purpose.


I used my little hacksaw to cut the panels out.


I cleaned up the burs with a small file.


I used a chisel to pop out the framed panels. Note that the flat side of the chisel is against the part we're keeping (the frame).


All done for tonight.

Saturday, February 06, 2021

Standoffs for Dome Speed Controller for Droid #2

Just a little bit of work tonight to get the Sabertooth 2x12RC dome speed controller onto some standoffs for ventilation.


The footprint for the dome controller has been shrunk by quite a bit, but that wiring is still a mess.

Friday, February 05, 2021

Updated Dome Drive Speed Controller Wiring for Droid #2

The wiring I had been using to power the Sabertooth 2x12RC dome speed controller was a little too wide for the connector on the controller, so I need to attach some smaller, 14 gauge wire. I know that this wire is not too small because it is the exact same size wire that the motor itself uses.


I soldered the wires together and used this handy-dandy butane lighter on the shrink tubing.


I still need to work on mounting the dome speed controller on some small standoffs.

Tuesday, February 02, 2021

Started Installing Dome Speed Controller for Droid #2

Why stop at one new speed controller for droid #2 when he can have two? To date, both droids have used a "poor man's dome controller," where I used Mike Senna's old design of employing a servo and two bump switches, along with some clever wiring, to turn the dome. This dome controller was limited to full-on or full-off, there was no proportional speed in relation to the joystick on the transmitter. Dimension Engineering's 2x12RC speed controller fits the bill for this task. This controller supports two motors, but for the dome I only need one.

Wiring is pretty simple, just the positive and negative wires from the main 12 volt battery, and the two wires leading to the dome motor. Those thick wires for the main power are going to need be replaced with smaller ones.


DIP switches allow the user to auto-calibrate the controller to the joystick, so that it knows that center-stick means no movement, full left means full speed counter-clockwise (from above), and full right means full speed clockwise (from above). Once calibrated, another set of DIP switches allows these settings to be remembered so that calibration is locked in and doesn't need to be set again. I should note that I saw some dome drift until I plugged in the second channel into one of the unused channels on the receiver.

I plan to install standoffs for this speed controller, as I did for the for the foot motor speed controller.