Wednesday, March 31, 2010

TeWinkle Middle School Read Aloud Day

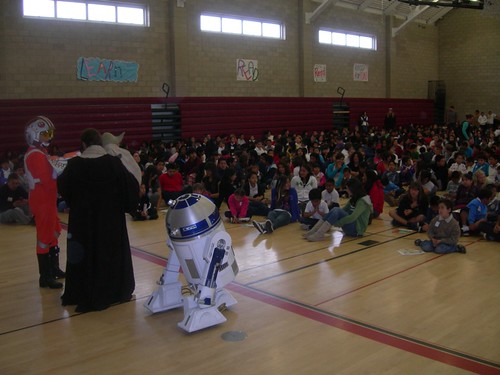
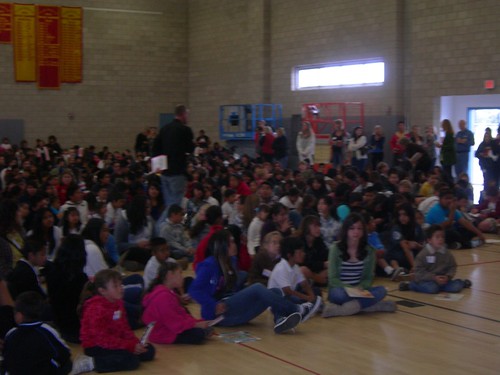
R2 was overdue for an event, so around lunchtime I took him out for about an hour to TeWinkle Middle School in Costa Mesa, CA, to help promote Read Aloud day. R2 was joined by Obi-Shawn Crosby (and Yoda), and Judy Simons. The day paired up 8th graders and kindergartners. The 8th graders each read a book to the kindergartners. Over 1100 kids were in attendance in all, and filled a gym and another auditorium.


The three characters made their way to the gym, where they were met with much enthusiasm. Here's a little bit of video.


Shawn read a story to the kids, while Judy held the book, turned the pages, and displayed the current page to the kids that were watching and listening. Occasionally R2 beeped and whistled along.


Afterward, many of the kids ran over meet the characters up close, especially R2.


It was good to get R2 out for a little while. The full photoset is here.

Tuesday, March 30, 2010

Finished Gluing First Outer Foot Shell

Tonight I finally finished gluing together the pieces for the first of the two outer foot shells. The skirt pieces and side strip and panels were all that remained to be glued down. First, the skirt pieces.


I applied the Testors glue to the back of the window strips.


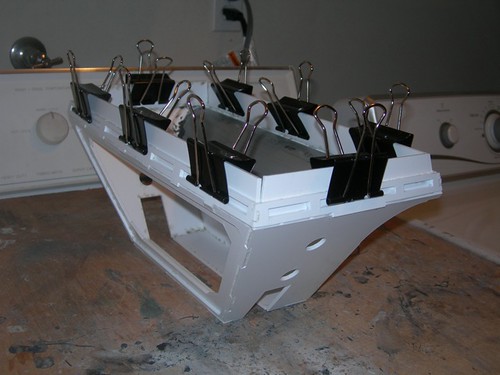
Then I clipped the skirt backing strip in place.


Repeat three more times, and that task is done.


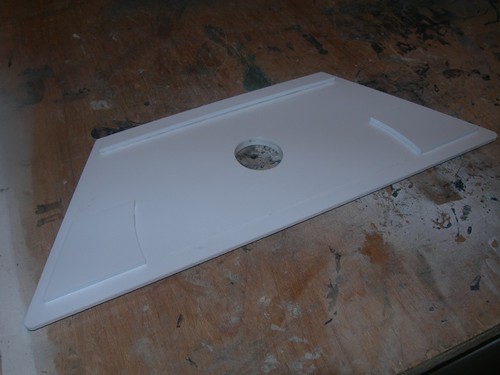
Next, the side strip and panels for the door.


The doors come with nice guide lines etched in them to show where to glue down the pieces.


Glue goes on the back of each piece and then the piece gets glued onto the door.


All done.


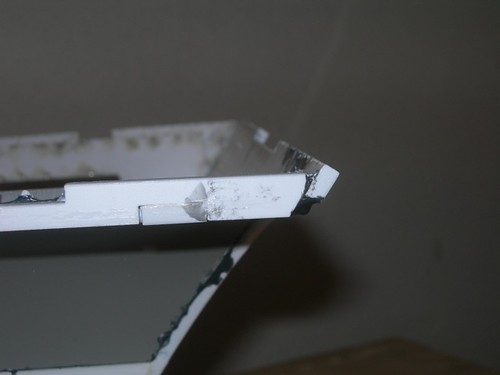
There is a lot of finishing work to be done, since the corners on the foot shell to not meet up without a gap. There are also some gaps to be filled at the corners of the backing strips that I glued in tonight (if I don't feel too lazy).

First I will build the other outer foot shell, and then I'll deal with the filling and sanding.

Monday, March 29, 2010

Glued Down Window Strip Pieces on First Outer Foot Shell

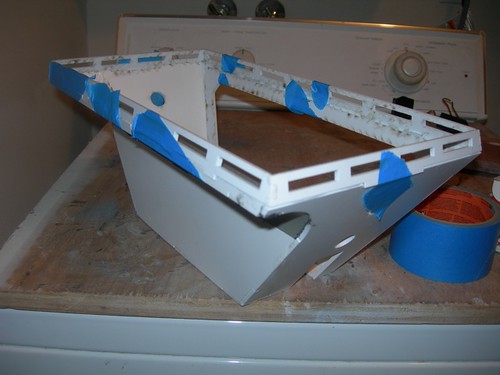
Tonight I had just enough time to glue down the rectangle of window strips for the first outer foot shell. I used blue painter's tape to keep the edges aligned. The tape will almost certainly get stuck to the glue, but I'll clean that up later if so.

Sunday, March 28, 2010

Finished Gluing Window Strips Together on First Outer Foot Shell

Today I finished gluing the "window strip" pieces together for the outer foot shell. Earlier I had glued two pairs of pieces together.


I blobbed some Testors glue on the joints to be glued.


I used whatever I had handy to help keep the rectangular shape. Quite an assortment. The foil in the corners helps prevent the glue from bonding to the wooden board underneath.


Before gluing this rectangle onto the foot shell, I needed to deal with some unevenness in the corner.


Nothing a little sanding can't fix.


That's better.


And then I ran out of time(!). Hopefully I'll get that rectangle glued in early this week.

Saturday, March 27, 2010

Cut and Glued Outer Foot Shell Curved Piece

Today I finally had some time to get back to work on the foot shells. I continued working on curved part that I started on last weekend. I'm taking it one foot shell at a time, because I'm not sure if the way I'm building this first foot shell is the best approach, so I want to wait until I'm done with the first one before getting too far along on the second one.

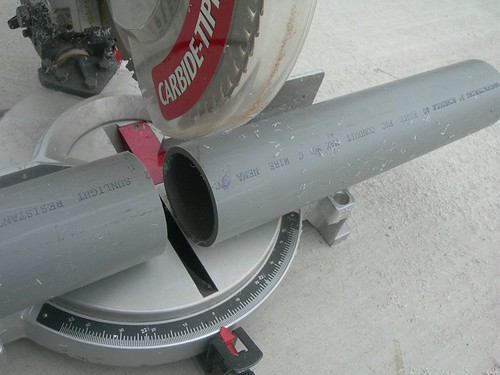
The first thing I did was use a piece from the second foot shell to calibrate the angle to chop at on the miter saw. About 35 degrees. (Note: This may be an error in the A&A flat packs, as it looks like this measurement is taken from the sheet of the blueprint that shows a projection [sheet 1 of the outer foot], rather than the top-down view [sheet 2 of the outer foot]. I think the angle should really be more like 33.75 degrees. This will affect the top channel piece of the drivetrain, but that's no big deal, I intentionally have not cut it yet.)
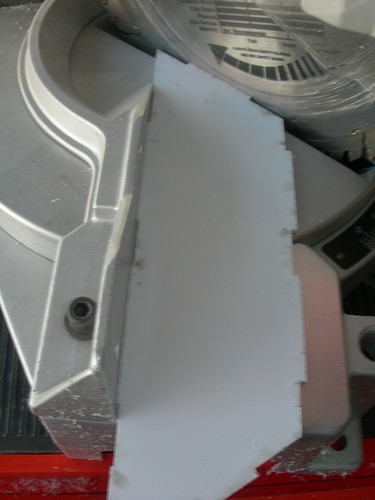


Next, I needed to figure out how to prop the quarter section of PVC pipe upright, so that it would hold a 90 degree angle. This is vital, so that the curve will hug the curve that's cut on the front and back pieces of the foot shell as closely as possible. Any other angle won't work right.

Luckily, the pipe I purchased at Lowe's is interlocking pipe, so one end was large enough to hold the 3" inner diameter section. I chopped this segment so that I could use it as a pipe holder.


I clamped this larger section to the miter saw, and then I was able to insert the quarter section of pipe into it, and keep it in place with my free hand to make sure it didn't move during the cut. Some scrap styrene helps prop up the quarter section of pipe.
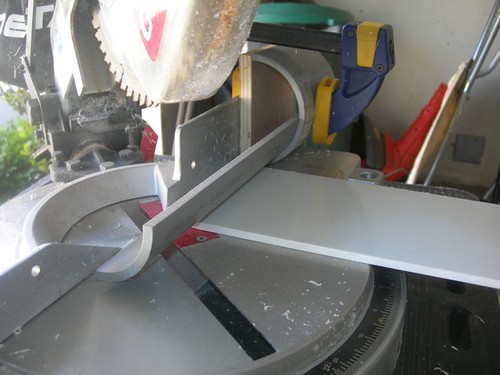


That worked just like I hoped it would. The PVC shavings make a huge mess though.
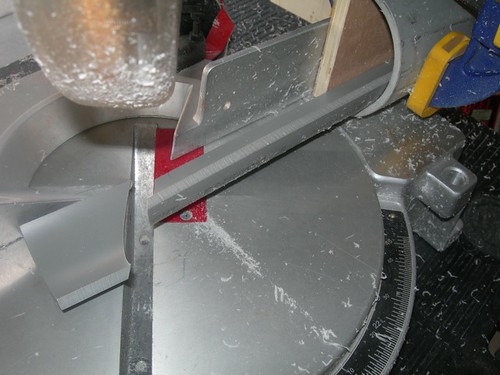


As usual, this was an iterative process. I would trim a little bit of the quarter section, and then do a test-fit. Still about a centimeter gap here.


Another trim or two and it fits.
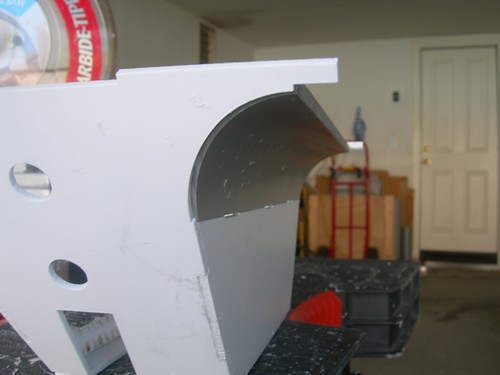


Note there is some overhang of the pipe compared to the front and back pieces. This is due to a couple of reasons. First, there is an additional small gap cut into the front and back pieces, intended for a thin sheet of styrene to be used for the curved piece, that comes with the A&A foot shells. The second reason for this mismatch is that the front and back pieces are cut when lying flat, but once they are leaning at an angle, they no longer cover the required area. I will fill this with Bondo and/or Evercoat later. Again, no big deal.


Time to glue it in! I'm using good ol' Oatey PVC glue for this. It loves both PVC and styrene.


Once the piece had dried, I decided to wrap up by gluing in the styrene piece that goes at the bottom of the curve. Again, I used the PVC glue.


Big clamps, but very light pressure keeps the piece in place while the glue dries.
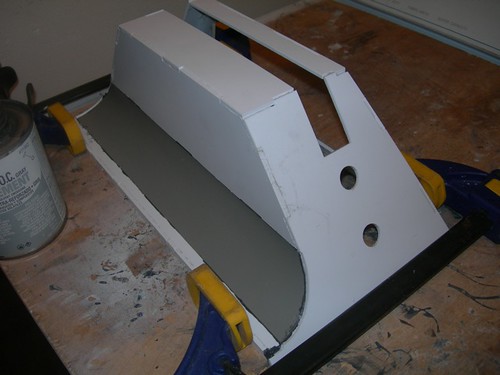


After it dried, I checked the results from the inside. Not bad, I didn't make too much of a mess, but I do want some extra PVC glue slopped around the edges of contact. I will probably add overlapping reinforcements later.


And here's the view from the outside.
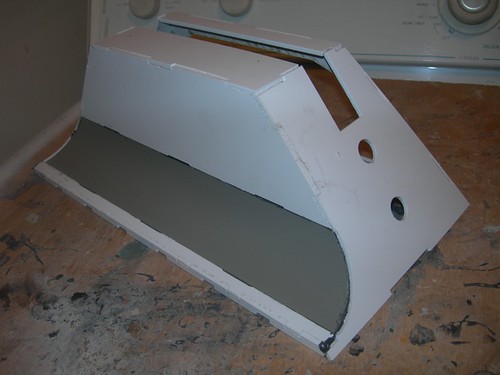


I hope to get some more work done tomorrow, we shall see.
Thursday, March 25, 2010

Over 40,000 Served

More non-building nonsense. Today marked another milestone for this blog, the 40,000th visit. Congratulations go to... someone in the Netherlands. Who speaks Spanish. And runs Windows XP. On a Mac.


It took 1 year, 10 months and 24 days to get to 10,000. It took another 1 year and 17 days to get to 20,000. It took another 11 months and 19 days to get to 30,000 visits. The kicker is, it only took an additional 7 months and 15 days to get to 40,000. Why the acceleration? Here's the answer.


March 10, 2010 was the date that Chris James wrote to makezine.com, which featured links to my Making of R2 video and this blog. As you can see, the spike is pretty amazing. The video has almost 100,000 views in 3 weeks too, as it has been linked several times throughout the world.

Anyway, hopefully I'll get back to building very soon.

-Victor

Sunday, March 21, 2010

Cut Curved Parts of Feet

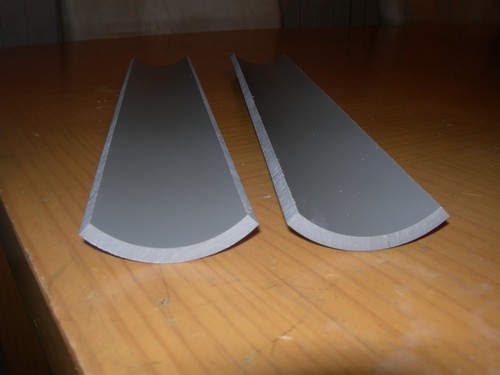
Yesterday I picked up some 3" inner diameter PVC pipe from Lowe's. Today I went over to my friend Kelvin's, to have the curved part of the outer feet cut on his band saw. The A&A foot shells provide some very thin styrene for this, but I want to use the thicker material that the PVC pipe provides (0.25").

The pipe was originally almost 10 feet long(!), so first I needed to cut it down to be just a little longer than the foot shells.


For the cut on the band saw, we needed to make sure that the cut was right through the center of the pipe, and that the pipe did not rotate at all, as it was being fed. Kelvin came up with the clever idea of hot gluing a small piece of wood to the outside of the pipe, that rides along the top of the fence as the work is fed through the band saw.


The blade is indeed cutting right through the center of the pipe, and Kelvin's wooden block assures that the pipe doesn't rotate. Perfect!


Now, the easy part, cutting the half-pipe section into quarter sections. No rotation to worry about here, just rest the pipe face down, center the blade, and start cutting.


The sections turned out great!


I didn't have time to work with them, but they'll get glued in soon enough. I will need to sand down some of the outer foot shell to handle the 0.25" wall thickness, but that shouldn't be a problem.

Friday, March 19, 2010

Glued Foot Shell Corners Under Battery Boxes

Next up, the corner strips that go underneath the battery boxes.


The glue goes in the grooves. The two strips meet at 90 degree angles.


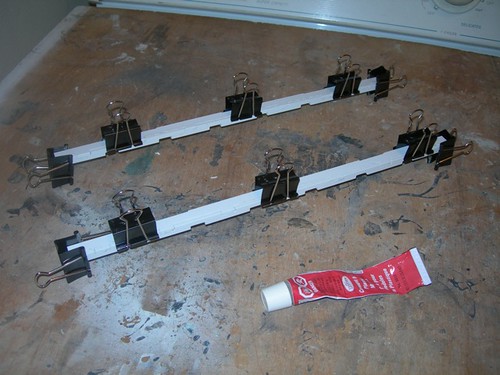
While I was at it, I repeated this for the other outer foot, even though I haven't built the rest of it yet. Clips hold it all together while drying.

Thursday, March 18, 2010

Finished Gluing Top Pieces of First Outer Foot Shell

Tonight I finished gluing the smaller of the two top pieces of the first outer foot shell that I'm building.


After applying the Testors glue and setting the piece in place, I used one of my tiny clamps to lock it down. Hopefully the glue won't lock the clamp down with it.

Tuesday, March 16, 2010

Outer Foot Shell Work Continued

Tonight I got back to work on the outer foot shell I started.

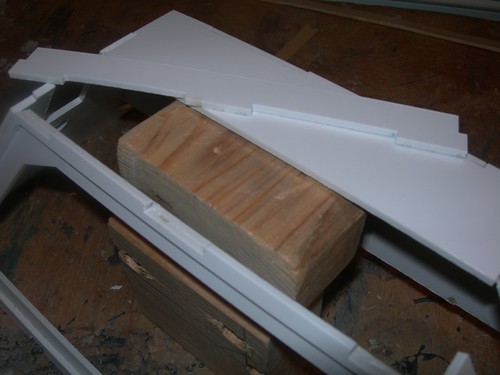
I set up one of the top pieces by having it rest on a small tower of wooden blocks.


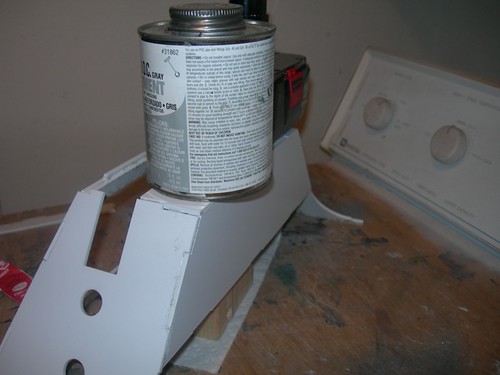
After applying Testors model glue, I used whatever I had handy to force the top piece down. In this case, a heavy can of PVC glue, and a battery for a cordless drill. There are some large gaps in the corners that I will fill with a gap-filling glue, as well as some filler such as Bondo and/or Evercoat.


I also started gluing up the window strip pieces for both outer foot shells.


I used the Ambroid ProWeld for this, as it sets up quickly. I only glued the two pairs of corners together. Hopefully tomorrow I can complete the rectangles.

Sunday, March 14, 2010

Outer Foot Shell Work

I'm taking it one step at a time with the feet. (I'll stop the puns now.) Today I worked on just one of the two outer foot shells, because until I see the result, I'm not sure I'll want to do the second one the same way.

The first decision is how to start gluing up the main body of the outer foot shell. Alex' web page kinda skips the steps I'm working on today, but it's no big deal, because it is obvious how the pieces are meant to go together. I'm just trying to decide the order of glue-up to make things turn out as good as possible.

I decided to start by gluing one of the front/back pieces to the side piece that goes up against the battery box, since those two parts sit at a 90 degree angle against each other. As usual, I applied the Testors glue to the tabs that will be joined together.


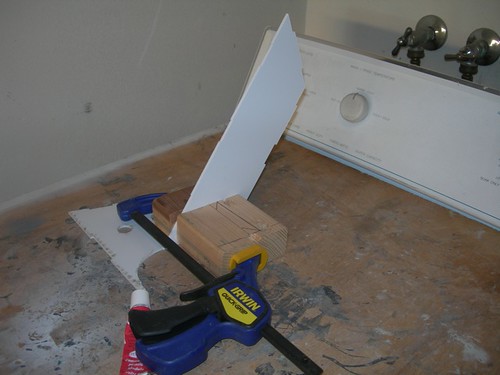
I used a couple of wooden blocks to support the long side piece so that it was perpendicular to the front/back piece, and I clamped everything together. Of course I knew I would probably end up gluing the wooden blocks to the styrene, and I did, but they were easy to pry off without damaging the styrene.


After this had time to dry for a few hours, I repeated the process with the other front/back piece.


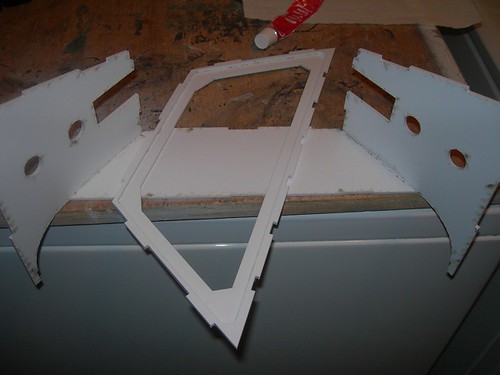
After this second glue-up was dry, there was one last piece to glue in for today, the door frame that I glued together yesterday.


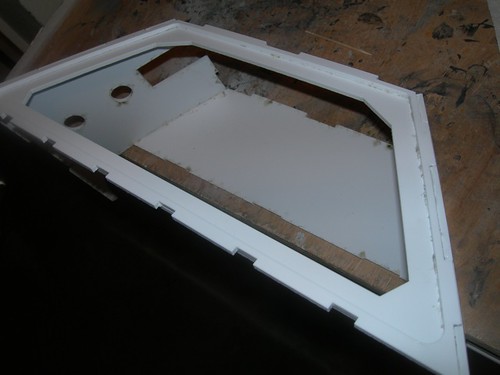
I slid the work to the edge of the board so that the top would be relatively flat, and glued down the door frame.


Tomorrow I'll check to make sure everything is sturdy. I plan to add reinforcements to the inside, but even without them the shell should be able to handle some stress.