Thursday, August 30, 2007

To Repaint the Dome Panels or not?

I'm going back and forth over whether I really want to repaint my dome panels.

Tonight I was going to start prying the panels off of the dome. The panels are held in place with 3M Very High Bond tape. The first pie panel I tried to remove didn't want to budge. I barely got it to move, and never did get it out. Maybe this is telling me that I should just leave well enough alone.

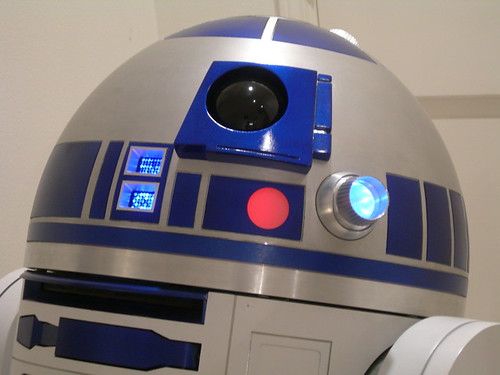
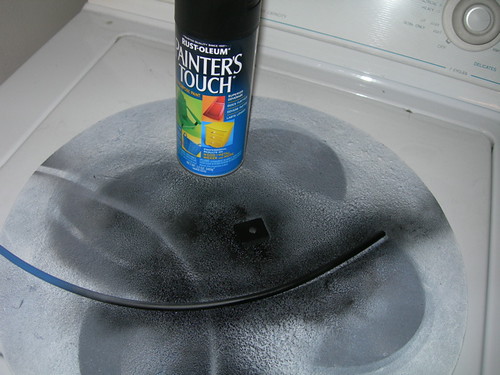
The "problem" I'm trying to solve is that the paint job does not have a nice shine to it, nor is the color quite as saturated as it should be. It's passable, but it could be better.

I may try using some automotive rubbing compound to see if I can get the panels shinier, but right now I'm not sure what I'm going to do, if anything.

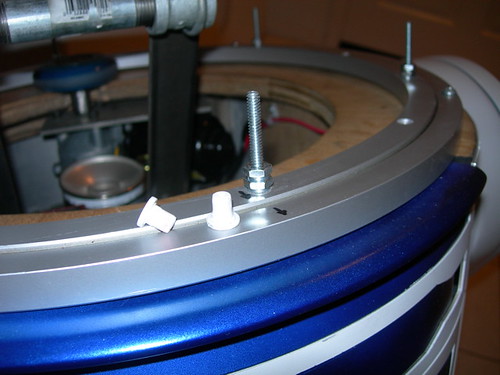
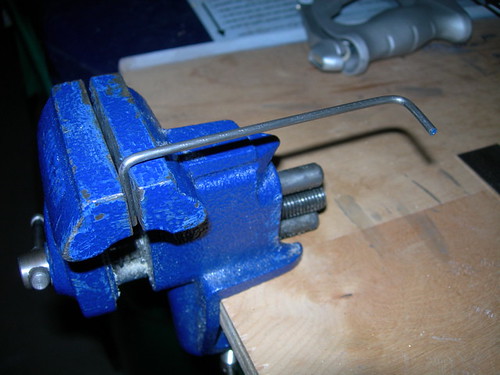
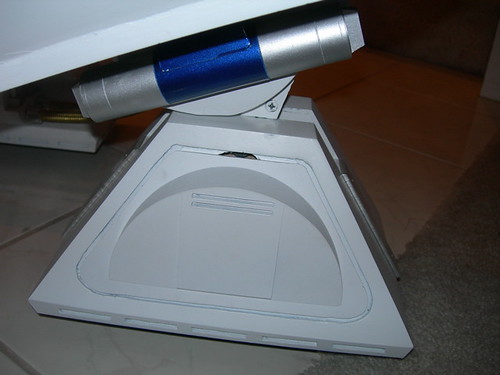
In the meantime, I would like to try recutting the top piece of the door frame on each side of the center foot. This piece had to be partly Dremeled down to allow the ankle bolt to be inserted and removed. Now that I've redrilled the ankle bolt hole lower, I should be able to recut this piece and replace it, without having the ankle bolt run into it anymore. Maybe I'll work on that.


I think I miss building.

Tuesday, August 28, 2007

Fixed Dome Gap

Another annoyance put to rest. For the longest time, I've lived with a relatively large gap between the bottom of the dome ring and the top of the body.


This was mainly due to the fact that when my frame was glued together, it apparently had a very slight forward tilt to it, so the skins actually clear the back of the frame just slightly, whereas the skins fall just short of the top of the frame on the front. (I've used a black marker to hide the wood.) The difference between the frame and skins on either side is probably a millimeter or so.

Unfortunately, this means that as the dome rotates, it has to clear all sides of the skins through the entire dome rotation, and the front of the dome had to be shimmed on washers higher than normal to clear the back side, leaving an unsightly gap in the front.

I was finally able to fix this tonight by removing two of the remaining plastic feet on the bottom of the front of the Rockler bearing, and through fine adjustments with washers and nuts on each of the six screws that hold the dome onto the bearing.


With this small modification, the outer ring of the Rockler bearing dips slightly in the front, while maintaining higher clearance in the back. This allows the dome clearance to be just right, around the whole perimeter of the droid. Now it looks a lot better to me.


I still plan to repaint the dome panels too. I picked up some primer and paint tonight, along with sand paper for wet sanding the primer. I probably won't even get to removing the old paint until this weekend at the earliest, but I'd like to have this all done well before R2LA V in late September.

Sunday, August 26, 2007

Xerox BBQ

Today I hosted my 10th Annual Xerox Reunion BBQ. It's a chance for me and my old Xerox alumni buddies and their families to get together and keep in touch. This was the first time the guests got to see R2 in all his glory. The kids really enjoyed him.

Saturday, August 18, 2007

Motor Post-Mortem

I dropped by Mike's today to take a look at what failed with the right foot's motor last weekend.

The plate that covers the gearing had to be removed by drilling out the rivets.


Next, the shaft and shaft adapter had to be hacksawed off, since the shaft adapter had been pinned and JB Welded on.


The problem? Possibly a manufacturing defect in the plastic gear's teeth. The grooves that mate with the worm gear were not of even depth, and there was some warping. Of course, it is possible this was caused by droid (ab)use, but I don't think so, because I recall when I first got the motor and applied power to it, once per revolution it made a funny noise. So I suspect this motor was defective to begin with. Lesson learned: If the motor makes an uneven noise as it runs, it could be the gearing is messed up.


Also, now that the nephews have returned home, I restored R2's original message to the top front logic. "R2 SAYS HELLO 2 U."

Tuesday, August 14, 2007

Replacement Motor, Brother Visits

Today I hacked off on of the tabs along the perimeter of the motor case, in preparation for installation on the right drivetrain. The motor swap seems to be working fine, and R2 is happy again.


Later on in the evening, my brother Dean finally got a chance to meet R2 for the first time. His boys had visited last Friday, but he couldn't make it until today.

Monday, August 13, 2007

Swapped Out Motor on Right Foot

Well, I found the reason why the rubber layer started slipping off of one of the right foot's wheels Friday. It appears as though the right foot motor has a problem when put under load. The motor usually spins okay when moving forward or backward, but most turns caused a strange grinding noise, and the motor ceased spinning. I pulled the motor off, and powered it up in isolation. When I put some strong friction on the motor, it made the same grinding noise. It seems as though something may be wrong with the worm gear inside. I'll open up the motor later and take a look.

In then meantime, I unwrapped the shrink tubing and electrical tape off the old motor wires, grabbed a new motor, and redid the soldering, electrical tape, and shrink tubing. I still need to hack one of the tabs off the motor case to get it to fit in the battery box. I'll do that tomorrow, and then R2 should be back in action.

Saturday, August 11, 2007

Fixed Rubber Layer on Wheel

Yesterday the rubber layer on one of the wheels on the right drivetrain started to work itself loose, so today I fixed it.


I globbed a bunch of "Amazing" Goop (it makes an Amazing Mess) along the perimeter of the wheel itself, and then stretched the rubber layer around the wheel.


I cleaned up the excess, and once the glue had set, I reattached the wheel on the drivetrain. Good as new.

Friday, August 10, 2007

Nephews Meet R2

"Oh my gosh! That is so cool!"

My two nephews Ari and Gabriel, who live in North Carolina and are visiting this week with their folks, at long last got a chance to meet R2 today. They didn't know what I had been working on, so I recreated the unveiling I did back on May 20, 2007 over again for them. Their expressions and exclamations made it all worth while. With my dad standing behind them, my mom shooting photos, my other brother shooting video and me working the controls, we captured their reactions.


They played hide and seek with R2, danced the dance program, and generally had a great time.


After they had left, my brother Jonathan and I played some more with R2 in the garage, and the rubber layer that covers the front right wheel started working its way loose, so I'll reglue that tomorrow.

I also soon plan to fix some of the gouging I had originally done on the top of the center foot door frames to get the ankle bolt to fit, and one day I'll repaint the blue panels on the dome.

Thursday, August 09, 2007

R2-KT Figures Arrive

The R2-KT figures that I ordered on Ray Sanders' run arrived today. Thanks, Ray!

The detail on them is very nice. When you turn R2-KT's head, the middle leg deploys. Hey, now we know how to do 2-3-2!


There I go, blogging about non-building-related stuff again.

Wednesday, August 08, 2007

Over 10,000 Served

Wow, tonight the SiteMeter counter shows over 10,000 visits to this blog! Even with me accounting for 9,900 of them, that's still a lot.

Not sure who the lucky winner is, but I think the domain belongs to rogers.com, which is actually in Canada, despite the fact that SiteMeter identifies the IP address as being in the United States. You can check the list of visitors at any time by clicking here.

Keep those visits coming, even though I've slowed down again with the updates! :) And remember, you can always search for keywords in the blog in the search field, and you'll get a nice page consisting of entries containing words from your search.

Monday, August 06, 2007

Dance Program, Black Tube for Mist

The little nephews are scheduled to visit on Friday afternoon. What's the first thing they are going to say to R2 once they meet him? "Hey R2! Dance Program!"

I captured the Dance Program music from my Hasbro Interactive R2, and saved it as a 44.1kHz mono .wav sound file, suitable for play on my CFSound III. You can right-click here and save the file to your hard drive (as I violate copyright regulations). CFSound II users will need to convert this to 22kHz.

On another note (so to speak), the black tube for the mist that I ordered from McMaster-Carr arrived today, so I cut it down to length and swapped out the light blue tube I had in there for this one. It's hard to see, but that's the idea, right?

Friday, August 03, 2007

Finished Mist Effect

Tonight I glued down the MDF holder for the silicone tube that directs the compressed air from the spray can to the area behind the upper utility arm.


After the glue had dried sufficiently, I attached the tube, and tried the mist effect.


It works great!

The only thing I will change is the tube that leads from the spray can to the MDF holder. I ordered a black tube, which I plan to use in place of the light blue tube that I painted black. The light blue tube doesn't look too bad, but I do plan to swap it out.

Thursday, August 02, 2007

Painted Mist MDF and Tube, Installed and Wired Up Mist Can and Solenoid

This evening I painted the MDF holder and tube for the mist effect black. I'm going to go ahead and order some real black tubing though, as I don't think the paint is going to stick to the silicone here.


I needed to re-bend the rod that connects the solenoid to the trigger on the spray can, as the bends were not quite perfectly located. Since the rod is brass, it breaks easily when bent repeatedly, so I cut a new segment of rod from steel, and bent it at the proper locations.


Next, I installed the can in the droid, and wired up the solenoid. One wire is connected to +12 volts, the other to Keycoder output #14. I eventually wrapped the connected wires with electrical tape.


Finally, while holding the MDF holder in place by hand, I flipped switch #14 on the remote, and R2 was ready for action!

Wednesday, August 01, 2007

Started Working on Spray Mist

I got started on a fun feature for R2 tonight, the spray mist. The source of the mist is an inverted can of office duster spray, and the spray will emit from the top utility arm area, when the arm is open and I press one of the Keycoder switches on the transmitter.

A 2mm inner-diameter rubber tube that I ordered from McMaster-Carr arrived today. It fits around the spray can's extension nozzle, and will help route the mist from the spray can to the area behind the upper utility arm. More on that in a moment.

The first thing I did was drill a small 1/8" hole in the trigger for the spray can. Then, I bent some 1/8"-diameter rod, so that one end goes through the hole in the trigger, and the other end goes through the hole in the solenoid piston that I'm using to pull the trigger on the can. I strapped the solenoid to the can itself.


I cut and drilled a small piece of MDF that will be used to hold the end of the tube that sits behind the top utility arm.


I attached the silicone tubing to the spray can, and fitted the MDF to the other end of the tubing.


Soon, I will glue down the MDF behind the top utility arm. I did a test fit (and a test spray), and everything looks like it's good to go. I just need to paint the MDF black, along with the tubing (why didn't I order black tubing???).