Sunday, November 27, 2005

Skirt Ribs - Third Try's the Charm

Let's see... First I tried using 1/4" MDF strips 1/2" wide for skirt ribs, but they ended up being too short. Then I tried 3/8" square dowels, but they ended up being too tall and narrow. What to try next?

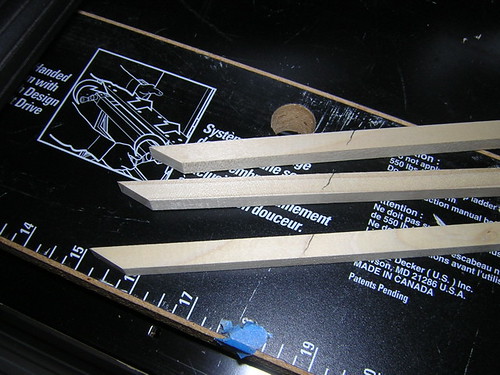
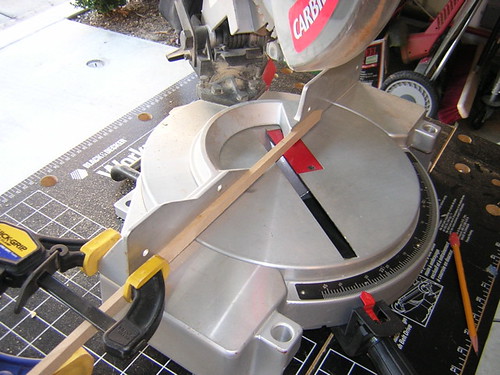
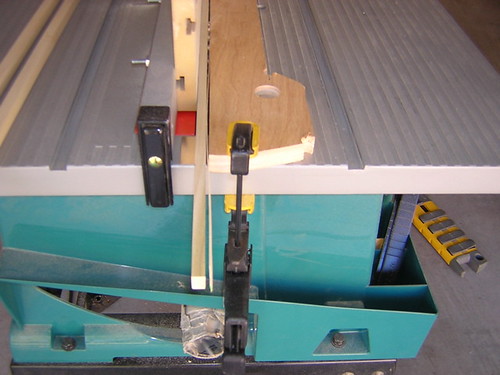
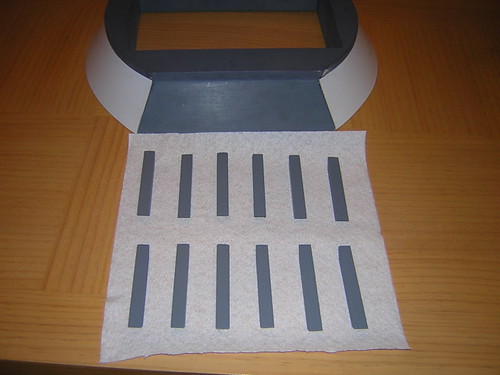
I took 1/2" square dowels and trimmed them in one of the dimensions to a little less than 3/8", leaving them 1/2" wide in the other dimension, as the blueprints suggest. First I had to trim the dowels (carefully and safely) using the table saw:


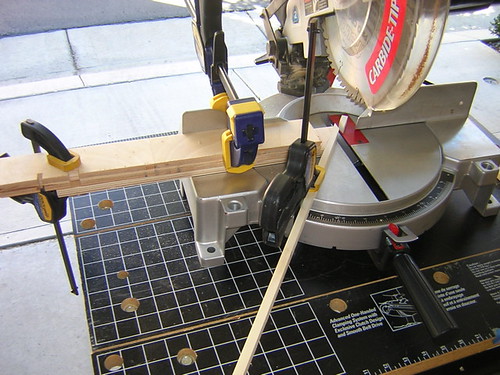
Next I cut the steep angle that rests up against the bottom of the skirt:


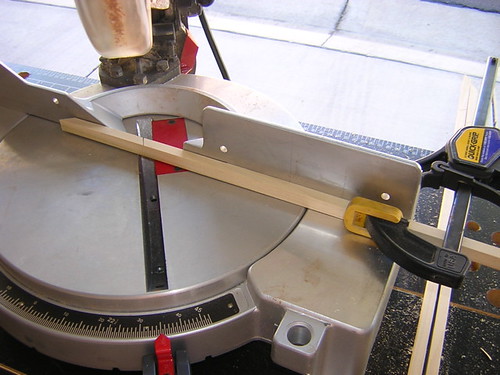
Then I cut the other angle that runs parallel with the top of the skirt. This will be cut flush with the top of the skirt later using the router to shave off the part that rides above the top of the skirt:


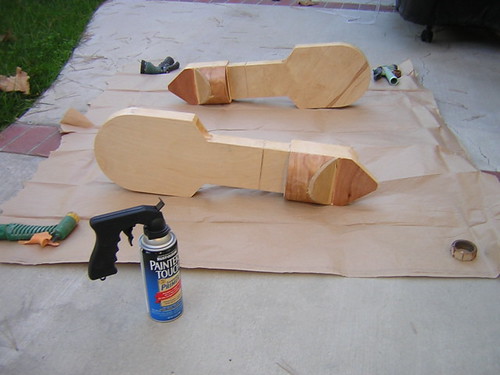
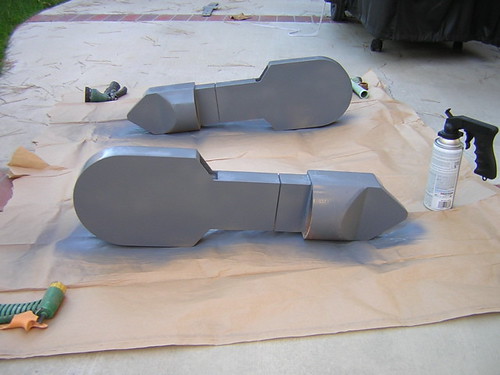
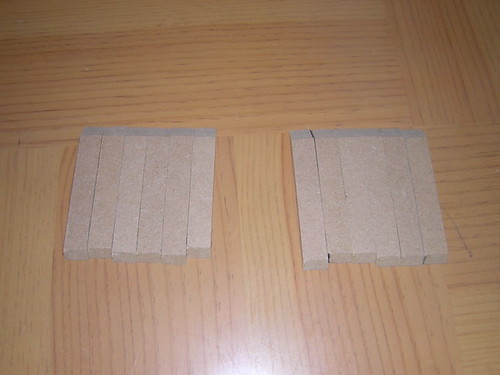
Finally I primered them, along with the legs that I had been sanding and primering throughout the weekend:


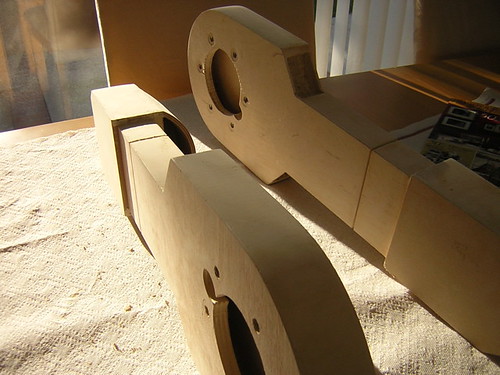
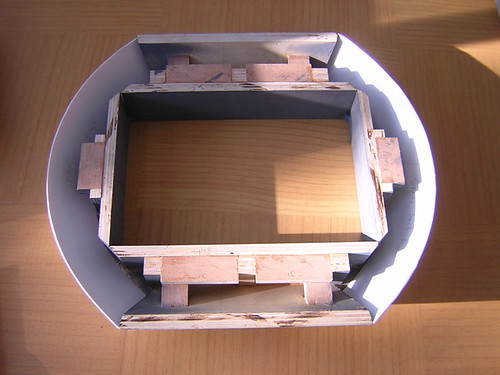
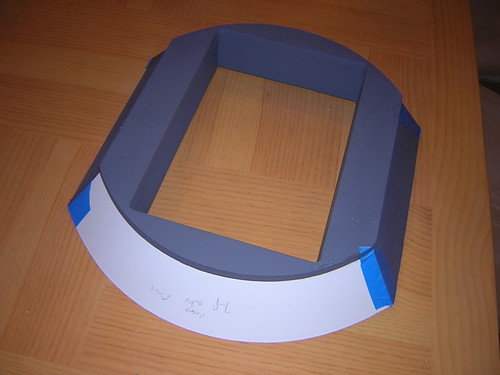
I just need to glue the ribs on and route them down to size. May need to sand the inboard parts of the ribs to make them fit the skirt snugly in places too.

Saturday, November 26, 2005

More Primering and Sanding, Recut Skirt Ribs

Just like puttying and sanding, the primering and sanding will go on indefinitely. Still trying to get the legs ~100% smooth. I also tried recutting the skirt ribs, with trials using 1/2" square and 3/8" square dowels to see if they would align with the skirt base better. The 1/2" dowel was much too large, the 3/8" dowel was just a touch too tall, but 1/8" too narrow to spec. I may try cutting some of the 1/2" dowels down to just under 3/8" in one of the dimensions to see if I can get it just right.

Tuesday, November 22, 2005

Started Primering Legs

Wow. After all these months of staring at wooden legs, I finally started applying primer to them. As odd as it seems, I consider this quite a milestone. Here's the before/after:


Michael McMaster's excellent C3 DVD set also arrived today. :)

Saturday, November 19, 2005

More Primer, Wood Hardener, Skirt Work, etc.

More primer on center leg. Applied Minwax wood hardener to left and right legs, thus declaring the base form of the legs COMPLETE. Filed styrene on skirt to be more level and more aligned with the wooden siding. Drilled holes for router table adapter I'm building.

Thursday, November 17, 2005

Primered Skirt Ribs & Other Detailed Work

This morning I put a coat of primer on the skirt ribs, and a second pass on the center leg. Got home, sanded down the primer with 400 grit sand paper, and did another round of primer. Finished marking up base plate of frame where routing needs to take place to make room for various details (power couplings, octagon ports, coin returns, pocket vents).

I ran a test of the Minwax wood hardener on a piece of scrap with Plastic Wood coated on one edge (similar to the legs) and it seemed to work, so I think I will try the wood hardener on the edges of the legs with Plastic Wood as well as the sides. I do want to make sure the wood hardener handles a coat of primer well first, though.

Let's see, what else? Well, I need to file the styrene on the skirt, as I did my first setting of the frame on the skirt, and it was evident that the top of the styrene was hitting the bottom of the frame too high in places. Who knows, I may even redo the styrene if I'm too unhappy with it, but let's see how the filing goes first.

Sunday, November 13, 2005

Sanded/Puttied Legs, Cut Skirt Ribs

The end is near for the sanding and puttying of the legs. They are just about done (really). Here's a so-so look:


Next I cut the ribs for the skirt:


Saturday, November 12, 2005

Sanded Legs, Glued Styrene on Skirt

I spent the morning sanding the legs where I added lots o' Plastic Wood wood filler. Legs may be done with puttying and sanding real soon.

Spent the afternoon working on the skirt, mainly gluing the styrene onto the wooden skirt (primered in gray). Here are a couple of views, upside-down and right-side up. (Yeah, a little bit of newspaper stuck to the glue in one corner, I'll sand that out.)


Monday, November 07, 2005

Finished Cutting Styrene for Skirt

I finished cutting the curved styrene parts of the skirt tonight. As you may have guessed, it isn't easy to get these perfect, and mine are still not 100% perfect, but I think they'll do.

Right now they're taped on. I still need to glue them in, and cut and glue the ribs that go on the styrene.

Reorganized Web Page

Okay, even I thought the web page was getting out of hand. So rather than show every post in history, I've changed the front page to only show the last 30 posts. All posts are still available by clicking on the various monthly archive links on the right.

Sunday, November 06, 2005

Dremeled Skirt, Recut Armpit MDF, Puttied Legs

I used the Dremel to grind off a bit of wood on the inner part of the skirt where the Styrene will need to rest. Next I recut some of the MDF pieces that will fit in the armpits. Finally, I decided to take the pluge and apply a (somewhat uneven) layer of Plastic Wood to each of the legs' edges. I only covered about half of each leg, I'll sand and cover the other half next.

Saturday, November 05, 2005

Worked on Skirt, Primered

I sanded the putty touch-up on the skirt, and then proceeded to start applying primer to the skirt frame and center leg. The primer does really show where I missed covering up the wood grain, so I may experiment to see if I can post-primer putty.

I worked on the armpits of the legs some more, using the drum sander Dremel attachment to smooth them out. I think they're just about ready.

Finally, I cut out a second curved styrene piece for the skirt, although it needs to be trimmed to length.

Oh yeah, and I picked up another R2 toy at Costco today! :)

Friday, November 04, 2005

Curved Styrene Skirt Cut

I gave a shot at cutting out the curved part of the skirt, which I am making from styrene, per Mike Senna's tutorial. The result was pretty close to being correct, but I'm going to give it another shot tomorrow. I need to make two of these total.