Thursday, December 31, 2009

Finished Attaching and Trimming Skirt Ribs

Today I trimmed down the ribs on the back part of the skirt that I attached yesterday, and I glued down and trimmed the ribs for the front of the skirt as well.

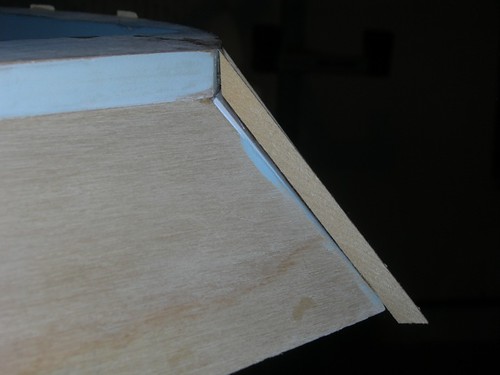
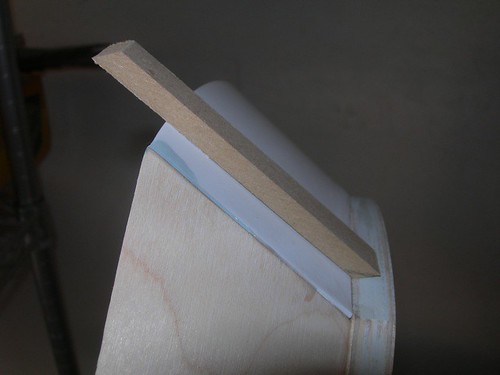
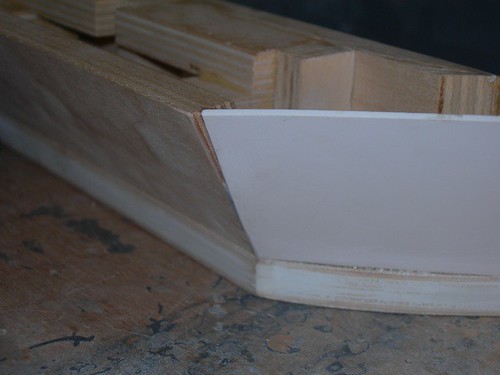
The ribs intentionally overhang the styrene by a little bit, so that I can use the router to trim them flush. (The R2LA IV DVD also shows this method in action.)


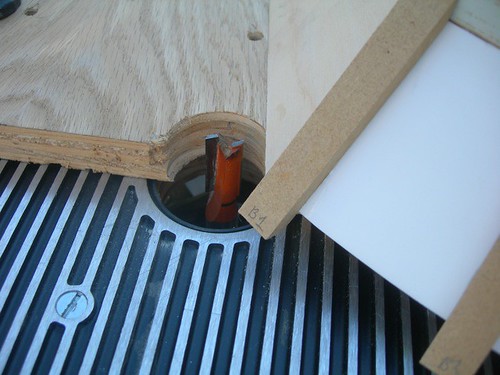
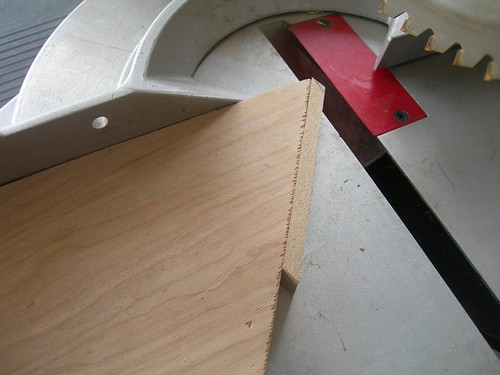
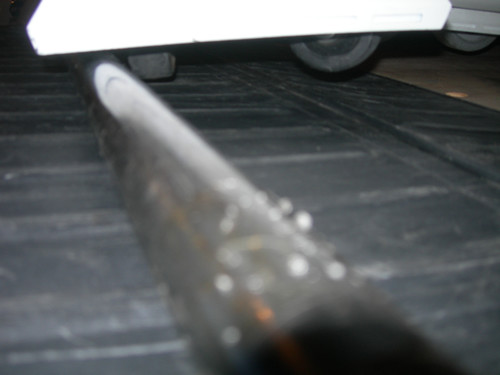
To demonstrate how this works, I stopped the router midway through rib #4 to show how the rib is fed into the bit. Disregard the fact that the skirt is tilted off the wooden board slightly. When the work is fed into the router bit, the skirt is flat against the wooden board.


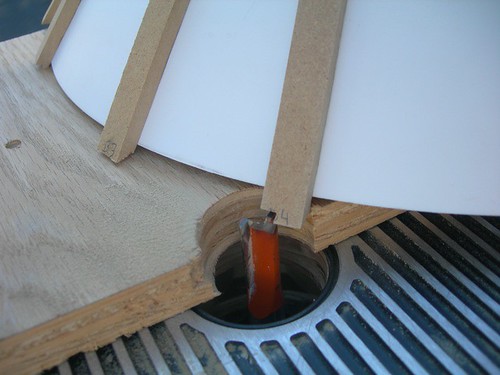
This technique works great for ribs made of MDF, but prior experience with droid #1 indicates that this method should not be done with fibrous wood (e.g. square wooden dowels), as the bit tends to rip the dowels apart (not good).


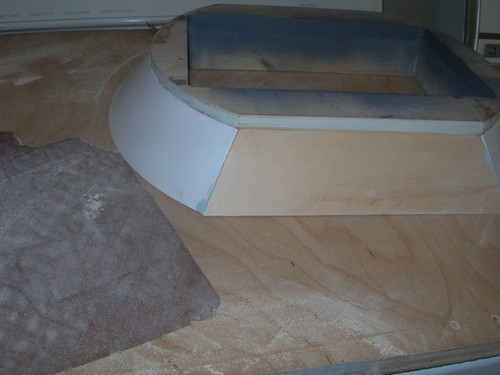
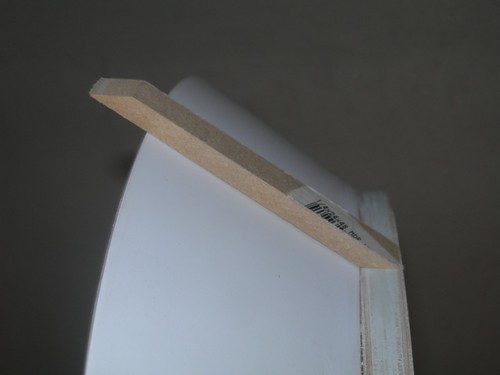
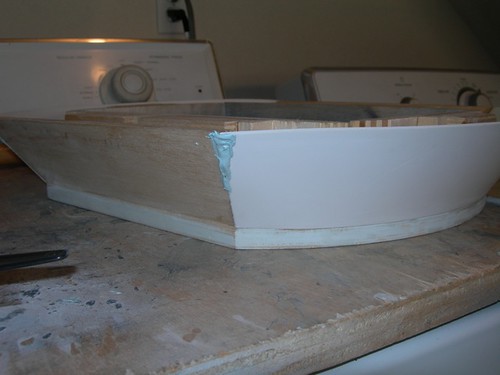
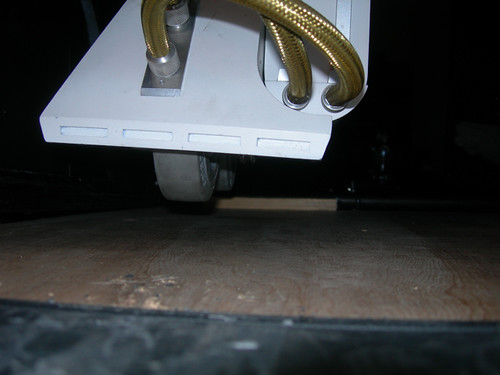
Six flush cuts. So far so good.


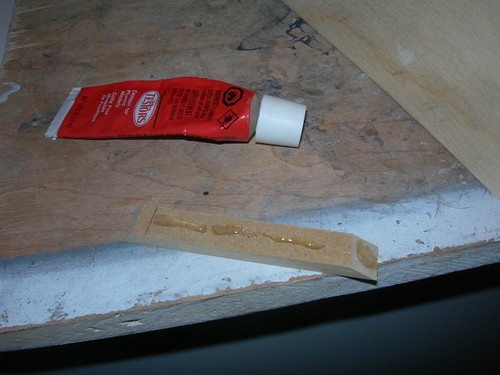
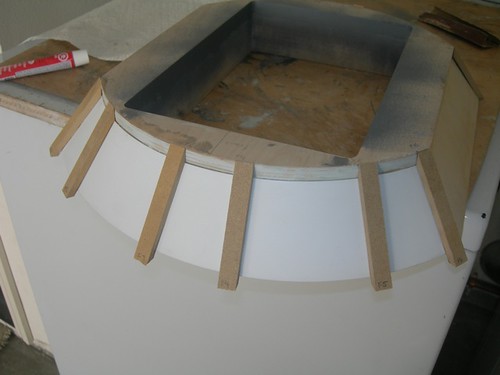
I had waited to glue down the ribs for the front of the skirt so that a) they wouldn't cause problems as I routed down the back ribs by hitting the wooden board, and b) in case the router technique didn't work on the ribs for the back of the skirt, I might have decided to trim the ribs some other way before attaching them.

With the success trimming the other ribs, I went ahead and glued down the front ribs.


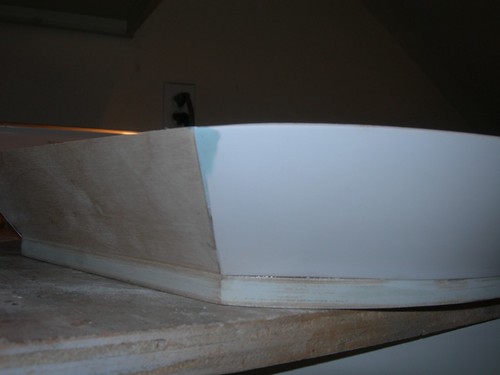
Again, the ribs are overhanging the styrene a little bit.


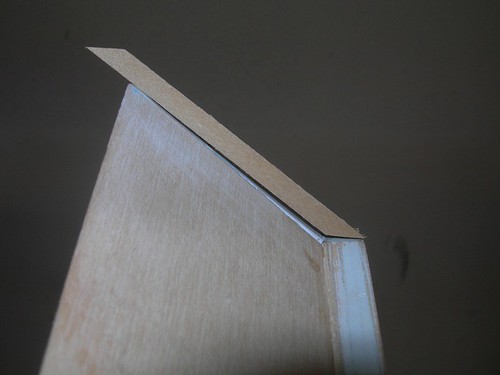
After the glue had sufficiently dried, I went back to the router, and after six more successful trims, the front ribs are also flush with the top of the skirt. I turned the skirt upside down and set it on a flat surface to check.


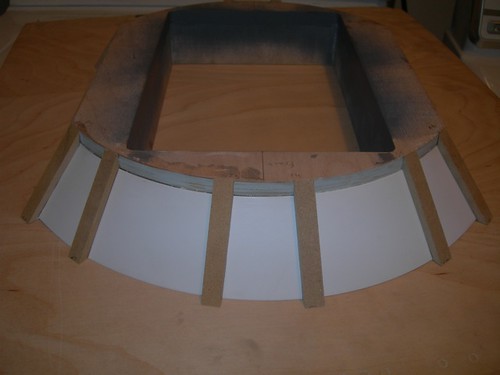
With the attaching and trimming of the skirt ribs done, the main build of the skirt is complete. Now I need to do some minor filling and finishing work, prior to final painting.

Wednesday, December 30, 2009

Glued on Ribs for Back of Skirt

Today I glued down the six ribs that go on the back side of the skirt.

First I fitted and labeled the front and back ribs, in an attempt to get the best size match possible.


I'm using Testors model glue. It does a pretty good job of bonding to the MDF ribs, and it slightly melts the styrene.


The ribs stick to the styrene pretty quickly, so it didn't take long to get the six ribs on.


As happened with droid #1, not all ribs are a perfect fit. The corner ribs are particularly tricky. I will fill in the gaps later on.


I will trim the overhang down before gluing the ribs that go on the front side of the skirt.

Monday, December 28, 2009

Sanded Top of Skirt Flat

Once again, getting the bare minimum done.

Today, it was turning the skirt over and sanding it flat, so all the surfaces will be even against the bottom of the frame.


If I were going any slower, I'd be going backward.

Sunday, December 27, 2009

Adjusted Angle on Skirt Ribs

Today I had a little time to work on the ribs that get glued to the styrene curve of the skirt. Matthew and I rough-cut these a long time ago, and now I'm finally getting around to using them.

As they are currently cut, the pointy part of the rib does not reach to the bottom of the base plate of the skirt.


A steeper angle needs to be cut on the miter saw.


I did some trial-and-error cuts with a spare piece, until I found an angle that worked well.


Even then, the angle doesn't work for every rib position, particularly the corner ribs. This was the case with droid #1 as well. I'll just fill this in with paintable caulk or something similar.


Before gluing the ribs in place, I need to turn the skirt upside down and sand the top smooth, to ensure that the styrene and wood pieces are perfectly even with each other.

I plan to use a router table to cut the ribs to the proper length once they've been glued down. That technique didn't work so well with droid #1, but this time I'm using MDF instead of wood with fibers, so I'm expecting things to go better this time. I sure hope I'm right.

Friday, December 25, 2009

Rewired Mist Can

Today I decided to rewire how my mist can connects to my droid. This is my second attempt, the first try didn't go so well, due to too much of a load going through my 24->12 volt converter, when sounds were playing simultaneously to the mist effect. Now that my droid is completely running on 12 volts, the converter is gone and I can try this again.

Currently the wires that connect the KeyKoder are tied and taped to the wires coming form the solenoid. This makes removing the can and solenoid difficult, since the solenoid cannot leave the droid.


I'm going to use a monophonic plug to couple the solenoid to the wires in the droid.


Not much solder is required for the small wires.


The solenoid side is ready for action.


Turning to the wires coming out of the KeyKoder, I soldered them to the female connector.


I wrapped the exposed surfaces in electrical tape, and a little Velcro holds everything in place.


I tested, and all is well!

Thursday, December 24, 2009

Evercoat for Skirt Corners

Having finally completing the droid lift, I'm returning to work on droid #2. Today, it was some finishing work on the skirt.

In the corners where the styrene meets the wood, the styrene doesn't always meet the wood. This isn't even that big of a deal, since the ribs on the skirt cover these areas, but it's not much effort to fix it up.


Evercoat to the rescue.


A little sanding, and things look better.

Tuesday, December 22, 2009

Droid Lift Completed

Today I went to Mike's to work out the final adjustments on the droid lift.

It turns out only a minor modification or two was required. We removed an extra boom support that I had added the other day (but didn't document here), and with the remaining support, we forced the boom to tilt up as high as possible (which isn't much, but it makes a difference).


Now I get plenty of clearance over the pipes that make up the base of the lift.


Mike liked the improvement so much, he decided to copy my design (ha ha ha). My lift on the left, his on the right.


Mike's droid lift was already working fine, but anything that helps keep the mast from bending is advantageous. I happened to have an extra 24" steel pipe, so he gave it a try. He will probably recut the stubby support on the base to reach up to the top of the mast holder.


For the first time ever, I was able to unload the droid from the car and get it into the house without begging anyone for help. A plywood board helps R2 get over a single step at my doorway.


I'm so happy that the droid lift is complete. I might see if there are any improvements I can make in the future, but for now it will do. Just in time for...

Oh, wait. I have absolutely nothing scheduled for R2, and I just got done with a flurry of events. Oh well, that's how it always goes with R2.

Saturday, December 19, 2009

Discovery Science Center Visit II

Today some of the R2 Builders and costumed characters from the 501st and Rebel Legion paid a return visit to the Discovery Science Center.


Vince Sanchez with R5-D4, Chris Romines with R2-A1, and I with R2-D2 headed into the science center. Once again I used my droid lift, which still doesn't quite work the way I want it to, but it's usable.


As usual, it didn't take long for folks to start snapping pictures.


Katrina, a student who works on her own robotics projects, chatted with Chris and I about our droids. We explained the insides and outsides, and she got a picture or two to show her friends.


I had to leave early, but the event was still going strong.

The full photoset is here.

Wednesday, December 16, 2009

Bring Your Droid to Work Day II

By popular demand, R2 came into work today for the holiday pot luck that was being held on the floor that I work on. This is a repeat visit from R2's first visit in December 2007.

Even though the droid lift isn't quite working the way I want it to, I decided to give it a try. Coworkers Rich and Ralph stand at the ready to catch R2 if he should fall...


Here's the video of the first unloading via the droid lift.


Once inside the building, R2 quickly became the center of attention.


A group picture with my coworkers, and it was back to work. I left R2 in the reception area, under the close guard of the receptionist. It doesn't get any safer than that.

Monday, December 14, 2009

First Droid Lift Test Under Load

Tonight I made the adjustments to the droid lift that Mike and I discussed yesterday.

First, I trimmed a couple of inches off the diagonal support pipe that connects the mast to the boom. The cut will allow clearance between the diagonal pipe and the droid.


Earlier on the way into work this morning, I picked up a new 1"-diameter steel rod, that serves as a taller mast. I assembled the new mast and the diagonal support pipe.


Under no load, the pulleys bump into the car ceiling.


Once the droid is lifted, however, the mast bends enough for the pulleys to clear the ceiling.


It turns out this isn't too helpful. Even though it allows me to drop the droid further into the car, I can't swing the boom back out of the car once the load has been removed; the pulleys go right back up into the ceiling.


This is as high as I dare go with the winch hook, so at this setting this is as high as I can lift the droid currently.


Unfortunately, this doesn't lift the droid as high as I'd like. The front casters bump into the base pipe at the tailgate.

With enough rocking back and forth of the front foot, I can get the wheels to clear the pipe, but that's not how I want it to work.


The back wheels are also levitating, but again, not as high as I need them to be to clear the pipes at the base.


And for the first time ever, a (poorly) narrated YouTube video by me showing the droid lift pilot test. I only lifted the droid an inch or two off the floor of the car. Sorry it is so poorly lit, and the audio isn't so great either.

Sunday, December 13, 2009

More Droid Lift Work, Doesn't Pass Certification Yet

It was apparent that I needed to cut down the top of the manual droid lift, and relocate the pipe holder. The 3"-diameter pulleys definitely interfere with the bars.


Time to hack and redrill.


I also decided to use a smaller square tube and U-bolt inside the droid for the droid lift hook. The larger U-bolt was just too tall.


Then, it was over to Mike's for inspection. Mike resoldered my atrocious job on the phono plug.


Finally, the moment of truth. Would the lift work?


No, the lift won't work as it stands right now.

There are two problems. First, the steel mast is too short. The problem is it bends a little bit as the load is put on it, and that causes the boom to be too low. I need to find a new steel rod and cut it to size again.

The second problem is that the diagonal support that connects the mast and boom needs to be cut down, as it runs into the droid. This support pipe needs to move closer to the corner where the mast and boom meet.

So the droid lift isn't quite ready to go, but it's getting there.