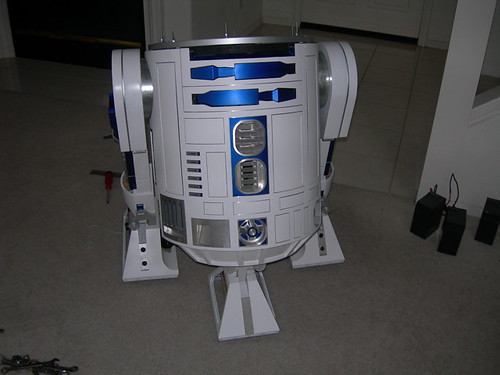
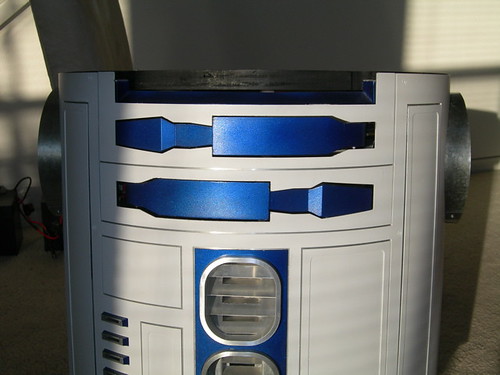
My little nephews (7 and 5 years old) are coming to visit in August. They like Star Wars, and they like R2-D2, and they don't know that I have built R2, so it's going to be a big surprise for them.
I customized the top front logic display to have R2 give them a special, personalized greeting. I can't wait until they see him for the first time!
Monday, July 30, 2007
Sunday, July 29, 2007
Stabilizer for Top Utility Arm Motor, PVC Stubs to Prop Left Battery Box
The minor tweaks never end.
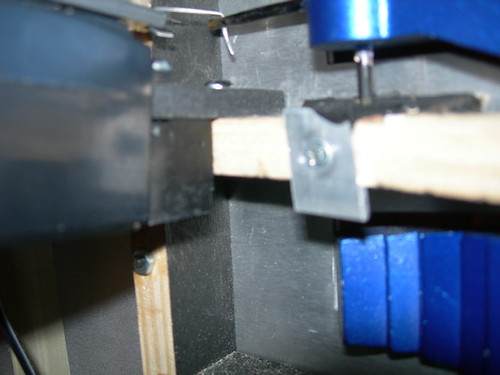
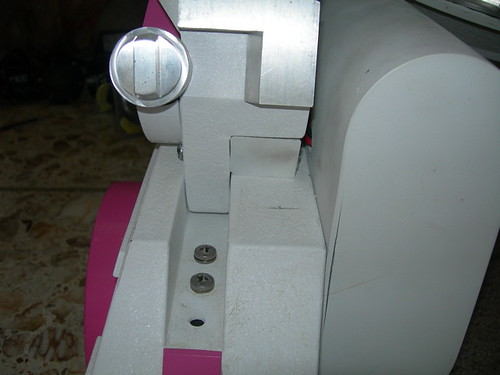
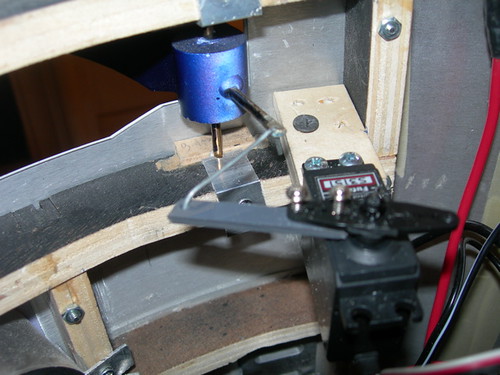
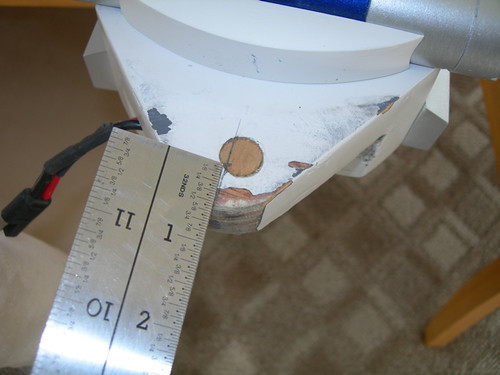
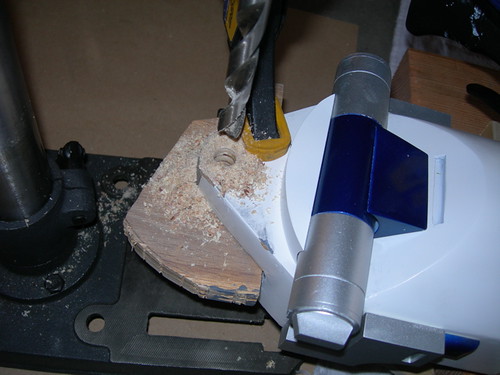
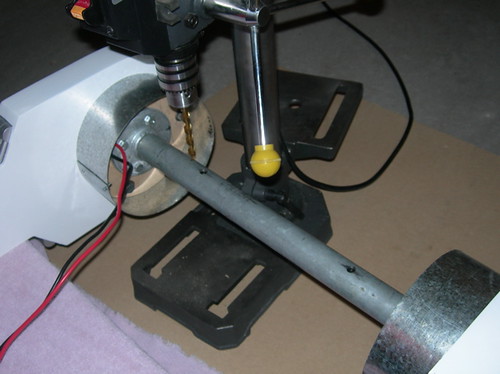
Today, I cut a small piece of wood to help prop up the servo motor for the top utility arm.
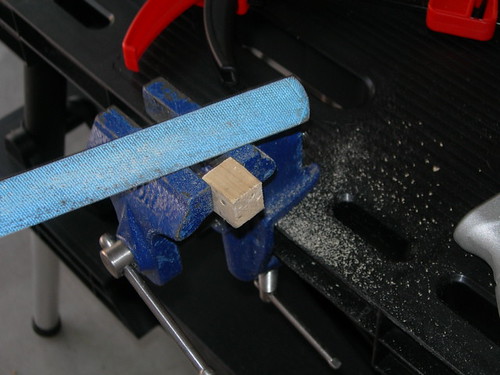
The motor had been hanging from the MDF like a diver on a diving board, and the MDF was flexing a bit when the arm moved. This block of wood helps stabilize the whole motor assembly, since it is sandwiched between the horizontal rib from which the MDF hangs, and the motor itself.

Once the test fit proved good, I painted the wooden block black, and later installed it. Of my three attempts to photograph this from the inside, none of them focused quite right. :(
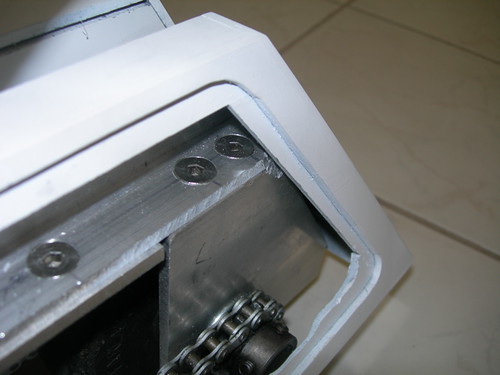
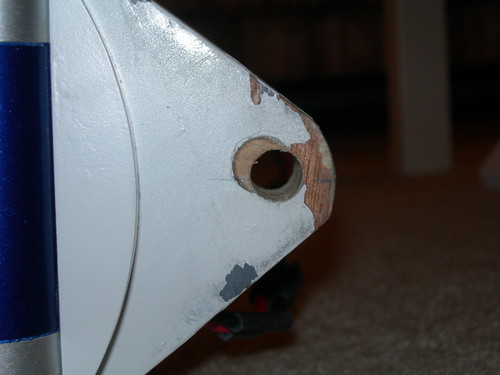
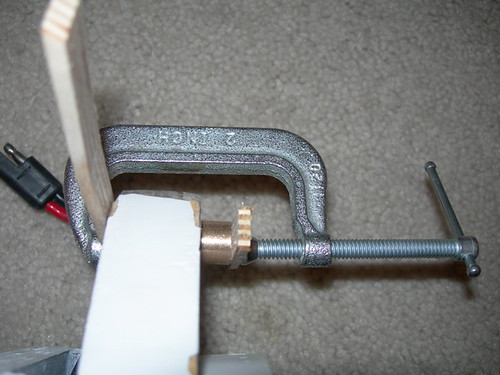
Later on, I cut a couple of small pieces of PVC and glued them to the cut out area of my left battery box.
With these installed, the battery box is propped up a little as it rests on the drive train's motor mount. Without these PVC pieces, the foot shell had a tendency to sag toward the center of the droid.
Today, I cut a small piece of wood to help prop up the servo motor for the top utility arm.
The motor had been hanging from the MDF like a diver on a diving board, and the MDF was flexing a bit when the arm moved. This block of wood helps stabilize the whole motor assembly, since it is sandwiched between the horizontal rib from which the MDF hangs, and the motor itself.
Once the test fit proved good, I painted the wooden block black, and later installed it. Of my three attempts to photograph this from the inside, none of them focused quite right. :(
Later on, I cut a couple of small pieces of PVC and glued them to the cut out area of my left battery box.
With these installed, the battery box is propped up a little as it rests on the drive train's motor mount. Without these PVC pieces, the foot shell had a tendency to sag toward the center of the droid.
Saturday, July 28, 2007
Dremeled Drivetrain, BBQ
In an effort to get my foot shells to lay perfectly on the feet, I used the Dremel grinding attachment to take a little material off of the left foot's drivetrain.

The diagonal part of the door frame had been bumping into the drivetrain ever since I repositioned the left ankle bolt hole, so this fixes that problem.
I also filed a small amount of material from within the foot shell, as it was very close to touching the gears.

In the afternoon, I dropped by Frank Cerney's BBQ, where I met up with Frank, Russell Rucker and Mike Senna and had a nice time.
The diagonal part of the door frame had been bumping into the drivetrain ever since I repositioned the left ankle bolt hole, so this fixes that problem.
I also filed a small amount of material from within the foot shell, as it was very close to touching the gears.
In the afternoon, I dropped by Frank Cerney's BBQ, where I met up with Frank, Russell Rucker and Mike Senna and had a nice time.
Thursday, July 26, 2007
Cut New Center Ankle Pivot Stops
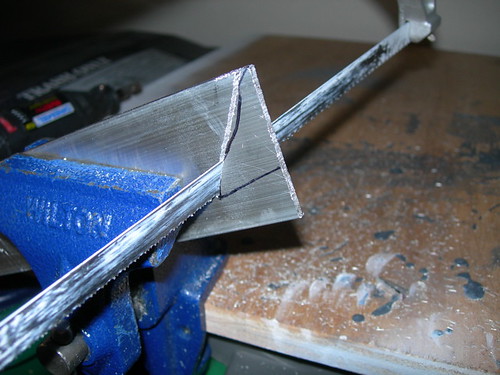
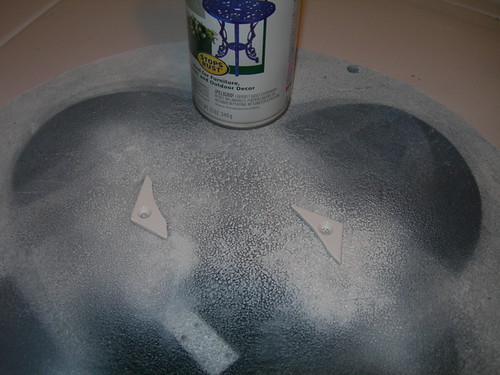
Just like I did last night for the outer ankles, tonight I cut some new stops for the center ankle. These keep the center foot from jumping up and doing a wheelie when going backward.
The center ankle stops are made from 1/8" aluminum. I marked the outline on the aluminum bar, and then hacksawed and Dremeled them to shape.
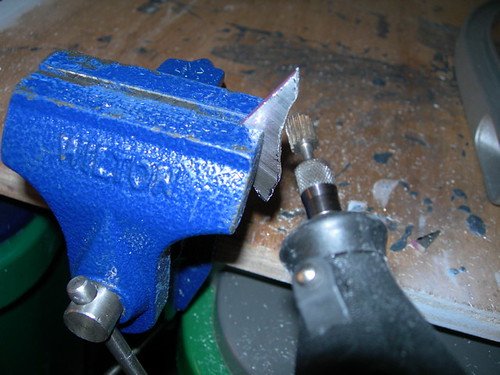
Next, I drilled and countersunk the mounting holes.
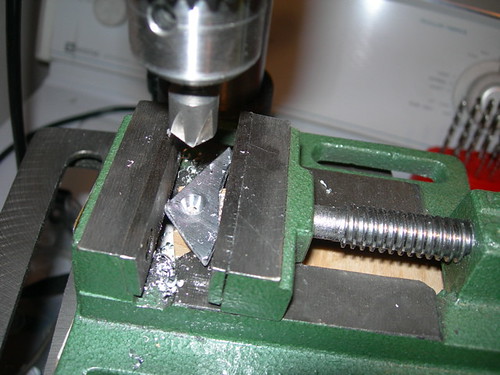
Finally, I primed and painted them. They should be ready for installation tomorrow evening.
The center ankle stops are made from 1/8" aluminum. I marked the outline on the aluminum bar, and then hacksawed and Dremeled them to shape.
Next, I drilled and countersunk the mounting holes.
Finally, I primed and painted them. They should be ready for installation tomorrow evening.
Wednesday, July 25, 2007
New Cutting Board Stops for Outer Ankles
Because I redrilled the ankle bolt holes on the outer ankles the other day, I needed to cut new stops to keep the feet from pivoting, as the old stops no longer fit.
I marked the same cutting board that I used last time (and that was used by a few R2 Builders at CIV, you know who you are :) ).
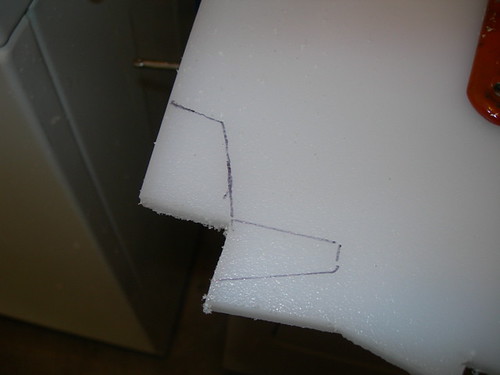
Then it was a matter of cutting with the hacksaw.

Next, I drilled the hole for the screw that holds the stop onto the ankle. I was able to match the hole in the cutting board to the pre-existing hole in the ankle.

Attach with a screw, and we're done!
Tomorrow I hope to cut some aluminum stock and do the same thing for center ankle.
I marked the same cutting board that I used last time (and that was used by a few R2 Builders at CIV, you know who you are :) ).
Then it was a matter of cutting with the hacksaw.
Next, I drilled the hole for the screw that holds the stop onto the ankle. I was able to match the hole in the cutting board to the pre-existing hole in the ankle.
Attach with a screw, and we're done!
Tomorrow I hope to cut some aluminum stock and do the same thing for center ankle.
Sunday, July 22, 2007
Painted Servo Mounting Blocks, Redrilled Center Ankle Bolt Hole, Started Reassembly
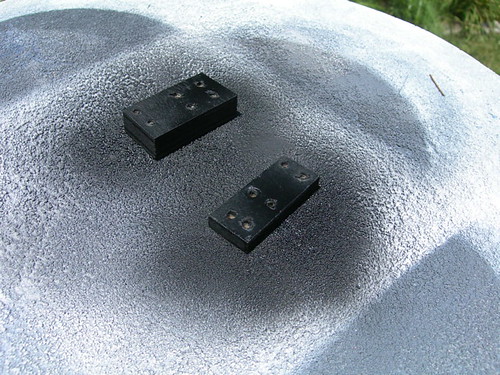
This morning I painted the mounting blocks for the utility arm servo motors black, so that they'll be unnoticeable from the outside when the arms are open.
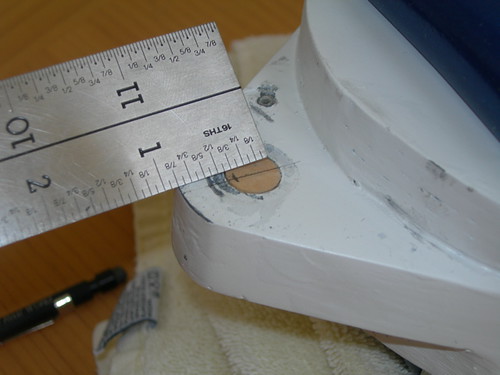
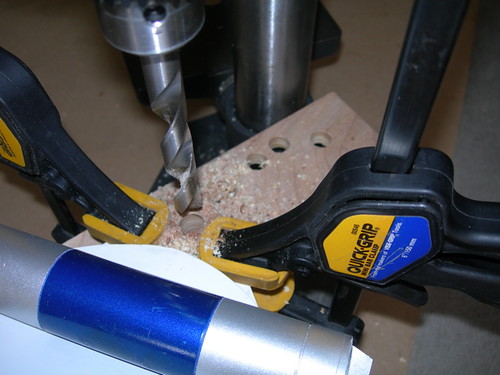
Later, I measured, marked and drilled a new hole for the center ankle bolt hole that I had filled yesterday.
Now that all three ankles have their ankle bolt holes redrilled closer to the tips of the ankles, I get much more clearance for things like the ankle cylinders. Before, the cylinders were jamming themselves into the tops of the foot shells, causing the foot shells to tilt. No more.
Looks like I need to do a bit of touch-up painting on the white areas that are newly exposed too.
Reassembly has begun.
I need to cut new wedges from cutting board (outer legs) and aluminum stock (center leg) to keep the feet from pivoting. The new location of the ankle bolt holes means that the old wedges no longer fit in the same way that they used to. I hope to get to that sometime this week.
Saturday, July 21, 2007
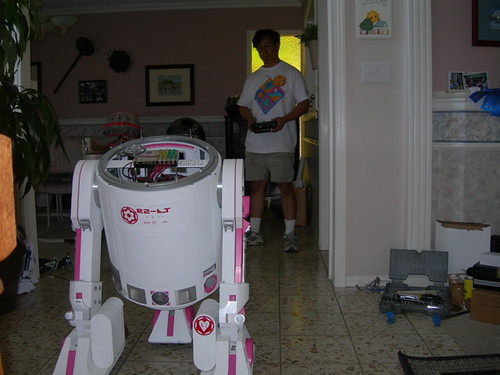
Another R2-KT Update, Remote Control for Utility Arms, Plugged Center Ankle Bolt Holes, Cleaned Up Wiring
Lots of pictures today. Apologies to those of you on dial-up.
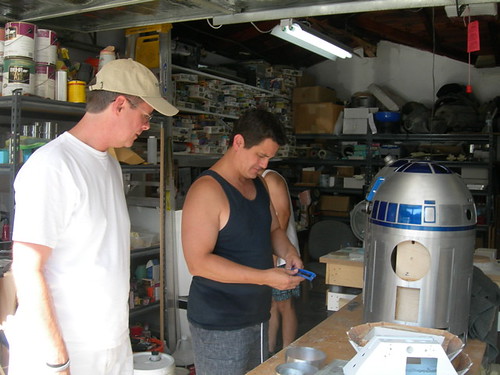
I went to Mike's to drop off a very minor part for R2-KT, which I'll get to in a moment.
We usually use a piece of cutting board to keep the outer feet from pivoting, but for R2-KT, Mike chose to use some plywood.
With the plywood wedges in place, and the ankles and shoulders now securely bolted down, R2-KT is much more drivable than she was before. Mike also removed the ball casters entirely from the outer feet, and moved two of them to the center foot, since they are in better shape than the original ball casters in the center foot. The vinyl lettering on the back door is in dire need of repair, however.
The receiver battery had no on/off switch, it was required to be manually unplugged from the receiver. I donated a 3-wire cable to allow an on/off switch in the circuit. Now R2-KT's receiver battery won't drain unexpectedly.
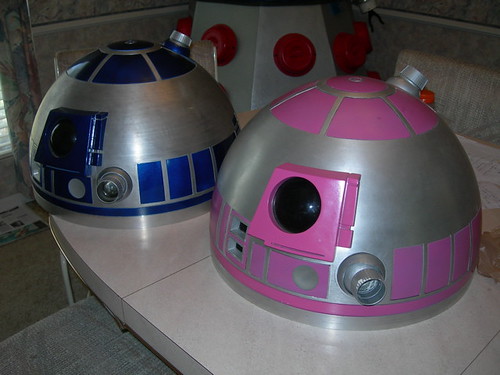
R2-KT's dome was indeed found socializing with Mike's R2-D2 dome, just as I thought.
In the meantime, I just happened to bring my droid's carcass to Mike's house. While Mike was working on R2-KT, chatting on the phone and reading e-mail, I was busy getting started on making the utility arms work under remote control. Sure, I could have tried this at my house, but as usual I wanted to copy Mike's proven design. (I have no pride, I admit this readily.)
The essential ingredients are the servo motor (with hacked-up servo horn), a small MDF or plywood platform for the motor to sit on, a PVC stick, and a paper clip.

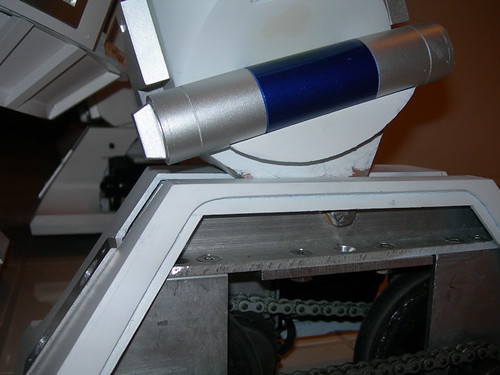
Both top and bottom arm motor assemblies are about ready to go. They just need to be mounted onto the horizontal ribs in the frame.
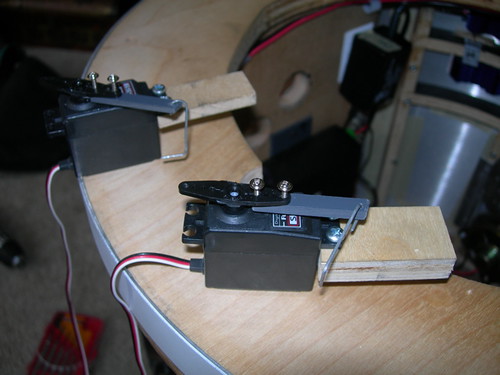
The idea when mounting the servo motor assembly is to get the servo arm and paper clip pointing in a straight line, parallel with the servo motor, when the arm is in the closed position. In this orientation, it's harder for kids (and adults) to pry open the utility arms from the outside.
It takes a little trial-and-error to get everything lined up, but with Mike's help, most adjustments were made by repositioning the servo horn on the motor, and bending the paper clip at the right point to match the hole at the end of the utility arm bar.
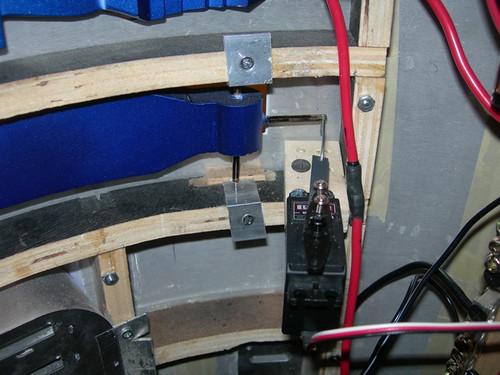
As the dial turns on the remote, the servo motor likewise turns, causing the arm to pivot open.
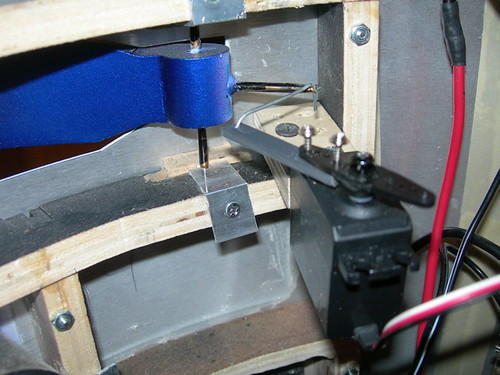
Hooray, both arms open under remote control now! I still need to paint the MDF and plywood platforms for the servo motors black, to conceal them. I also need to support the MDF platform for the top arm motor a little better, by wedging something between the servo motor and the horizontal rib from which it hangs.
In the evening, I decided to go ahead and plug the center ankle bolt hole. Like I did with the outer ankles, I will redrill the center ankle bolt hole a little closer to the tip of the ankle. This will provide a bit more clearance for the foot shell, and allow me to fix the center foot shell door holders that I had to gouge in order to slip the bolt through. I'll get to that some other time, though.
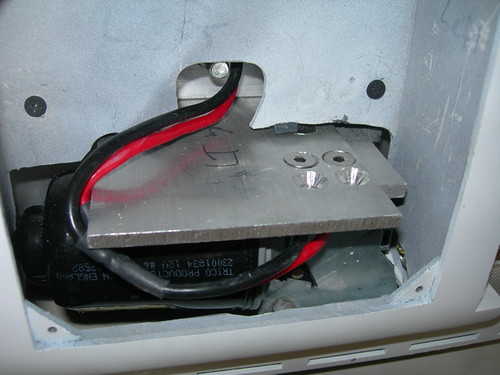
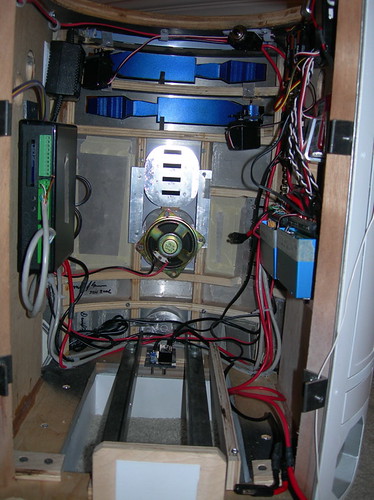
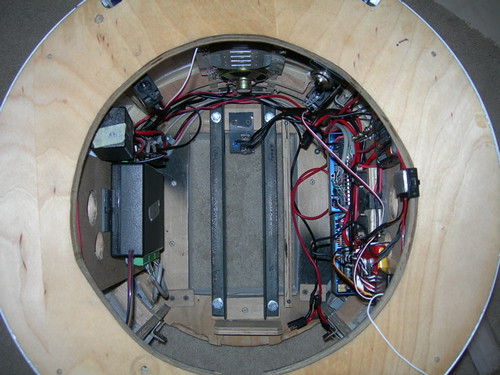
Finally, I finished cleaning up my wiring, at least to my satisfaction.
Tomorrow I hope to redrill the center ankle bolt hole, paint the utility arm servo holders black, and reattach my cylinder wedges and LDP that always seem to come off when I work on R2. Then I can start (and maybe finish) putting my droid back together.
I went to Mike's to drop off a very minor part for R2-KT, which I'll get to in a moment.
We usually use a piece of cutting board to keep the outer feet from pivoting, but for R2-KT, Mike chose to use some plywood.
With the plywood wedges in place, and the ankles and shoulders now securely bolted down, R2-KT is much more drivable than she was before. Mike also removed the ball casters entirely from the outer feet, and moved two of them to the center foot, since they are in better shape than the original ball casters in the center foot. The vinyl lettering on the back door is in dire need of repair, however.
The receiver battery had no on/off switch, it was required to be manually unplugged from the receiver. I donated a 3-wire cable to allow an on/off switch in the circuit. Now R2-KT's receiver battery won't drain unexpectedly.
R2-KT's dome was indeed found socializing with Mike's R2-D2 dome, just as I thought.
In the meantime, I just happened to bring my droid's carcass to Mike's house. While Mike was working on R2-KT, chatting on the phone and reading e-mail, I was busy getting started on making the utility arms work under remote control. Sure, I could have tried this at my house, but as usual I wanted to copy Mike's proven design. (I have no pride, I admit this readily.)
The essential ingredients are the servo motor (with hacked-up servo horn), a small MDF or plywood platform for the motor to sit on, a PVC stick, and a paper clip.
Both top and bottom arm motor assemblies are about ready to go. They just need to be mounted onto the horizontal ribs in the frame.
The idea when mounting the servo motor assembly is to get the servo arm and paper clip pointing in a straight line, parallel with the servo motor, when the arm is in the closed position. In this orientation, it's harder for kids (and adults) to pry open the utility arms from the outside.
It takes a little trial-and-error to get everything lined up, but with Mike's help, most adjustments were made by repositioning the servo horn on the motor, and bending the paper clip at the right point to match the hole at the end of the utility arm bar.
As the dial turns on the remote, the servo motor likewise turns, causing the arm to pivot open.
Hooray, both arms open under remote control now! I still need to paint the MDF and plywood platforms for the servo motors black, to conceal them. I also need to support the MDF platform for the top arm motor a little better, by wedging something between the servo motor and the horizontal rib from which it hangs.
In the evening, I decided to go ahead and plug the center ankle bolt hole. Like I did with the outer ankles, I will redrill the center ankle bolt hole a little closer to the tip of the ankle. This will provide a bit more clearance for the foot shell, and allow me to fix the center foot shell door holders that I had to gouge in order to slip the bolt through. I'll get to that some other time, though.
Finally, I finished cleaning up my wiring, at least to my satisfaction.
Tomorrow I hope to redrill the center ankle bolt hole, paint the utility arm servo holders black, and reattach my cylinder wedges and LDP that always seem to come off when I work on R2. Then I can start (and maybe finish) putting my droid back together.
Thursday, July 19, 2007
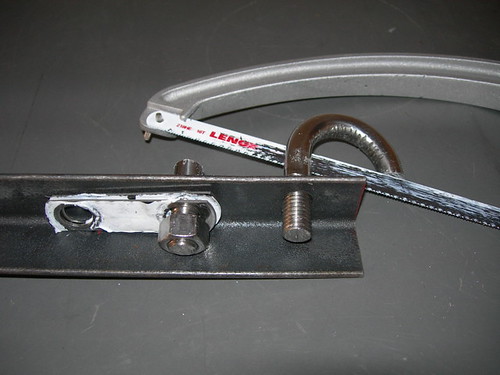
Finished Cutting Grooves in U-Bolt, Widened U-Bolt Holes on Angle Iron
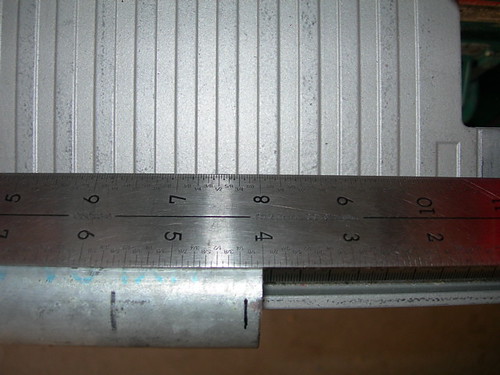
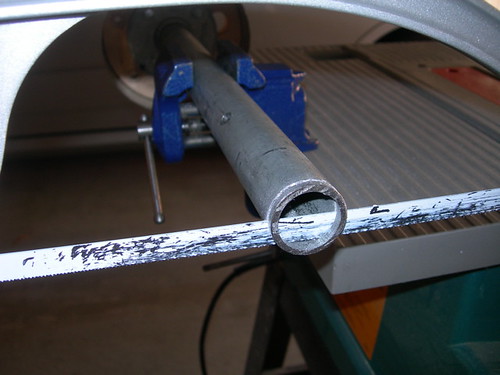
Tonight I hacked several more grooves into the new U-bolt, to provide traction around the gas pipe.
I also widened the bottom hole in the angle iron on the drill press.
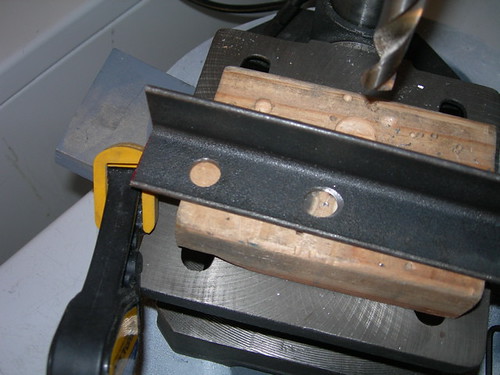
Now the U-bolt slides into the holes in the angle iron without excessive contact, preserving the threads.

I also widened the bottom hole in the angle iron on the drill press.
Now the U-bolt slides into the holes in the angle iron without excessive contact, preserving the threads.
Wednesday, July 18, 2007
Drilled New Holes for Ankle Bolts, Gas Pipe Bolts, Cut New U-Bolt
Today I drilled new 1/2" holes in the outer ankles. The center of the holes is 0.5" from the tip of the ankle (and centered much better front-to-back than before).
It was a bit tricky to set up the drill press and legs to be at the right height, but I eventually got it, and was able to drill good holes.
Reversing the process from the other day, I used a C-clamp and some scrap wood to press the bronze reducers back into the ankle bolt holes. These reduce the holes from 1/2" to 3/8", for the 3/8" ankle bolts that will connect the feet to the ankles.
Next, I bolted the shoulder brackets back onto the legs, and set up the drill press to drill new 5/16" holes in the gas pipe. This is necessary because yesterday I trimmed the gas pipe by 3/16". Now the pipes overlap a bit differently, and new holes are required for the two 5/16" bolts that lock them together.
I decided to drill the new holes just outside of the old ones. Alignment looks good, the bolts appear to fit just right. I won't know if it's a complete success until I reassemble the droid and try driving it, though.

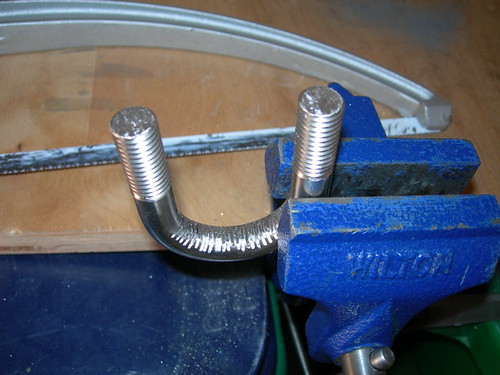
Finally, I'm embarrassed to say that the threads on my U-bolt for the gas pipe are pretty much trashed. So much so that I had to saw the old U-bolt off of the angle iron that it was attached to, since one of the nuts is completely stuck!
I think that the holes I drilled in the angle iron are ever so slightly too close together, so whenever I shoved the U-bolt through those holes, I was wearing down the threads. I will hack on the holes in the angle iron soon, to alleviate this problem. In the meantime, I luckily have a spare U-bolt I can use.
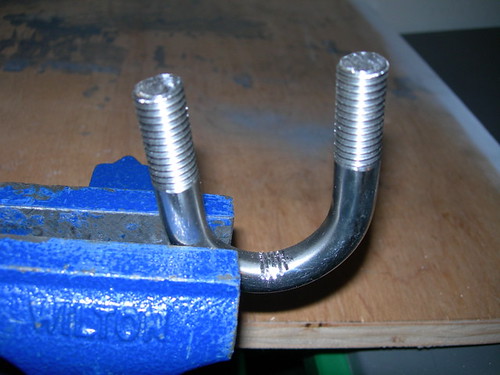
I hacked down the ends of the new U-bolt to allow a socket wrench to reach the nut once it is screwed down all the way.
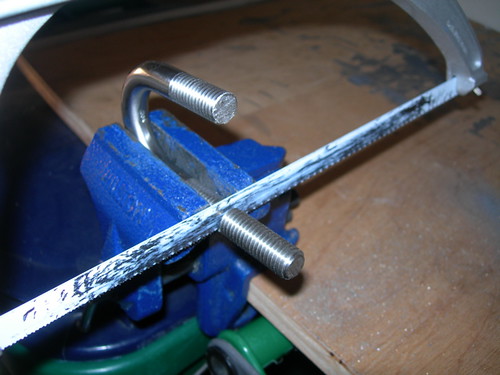
I also started hacking in the grooves that are used for traction against the gas pipe. I still have a lot more of these to cut, I only had time for a few of these before it started getting late.
It was a bit tricky to set up the drill press and legs to be at the right height, but I eventually got it, and was able to drill good holes.
Reversing the process from the other day, I used a C-clamp and some scrap wood to press the bronze reducers back into the ankle bolt holes. These reduce the holes from 1/2" to 3/8", for the 3/8" ankle bolts that will connect the feet to the ankles.
Next, I bolted the shoulder brackets back onto the legs, and set up the drill press to drill new 5/16" holes in the gas pipe. This is necessary because yesterday I trimmed the gas pipe by 3/16". Now the pipes overlap a bit differently, and new holes are required for the two 5/16" bolts that lock them together.
I decided to drill the new holes just outside of the old ones. Alignment looks good, the bolts appear to fit just right. I won't know if it's a complete success until I reassemble the droid and try driving it, though.
Finally, I'm embarrassed to say that the threads on my U-bolt for the gas pipe are pretty much trashed. So much so that I had to saw the old U-bolt off of the angle iron that it was attached to, since one of the nuts is completely stuck!
I think that the holes I drilled in the angle iron are ever so slightly too close together, so whenever I shoved the U-bolt through those holes, I was wearing down the threads. I will hack on the holes in the angle iron soon, to alleviate this problem. In the meantime, I luckily have a spare U-bolt I can use.
I hacked down the ends of the new U-bolt to allow a socket wrench to reach the nut once it is screwed down all the way.
I also started hacking in the grooves that are used for traction against the gas pipe. I still have a lot more of these to cut, I only had time for a few of these before it started getting late.
Tuesday, July 17, 2007
Cut Down Gas Pipe
I partially fixed one of my pet peeves today. The shoulders sit just a little too far from the body. In order to fix this, I must cut 3/16" off of the end of each gas pipe that connects the legs.
Boy, how I missed hacksawing steel.
Now the shoulders will each sit exactly 1/2" from the body, and this will look much better (to me, at least).
I did not reattach the legs yet, as I still need to drill the holes I plugged yesterday. I plan to do that tomorrow. I will also drill new holes through the gas pipe, since the old 5/16" holes no longer align.
Subscribe to:
Posts (Atom)
