Wednesday, April 30, 2014

Mystery Photoshoot

Today R2 and I motored up to Hollywood, to Kelsey Edwards Photography Studios for a photo/video shoot.


R2 is short, so sometimes the camera has to get down low. Way low. Like so low, you can't even see the camera on its tripod, in front of the first rung of the ladder.


It almost looks as if R2 is getting ready to have tea with someone. How odd.


If all goes according to schedule, I'll have more to share next week.

Monday, April 28, 2014

Started Drilling Shoulder Disc Holes for new Discs on Droid #2

Tonight I drilled the outer holes on the new shoulder discs for droid #2. These 5/16" diameter holes are used to bolt the discs to the legs. As I mentioned yesterday, the original discs have six superfluous holes (otherwise known as mistakes) that I won't be duplicating.

This was the easy part. I used a nail that fits through holes drilled in the centers of the discs to align the original discs with the new ones, and drilled the first hole.


For each hole I drilled, I inserted a bolt to keep everything aligned.


I used a bit similar to a spade bit (but better) to drill the large hole for the motor wires to pass through, on their way from the body, down the leg to the feet.


I repeated the process for the second set of discs.


Next up, I need to figure out exactly where to drill the four inner holes that will secure the gas pipe flange. These will be offset a few degrees from the holes in the original disc. I plan to rotate the disc on the nail to the proper location and drill the holes, and then perfectly match the offset on the opposite disc. This will require careful planning and execution, so I'm going to take my time to try to get it right.

Sunday, April 27, 2014

Cut New Shoulder Discs at Kelvin's

I've been thinking about how to fix the problem of droid #2 leaning too far back. I believe the problem is due to my filing the flat spot on the gas pipe a couple of degrees too high.

Filing a new flat spot isn't a good option, and I don't want to start over with a new gas pipe/flange assembly, especially since the pipes are JB Welded and pinned to their flanges.

Another option is to cut and drill new shoulder discs, with the outer holes used to bolt the discs to the legs staying put, and slightly rotating where the inner holes are drilled to attach the flanges to the discs.

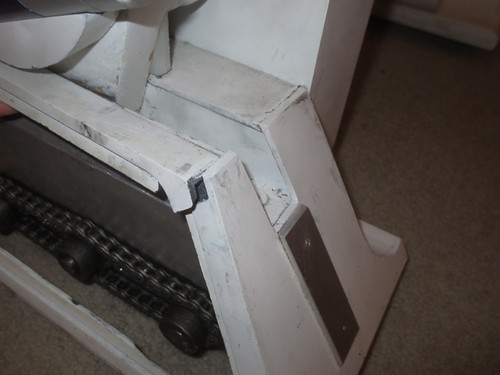
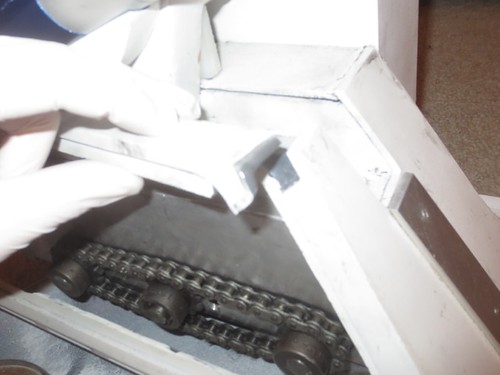
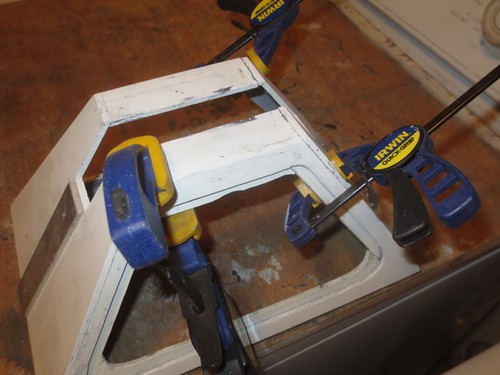
Of course, this means exploding droid #2 to get the shoulder discs off the legs. Kaboom.


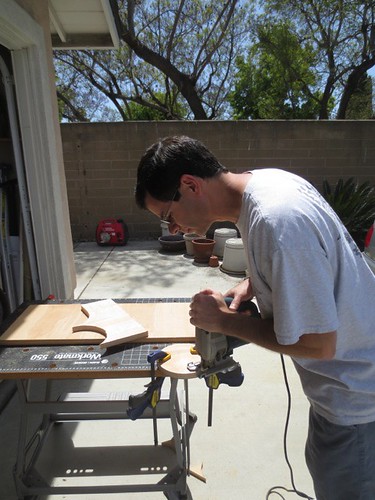
I needed to pay a visit to my friend Kelvin's house, so we could use his jigsaw and router to recut the shoulder discs.

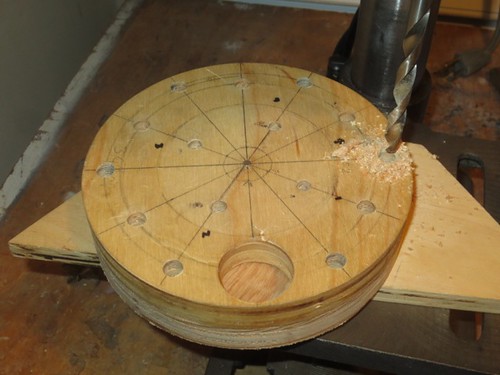
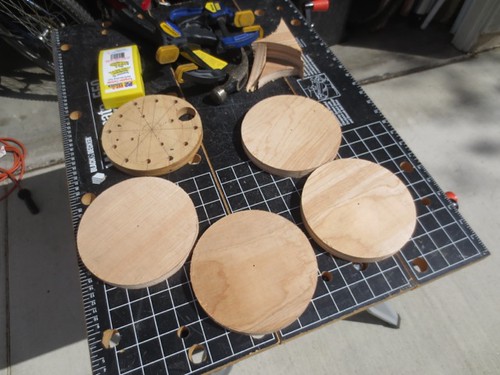
There are four holes closest to the center, to attach the flange for the gas pipe. There are supposed to be six holes toward the outside of the disc, for bolting the disc onto the leg. On this disc, there are six extra holes that I somewhat mis-drilled and don't use. ("Those are speed holes. They make the droid go faster.") I won't be drilling the additional six holes on the new discs. Finally, there is a large hole for the motor wires to pass through.


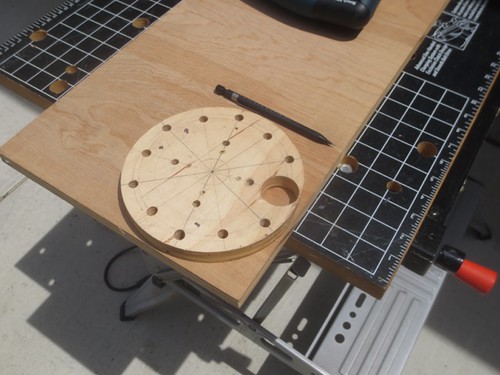
I only need two new discs, but am cutting four in case I mess up.


I used a jigsaw to rough cut the circles, leaving a little material just outside the perimeter line for routing to size.


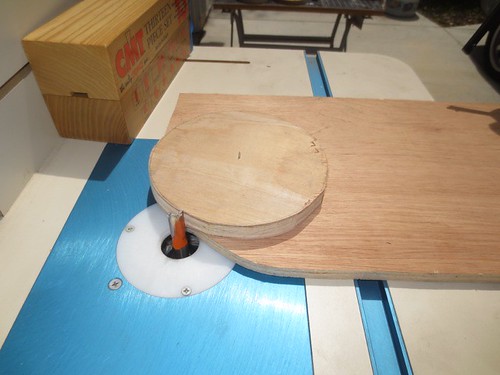
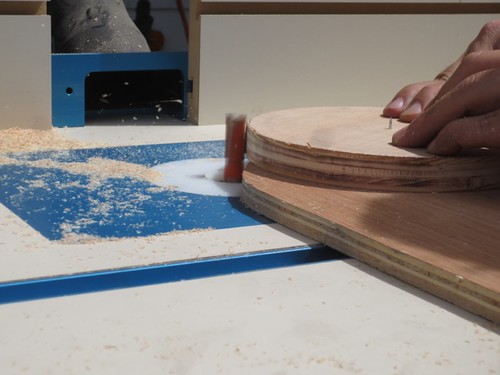
A router is used to trim the disc to the perfect diameter, using a technique Mike Senna taught me years ago. The disc spins on a nail, and as the disc is spun around, the router trims the edge flush all the way around.


The four new discs, along with their progenitor.


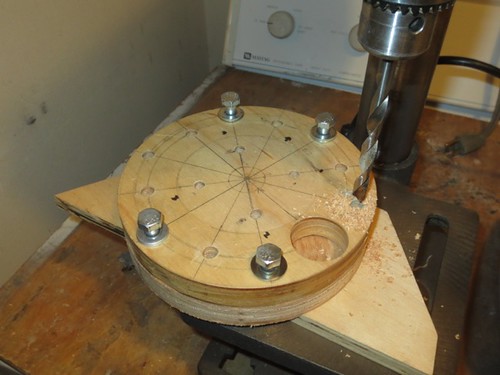
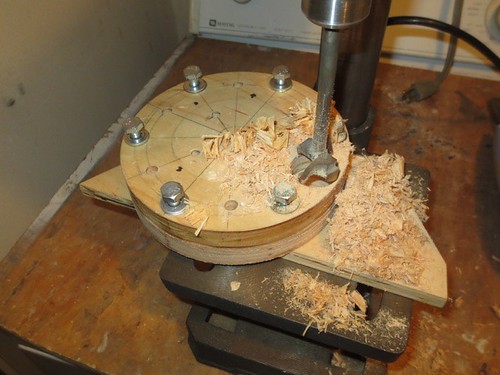
Next I need to use the original discs as drilling templates for the outer holes, and then I'll need to carefully determine how much to rotate the original discs in order to have the flat spot on the gas pipe better line up with the 36-degree tilt that R2 should have.

Saturday, April 26, 2014

Make-A-Wish Walk for Wishes 2014

Today was Make-A-Wish's Walk for Wishes event at the Great Park, in Irvine CA. The park's centerpiece is a large orange helium balloon that takes visitors for rides, although during the event it was too windy for the balloon to go up.

R2 arrived incognito around 7:30am.


At 8:00am the event started, and the characters mingled with the crowd. Some pics.


Someday you'll get to ride up in the balloon R2. (Or not.)


Wednesday, April 23, 2014

More Work on Droid #2

My replacement U-bolt arrived today, so I attempted to get droid #2 back in working order.


First, I wanted to see the damage to the threads on the old U-bolt, so I hacked the nut in half so I could remove it.


Those would be the stripped threads.


I needed to cut down the legs on the new U-bolt in order for the socket wrench to reach the the span of the legs as I tighten the nuts.


I also cut notches into the inside curve of the U-bolt to help grip the gas pipe around which it fits.


The old, mangled U-bolt on top, and the new replacement on the bottom.


I removed the gas pipe from the right leg in order to more easily continue filing the flat spot on it where the vertical rail gets bolted down.


After I'd finished filing, I did a loose fit of the related parts.


I then bolted the gas pipe and flange back onto the wooden disc on the leg.


And finally, I tightened down the vertical rail with the new U-bolt.


And after all that… he's still leaning too far back.


Also, something's wrong with the right foot motor. Possibly a piece of keystock got loose, I'm not sure.

At this point I definitely need to step away from this and take a breather, lest I fix it with a baseball bat. I'll get back to it in a while, but I have other stuff coming up with droid #1 that will keep me busy.

Tuesday, April 22, 2014

Semi-Repaired Bent Skins on Droid #1, Dismantled Droid #2 for Stuck U-Bolt

Tonight I continued working on post-Wondercon repairs for both droids.

Droid #1 has a recurring injury, like a scab that won't heal. Part of the outer skins near the front pocket vent got bent.


Ideally, I'd just remove the screw where the bend occurred and bent it back. Unfortunately, the nut that backs this screw is pretty much impossible to reach on the assembled droid, so that's not really a viable option. I also considered removing the pocket vent or the side kick plate, but I didn't want to inflict more injury to the droid.

Instead, I used a block of wood, a mallet and some paper towels as a dampener to try to tap out the bend as much as possible.


Well, it's not 100% better, but it's definitely a lot better.


With droid #2, I needed to remove the stuck U-bolt. One of the two nuts securing the U-bolt to the vertical rail in the droid had its threads stripped, so the only way to get it off the gas pipe was to remove the legs and slide it off.


I've ordered a replacement U-bolt, although I'm somewhat concerned that the same problem may occur if I'm not careful. I will work on getting a better flat spot filed on the gas pipe for the vertical rail to rest upon, and then get everything bolted back together.

Monday, April 21, 2014

Minor Foot Shell Repairs for Droid #1

I had a couple minor Wondercon casualties that needed fixing on the foot shells for droid #1.

The outer left foot shell was hit pretty good by a motorized wheelchair.


And the center foot shell got damaged… somehow. I didn't see it happen, but the front face is just slightly separating from the rest.


Fortunately, the outer foot shell didn't require removal. I was able to apply the PVC glue in-situ.


The center foot shell did need to come off, so it also got glued and clamped.


Should be as good as old by tomorrow. Droid #2 awaits much more attention.