Monday, June 29, 2009

Routed Slots for Booster Cover Holders

Okay, one more cut for the booster cover bodies.

I set up the router to route the underside slots for the little MDF rectangles I will cut, slot, and glue to act as holders for mounting the booster covers.


All done.


Here is a look at how this will work from droid #1.


Soon I'll cut the small MDF rectangles and slot them, and later glue them on.

Sunday, June 28, 2009

Finished Cutting Booster Covers

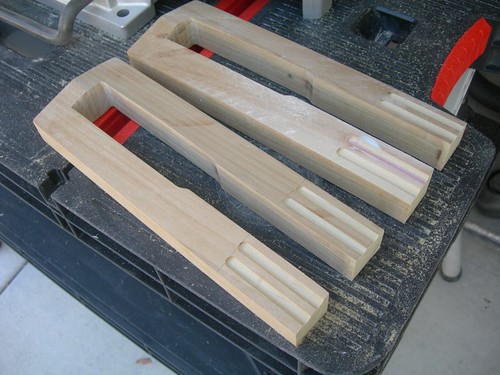
Today I was able to put in just a little more time on the booster covers, which, fortunately, was all I needed.

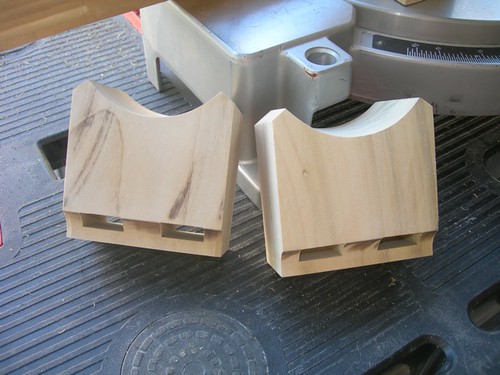
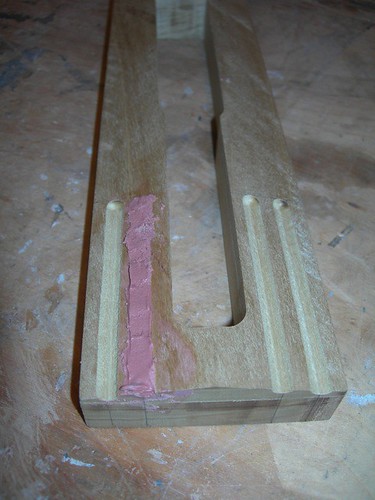
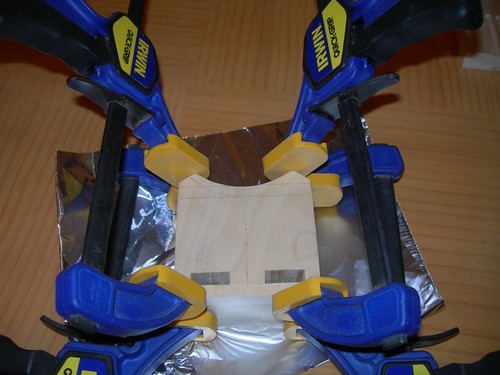
I started off by lightly applying some Evercoat here and there on the booster cover top pieces where the seams were, and I spot-filled a small area where I had applied Bondo last night on the messed up groove on one of the booster cover body pieces.


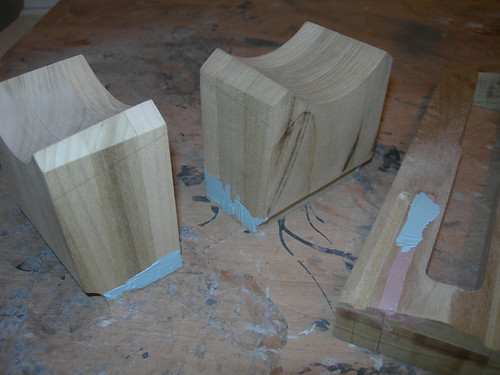
Followed, of course, by sanding.


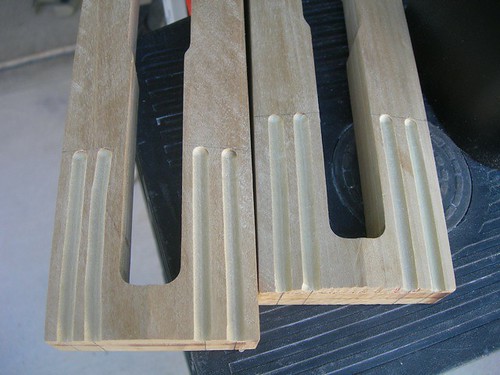
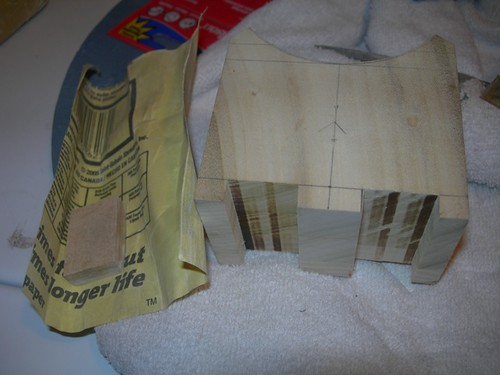
With the groove filled in on the booster cover body, it was time to reroute it, correctly.


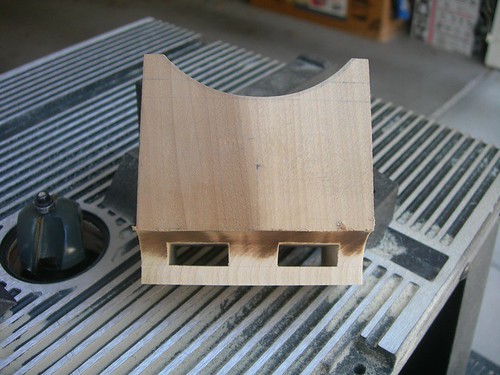
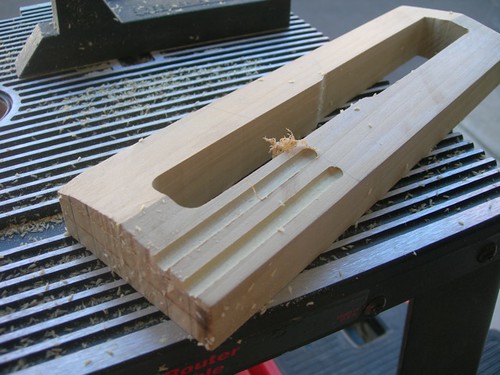
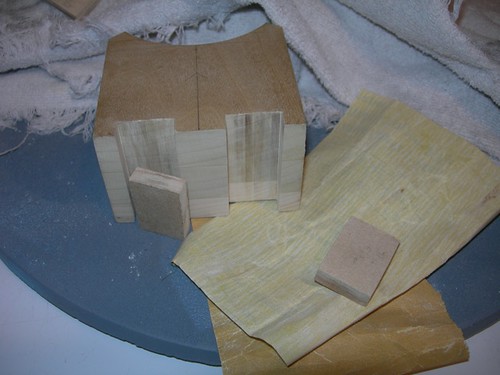
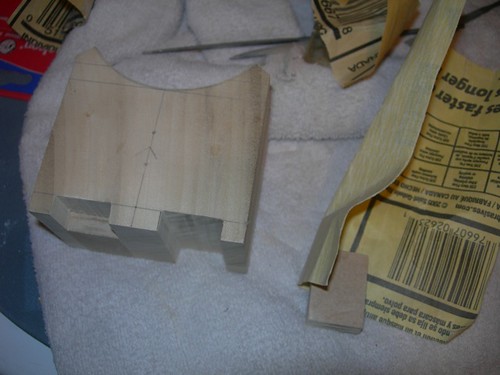
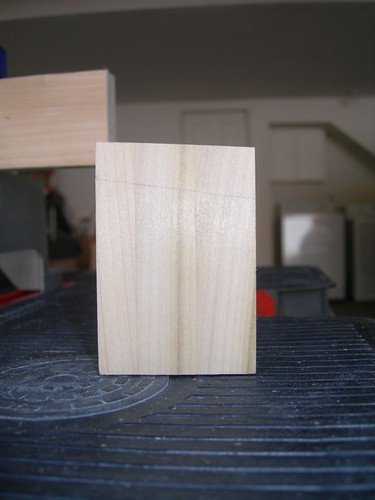
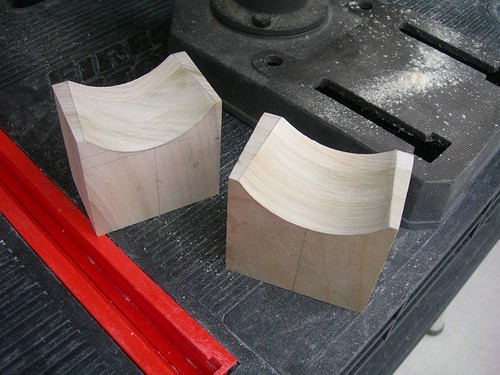
Finally, it is time to trim the bottoms off the booster cover body pieces. Yea!


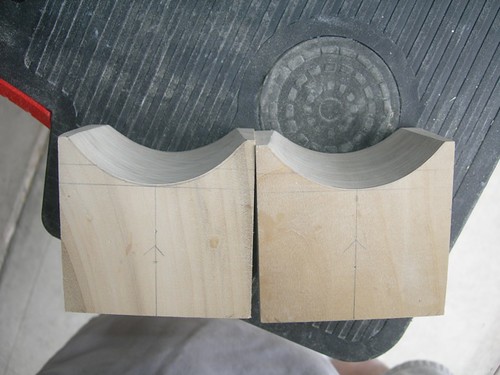
A few seconds with the file straightens out the inner edges.


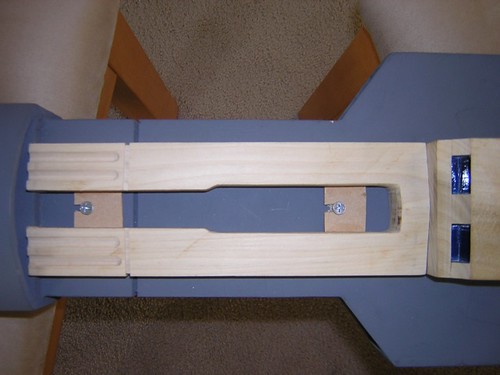
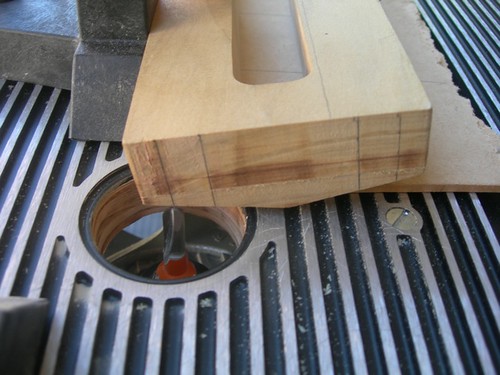
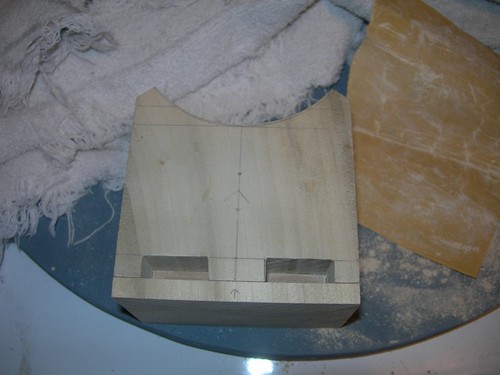
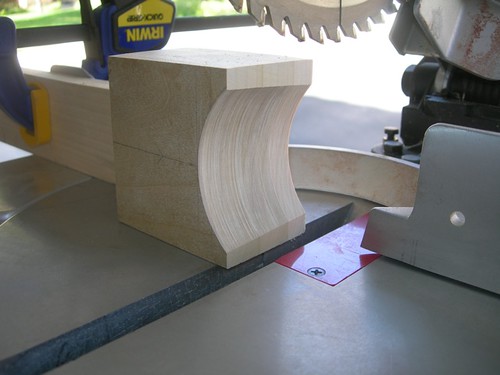
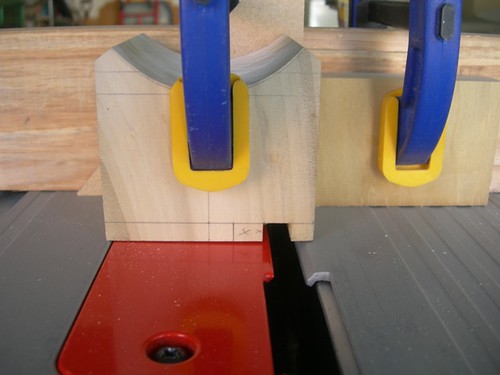
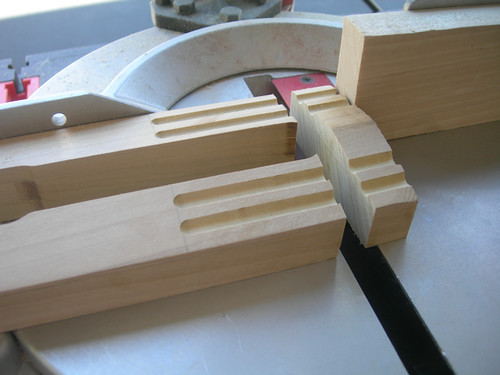
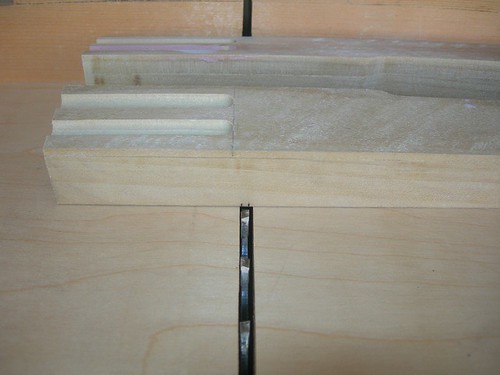
The last cuts are the grooves on the booster cover edges and front faces, that match those on the legs. I placed the booster cover on the leg and marked where the groove was on the leg.


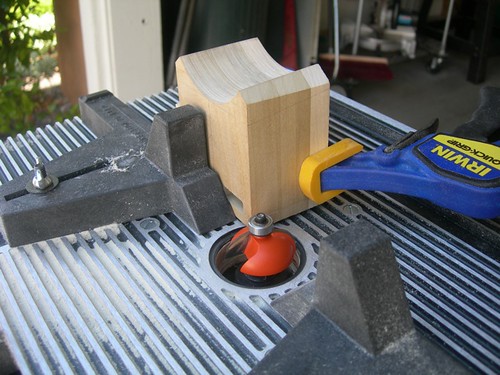
I lined up my mark with the saw blade, for a 0.060"-deep cut, as per the blueprints. Note that I am not cutting underneath the bottom of the piece here, I am merely aligning the mark with the blade, so I can set the stop that determines where the cut will go once I turn the piece over.


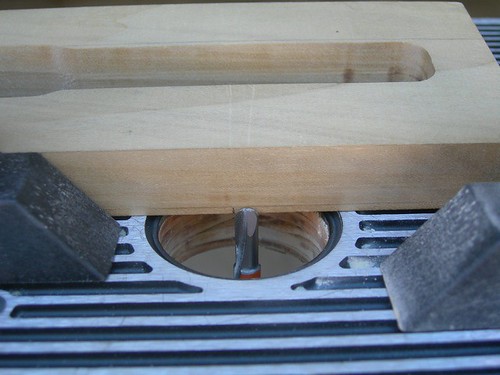
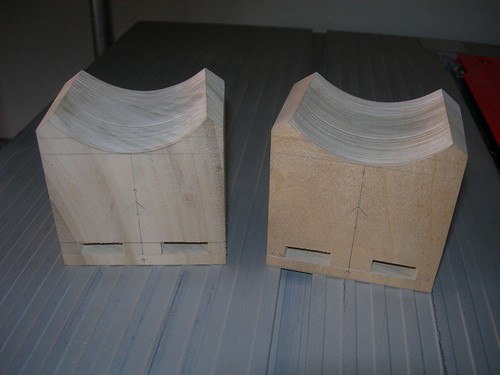
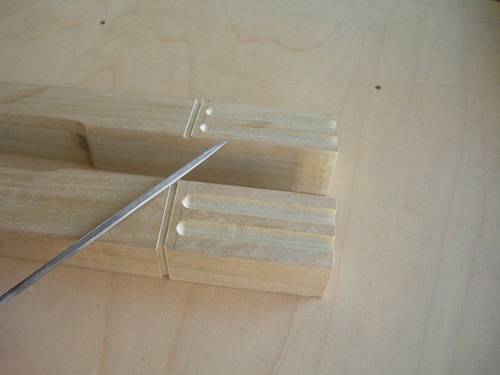
Perfect! I used a small square file to straighten out the kerf that the blade left. It's like a small, inverted 'v', so I flattened that out.


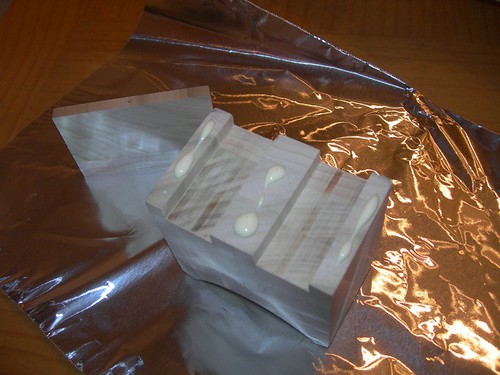
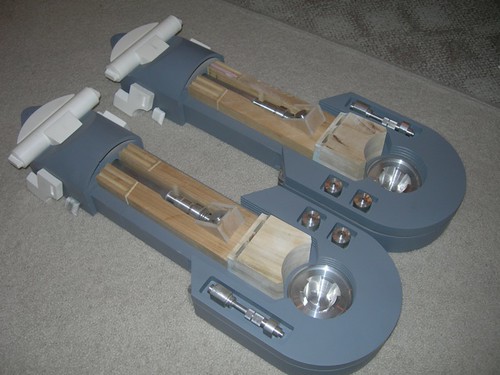
I was overdue for a "big picture" look, so I grabbed my aluminum and resin pieces and set them all up. About all that's missing is the ankle bracelet, and I just so happen to have rough-cut a couple of those back when I was working on droid #1, so I'm ahead of the game on those.


Not sure what I'm going to work on next.

Saturday, June 27, 2009

Finished Booster Cover Tops, Grooves for Booster Cover Bodies

Today I put some time in to drive the booster covers to completion.

I started by trying out my new 5/8" radius cove bit. I wisely decided to test it on the spare booster cover head pieces that I gave up on earlier.


Uh oh! The curve is not supposed to go any higher than the top of the slots! I'm not sure exactly what went wrong, but I immediately switched back to the 1/2" radius bit that I used for droid #1.

I clamped a small piece of MDF on the side that goes through the router last, so that there wouldn't be any tear-out.


That's more like it.


While I had the router out, I decided to route the grooves in the booster cover bodies. I marked the end-point for the top of slots, and set my stop so that the slot length matched the blueprints.


I temporarily placed a 1/8" piece of MDF under the work, to align the center of the router bit with the center of the marks where the grooves go.


I got busy routing the grooves. I did the outer groove followed by the inner groove on the right side of each piece.


Wouldn't you know it! The very last groove I routed got messed up. The groove that's second to the left on the left piece is goofed up. I'll get to the repair strategy in a moment.


Done with the router for the moment, it was time to finish the booster cover top pieces by shaving three degrees from the front face.


I must say, I am very happy with how these pieces turned out. If someone told me a few years ago I could do this, I wouldn't have believed them.


Time to fill the mistake. I used Bondo this time instead of Evercoat, because Bondo seems a bit tougher to me, and I'll be running this through the router again tomorrow.


After the Bondo had dried for several hours, I sanded it smooth. I may use Evercoat to do some minor spot-filling before rerouting.

Wednesday, June 24, 2009

Sanded Slot Fillers, Glued Bottom Pieces Back on Booster Cover Tops

Having sanded the slots on the booster cover top pieces last night, tonight I sanded the small MDF filler pieces that will partially fill the slots.


The filler pieces are made from 1/4" MDF and 1/8" MDF glued on top of each other. The slots are supposed to be about 5/16" tall, so about 1/16" needs to be removed from the stack.

Still barely peeking over the top...


Now we have a nice fit.


After repeating for the pair of slot fillers on the other booster cover top piece, it's time to glue up.


After ensuring that the bottom part is perfectly aligned, I clamped it down and I'll let it dry overnight.

Tuesday, June 23, 2009

Sanded Booster Cover Slots

Tonight I spent some time sanding smooth the dado cuts that I made for the slots on the booster covers on Sunday.

The before picture.


There is very slight unevenness, probably only a few hundredths of an inch. I used some 220 and 400 grit sand paper wrapped around one of my slot filler pieces to sand the slots nice and even.

The after picture.


The slot fillers fit better now, and the slots are more square than they were.

The slot area of the front face is going to get routed with a 5/16" cove bit that I ordered today from MLCS, and three degrees will be taken off the front face as a whole, so the current look will change soon.

Sunday, June 21, 2009

Booster Cover Corners and Dado Cuts

Trying to keep the momentum going on the booster cover tops (and not mess up).

Time to trim three degrees off the top of the pieces.


I choppa' you good!


Three degrees, per the blueprints. Later, another three degrees will be taken off the front face.


Next up, chopping 37 degrees off each corner.


So far, so good.


Repeat three more times, and done with that step. Looking good!


To wrap it up, I marked the areas for the slots. I really only need to mark one slot, since once I set my cutting guides, I can reuse them for each subsequent slot.


For the first time, I managed to set up the dado blades without my friend Kelvin's help. I've seen it done enough times that I should be able to do it myself by now, and evidently I can.

One pass only cuts a slightly more than half the width of the slot.


An adjustment to the guide on the right, followed by another pass for each slot, finishes the job. There is a little unevenness, but I think I can lightly file it smooth.


Done with the afternoon's work. Still to do: Filling the slots, gluing the bottom pieces on, routing the groove near the slots, and shaving three degrees from the front face.

Saturday, June 20, 2009

Perfect Curves

Today I made my attempt to get the curves right on the booster cover top pieces.

As usual, I started by using the drum sander on the drill press to sand out the shallowest arc first.


The drum sander can only sand about half of the distance that is required.


Periodically I would turn the piece over to sand both sides. Almost done sanding down to the shallow arc.


Once the first arc had been sanded out, I tilted my drill press table to the 8.78 degrees that I calculated the other day, and started sanding toward the larger arc on the front side.


The lines on the top of the piece are my guide for how wide the arc should be.


In order to sand the back half of the piece, the booster cover top must be flipped upside down and placed on the opposite side of the drill press table.


Done with the first one!


And done with the second.


I'm very happy with how the curves turned out. Nice and smooth, and pretty much along the lines that I drew. Now I have to make sure I don't ruin these pieces during one of the many other cuts that are coming up.