Sunday, November 29, 2009

Attached Winch Harness to Manual Droid Lift

Today I worked on the harness that holds the U-bolt that the winch will hook onto, to lift the droid in the car. This harness goes into the droid itself.

I started by cutting a segment of square steel tube that spans the width of the manual droid lift that I built in 2007.


Next, I measured, marked and drilled holes for a pair of 3/8" bolts that will attach the tube to the bars.


So far so good. The tube is secured to the bars.


Next, I marked where to drill the holes for the U-bolt, and drilled the holes.


Everything seems to fit.


Then, having done all that, I rotated the tube 90 degrees did it all over again!

I didn't like how little material is available on the underside of the U-bolt, so I bought a larger U-bolt with a larger diameter, necessitating the redrilling. No big deal. I will probably cut down the longer U-bolt later.

Saturday, November 28, 2009

Wired Up Car for Droid Lift at Mike's

Today I went over to Mike's for help on wiring up the Element to support the droid lift. Or, to be more accurate, today I went over to Mike's to watch him wire up my car.

Before the wire-up got started, we dropped his second droid into the car and used his droid lift to get some measurements and an idea on how certain parts of the lift should be cut.


With the measurements out of the way, it was time to tear up the sides and floorboards on the car.


Wire was run from the front of the car to the back for power. There is already a socket at the back of the car, but it's only rated for 10 amps. We want to support up to 30 amps.


Next, Mike soldered up the connectors. We're using an extra large monophonic plug for the back of the car.


The socket is now locked down at the back of the car. I will clearly label this plug as a power source. Plugging headphones or a speaker in there would not be good.


I plan to wire up the winch side of the connector shortly.

Friday, November 27, 2009

Started Gathering Droid Lift Parts

The time has come to start building a droid lift. Actually, the time came quite a while ago, but I'm a little slow sometimes.

Like everything else I do that's R2-related, I'm borrowing from Mike Senna's ideas. Here's what Mike's droid lift looks like, as seen at R2LA III.


Mike's droid lift fits his Toyota Sienna just right. However, my Honda Element has a tailgate that needs to be cleared, requiring a modification to Mike's droid lift design. After considering several alternatives, I've decided on a design that will allow part of the lift to extend onto the tailgate for loading and unloading, and then retract back into the car when in transit.

Most of the parts can be purchased at Home Depot and Lowe's, although a few structural connectors, such as 45-degree elbows and T-connectors, are on order from McMaster-Carr. The winch is from Harbor Freight.


I tried connecting the base together for a loose-fit to see how it would sit inside of the car.


The 3' pipes that run left/right provide the perfect spacing. The front/back pipes are two segments of a 10' pipe cut in half. This will all be anchored down to the anchors in the floor, once I have the base rectangle finished up.

I pulled the assembly out onto the tailgate for a look.


The fit on the tailgate seems good too. The only minor concern I have is that the tailgate tilts a degree or two upward, causing the front/back pipes to elevate a little bit above the floor. I don't think this will be a problem, but I'm keeping an eye on it.

Without the rest of the parts in place it may be hard to understand how it will all go together, but it should start making sense once I receive the parts on order. I also need to pick up a 1"-diameter solid steel rod from Industrial Metal Supply, that acts as the mast.

Monday, November 23, 2009

Installed Rear Power Coupler Frame

Well, I couldn't leave the back door 90% done, so tonight I installed the rear power coupler frame piece.

Unlike the back door panels, I'm using silicone to secure the frame piece. This is to allow for easier removal should I need to repaint the blue corners in the future. While I might want to repaint the white panels too one day, I used JB Weld for the panels rather than silicone because JB Weld won't harm potential autographs in the future, whereas silicone wreaks havoc with them over time. The odds are pretty slim that the back door of droid #2 will ever be autographed, but better safe than sorry.

I scraped the area with a razor blade where the frame for the rear power coupler will rest against the inside of the back door. I also scraped the front top and bottom curved area of the frame piece. This removes oxidation and roughs-up the surfaces so the silicone will get a better grab on the aluminum.


I then cleaned the pieces with acetone. Next, I ran a thin bead of silicone on the curved parts of the frame piece.


I then carefully set the frame in place on the inside of the back door, and ran silicone all around it.


I ensured that the piece looks as centered as possible from the front side.


Hopefully this will cure in 24 hours, but we shall see. I have a history of mixed results with silicone.

Sunday, November 22, 2009

JB Welded Right Rear Coin Return

Today I JB Welded the right coin return into place on the back door.

Pretty much a replay of yesterday.

Saturday, November 21, 2009

JB Welded Left Rear Coin Return

Today I JB Welded the left coin return onto the back door. I scratch-built these coin returns quite a while ago, using scrap pieces from the skins.

I sanded the back side of the coin returns, and then cleaned them up with acetone.


Without much room to sand, I scraped the landing area of the inner skin with a razor blade, and afterward carefully cleaned it up.


I applied JB Weld to the back of the part, where it meets the inner skin. As with the back door panels I recently put in place, I used a toothpick to apply the JB Weld.


I clipped the part in place so that it is properly centered on the front side of the skin, and I'll let it set for 24 hours.

Wednesday, November 18, 2009

Finished JB Welding Back Door Panels

Tonight I finished JB Welding the last of the back door panels in place.

Having already used the clips as much as possible, it's up to the blue painters tape to hold down the center panel. It seems nice and snug.


I applied JB Weld along the back seam, and I'll let this dry for 24 hours.


I have a set of scratch built coin returns that I can use on the back door for this droid, but I haven't decided yet if I'm going to use them or not. They need a little prep work if so.

Tuesday, November 17, 2009

Another Back Door Panel JB Welded In Place

More of the same, only this time it's the right-center panel that's getting JB Welded into place.

I'm getting pretty good at painting with a toothpick.


The clips are locked down (hopefully not permanently), and this will dry overnight.


One more panel to go. And eventually, the coin returns.

Monday, November 16, 2009

Continued JB Welding Back Door Panels

Post #1000. Yea!

Tonight I continued JB Welding the back door panels in place. Only one panel, actually. I'm taking it a bit slower this time around, and by doing one panel at a time I'll have easier access to the panels as I clip them down.

I clipped and taped the left-center panel in place.


Like yesterday, I applied the JB Weld along the seam, temporarily moving the clips out of the way as needed.


I periodically loosened the clips to help prevent them from bonding to the back of the door. This worked for last night's session, so hopefully it'll do the trick again.


I'll let this sit for 24 hours, and then I'll move on to the next panel.

Sunday, November 15, 2009

Started JB Welding Back Door Panels

Tonight I started JB Welding some of the panels that go on the back door.

After sanding and cleaning the surfaces to be bonded, I used my clips to lock down the large panel at the top of the door.


I applied the JB Weld with a toothpick. I temporarily moved the clips out of the way as needed.


Throughout the evening,I occasionally released the clips momentarily, to help keep them from bonding to the back of the door. On droid #1, one or two of the clips had to be pried off, and that may happen again this time around.


Moving to the smaller panels, I used blue painters tape to hold these in place.


Again, I applied JB Weld on the back side.


The clips can't reach most of the area on the small panels, but I did use a few to help keep them in place. Hopefully by tomorrow everything will be in good shape.

Thursday, November 12, 2009

Las Vegas Meet-Up with Dave Everett & Friends

Time for another road trip, this time to Las Vegas, Nevada to meet up with R2 Builders Club founder Dave Everett, and some members from the Las Vegas area.

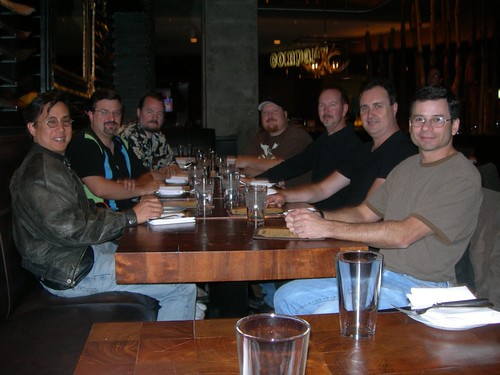
Mike Senna and I joined Las Vegas-area residents Mike Johnson, Efrain Lona (not pictured), Damien Metz and Dan Johnson, along with Central California builder Michael McMaster, to meet Dave Everett. Dave was attending a convention in Las Vegas, so it was a rare opportunity to meet the club's "lord and master" (his preferred title). :-)


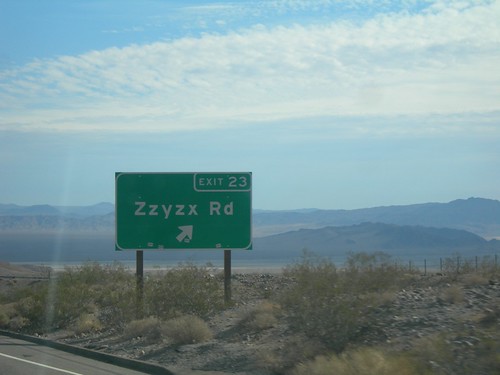
Mike and I made the four-hour drive out from Southern California, while Michael McMaster started out from Central California. When you're in the middle of nowhere, road and town names get a little strange.


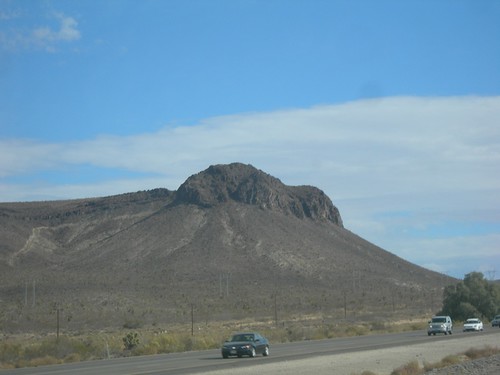
I call this "Dewback Mountain." You should drink Mountain Dew when viewing it.


We finally arrived at the Luxor, where we met up in the registration area, and then proceeded to talk about all things R2 and beyond, over a 3+ hour lunch.


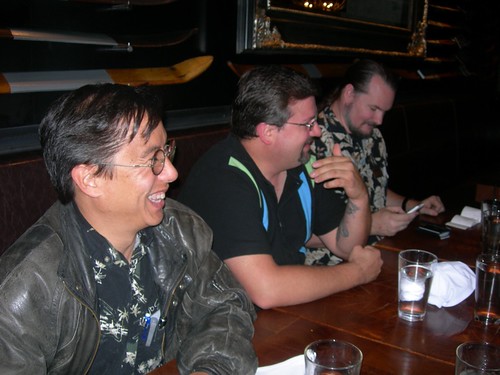
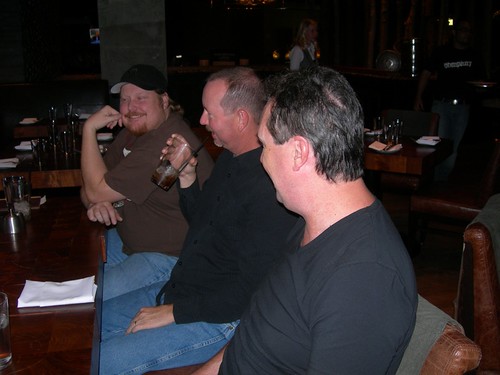
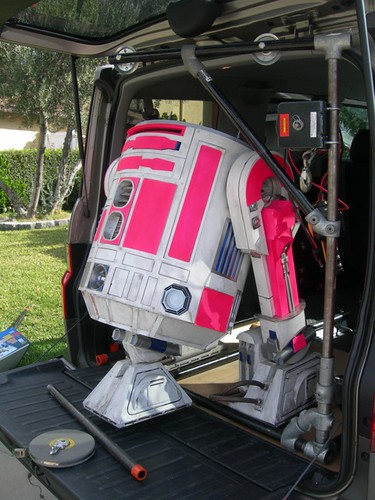
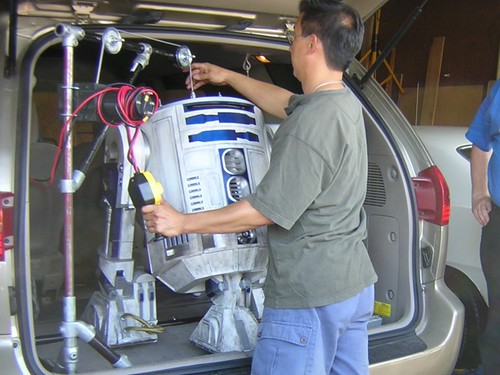
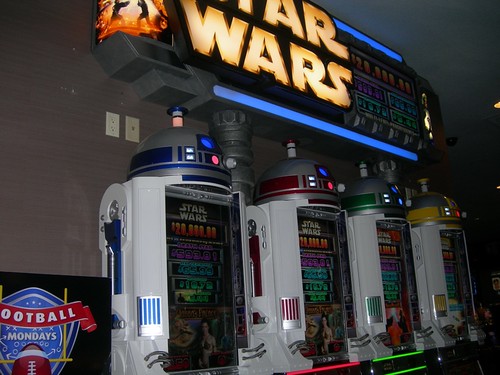
R2 is never very far.


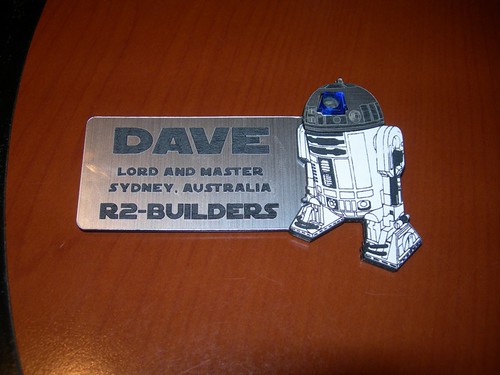
We had some time to kill between lunch and dinner, so we split up for a bit. By the time we got back together, Damien had pulled together an official R2 Builders badge for Dave, in record time.


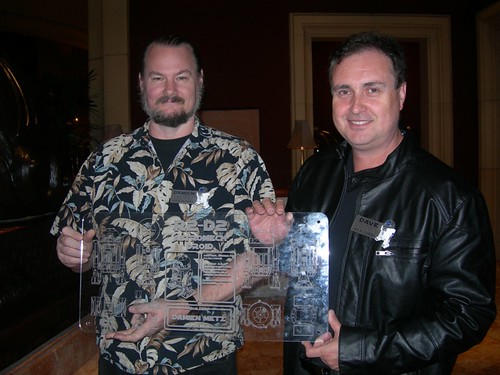
Damien also shared some cool laser work featuring R2.


Mike Senna presented Dave with a special autographed picture of George Lucas, posing with Mike and Mike's droid.


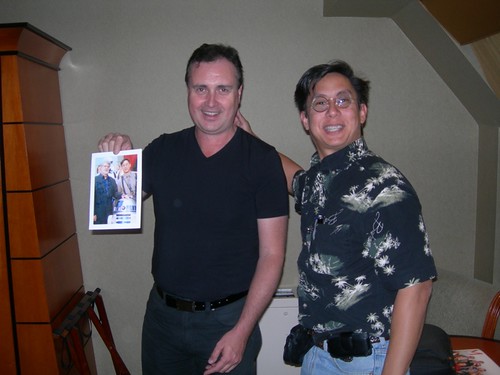
The autograph says, "Dave E. All the best!" It is signed, "Michael J. Senna" I'm sure Dave will treasure it, and treat it with the reverence it deserves.


We wrapped it up with a guided tour of one of the casinos' surveillance rooms. I can't go into too much detail, but suffice it to say that a) we were amazed, and b) don't think you can get away with anything in any public area of a Las Vegas casino. We were even able to watch the recording of our group walking into the casino just minutes before, making our way all the way up to the surveillance room in which we were now standing. It was fascinating stuff.

It was a privilege to get to meet Dave. Without him, there is no doubt I would have continued to lead a more ordinary life, and not have been introduced into the crazy hobby that is R2 building. It was also great to meet up with our Las Vegas-based members, both those I met before and those I met for the first time. Oh, and Michael McMaster! Always good to see him too. It was a great trip.

The full photoset is here.