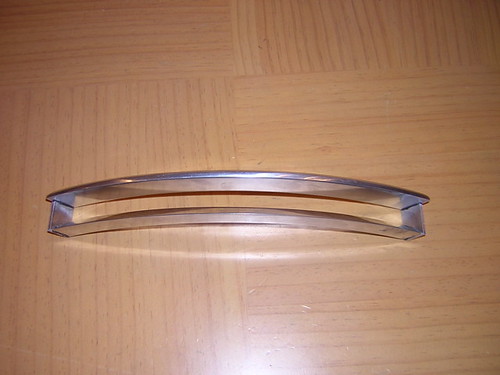
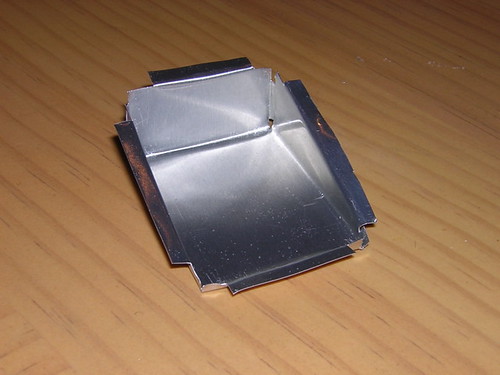
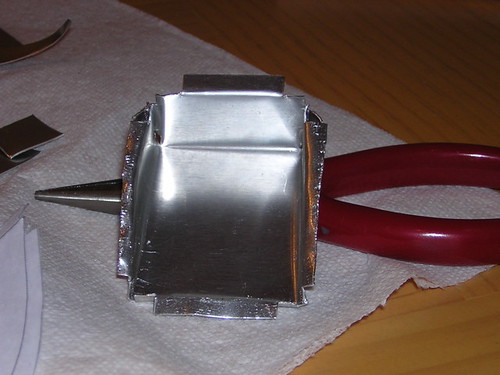
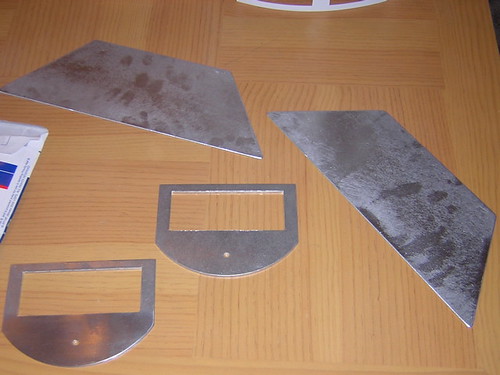
Tuesday, January 31, 2006
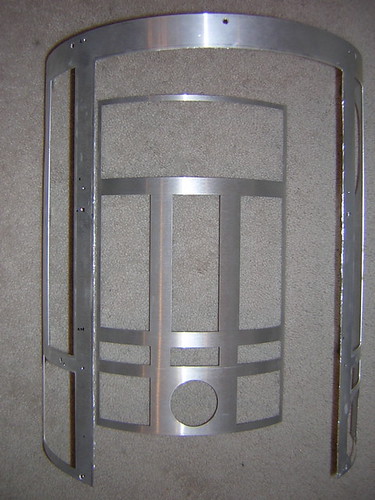
Assembled Large Data Port
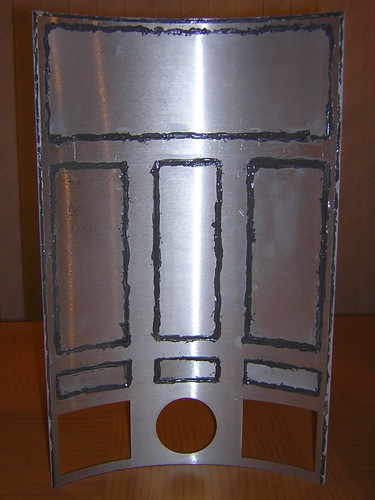
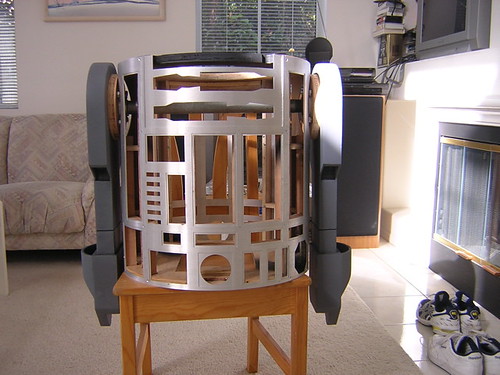
Some days I aim low, and manage to hit my target. Today was one of those days, I used JB Kwik to fasten the four parts of the aluminum large data port.
Sunday, January 29, 2006
Drilled Gas Pipe & Rail, Fitted Bushings
I drilled the gas pipe to fit two bolts into it to tie the legs together.
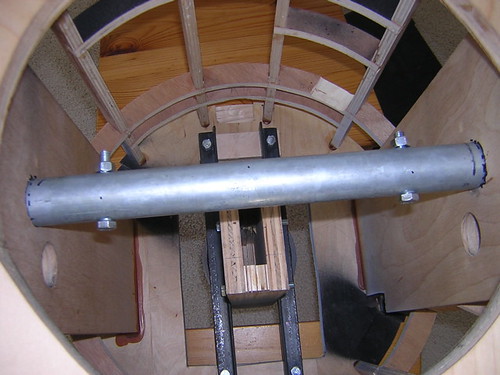
Later I drilled the vertical rail to accommodate the U-bolt that will pass through it. I also fitted the bushings inside each of the ankles (outer and center). Lastly, I attached the casters to the center foot.
I almost got R2 on 3 feet today, but the casters on the center foot were placed too close to each other, and the center foot construction may be too tall with the 3" caster wheels (plus stand) attached. I may need to remake the center foot, or modify it somehow.
Saturday, January 28, 2006
Temp Feet (The Sequel), Drilled Vert. Rail, etc.
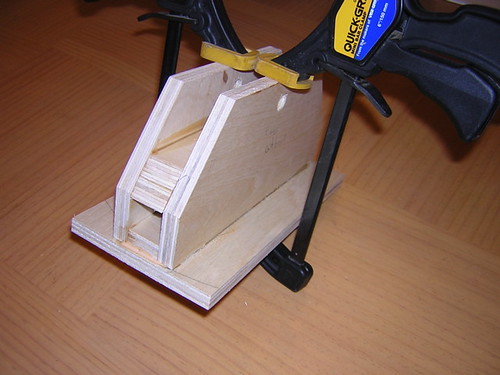
I remade my temporary feet, this time apparently correctly. It's amazing what minimal planning can accomplish. First I cut the feet to size, and then drilled various holes. The wheels I'm using require a 3/4" diameter axle. The hole at the top of the foot to secure it to the ankle is 3/8".
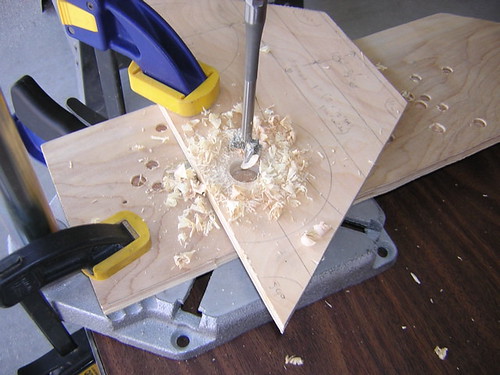
After cutting everything to size, I glued it all together. The wheels are just there to help support the other side of the foot that's about to get glued on top. The large bolts will be removable, along with the wheels. The two sides of the feet are 1.5" apart, which is just slightly wider than the wheels.

The middle temporary foot requires somewhat different construction, since it will ride on top of caster wheels. It is not quite done yet.
I drilled a hole in the vertical rail that will run from where the front bolt that secures the center leg passes through the leg rails, on up to the gas pipe that connects the legs.
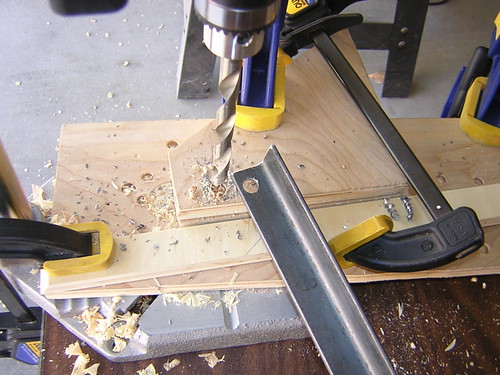
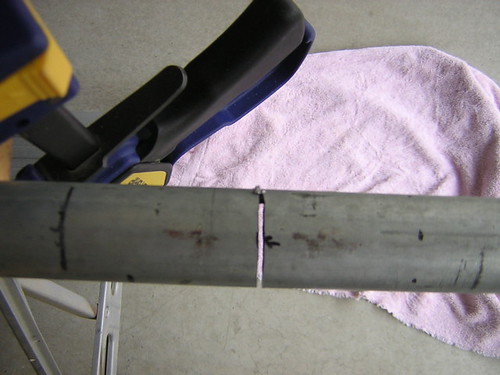
Speaking of the gas pipe, I started using a hacksaw to saw grooves into the U-bolt that will connect the top part of the vertical rail to the gas pipe. The grooves are to help get traction on the pipe. The purpose of all this is to allow R2 to tilt back 36 degrees and tighten the U-bolt around the gas pipe to hold the position.

Continuing on the gas pipe theme, I JB Welded the gas pipe into the pipe connectors, so they're in there for good.

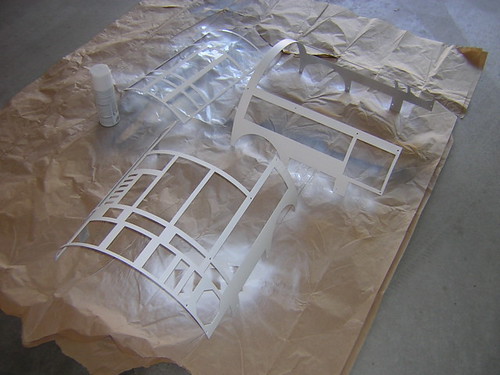
Finally (actually, the first thing I did today), I painted the outer area of the bottom of the wooden frame white, so that the areas not covered by the skirt will match the rest of R2's body color.
After cutting everything to size, I glued it all together. The wheels are just there to help support the other side of the foot that's about to get glued on top. The large bolts will be removable, along with the wheels. The two sides of the feet are 1.5" apart, which is just slightly wider than the wheels.
The middle temporary foot requires somewhat different construction, since it will ride on top of caster wheels. It is not quite done yet.
I drilled a hole in the vertical rail that will run from where the front bolt that secures the center leg passes through the leg rails, on up to the gas pipe that connects the legs.
Speaking of the gas pipe, I started using a hacksaw to saw grooves into the U-bolt that will connect the top part of the vertical rail to the gas pipe. The grooves are to help get traction on the pipe. The purpose of all this is to allow R2 to tilt back 36 degrees and tighten the U-bolt around the gas pipe to hold the position.
Continuing on the gas pipe theme, I JB Welded the gas pipe into the pipe connectors, so they're in there for good.
Finally (actually, the first thing I did today), I painted the outer area of the bottom of the wooden frame white, so that the areas not covered by the skirt will match the rest of R2's body color.
Thursday, January 26, 2006
Finished Gluing Shoulder Planks
As promised, this morning I inverted the droid (sounds like some sort of euphemism), and glued in the tops of the shoulder planks to the top plate. I also dabbed some glue into the areas of the vertical ribs to make sure they are nice and secure. No pictures here, but it looks a lot like yesterday.
Wednesday, January 25, 2006
Glued Shoulder Plank Bottoms
I glued the shoulder planks in place, at least on the bottom plate. Tomorrow morning after the glue has dried, I'll flip the frame over and glue the top of the planks to the top plate. This locks the planks in place, which locks the legs in place from front to back, since the gas pipe attaching the legs goes snugly through the planks.

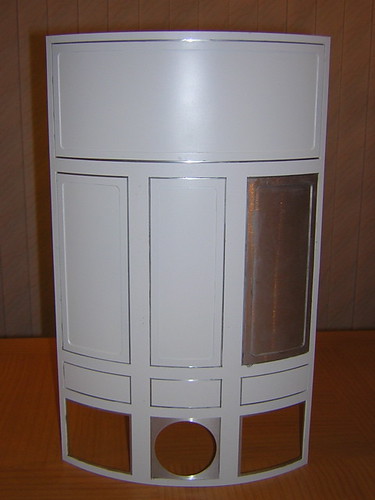
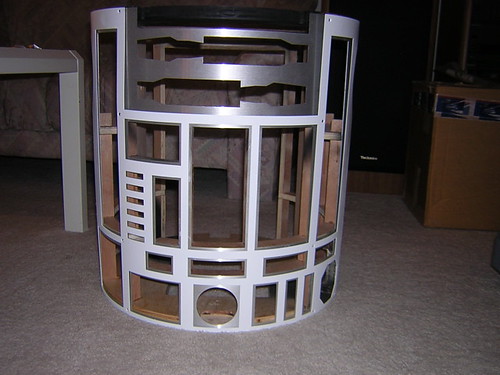
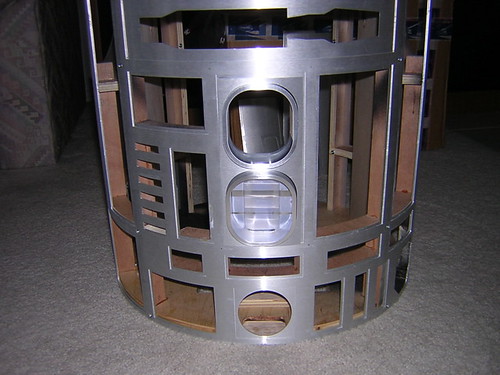
Every once in a while I have to take one of these pictures, otherwise it's really hard to see the progress on a day-to-day basis. All the cutout panels are blue-taped in, ready to fall out if I sneeze. The vents, coin slots, power coupling and octagon port are also sitting there loose. One day this will all be real...

Every once in a while I have to take one of these pictures, otherwise it's really hard to see the progress on a day-to-day basis. All the cutout panels are blue-taped in, ready to fall out if I sneeze. The vents, coin slots, power coupling and octagon port are also sitting there loose. One day this will all be real...
Tuesday, January 24, 2006
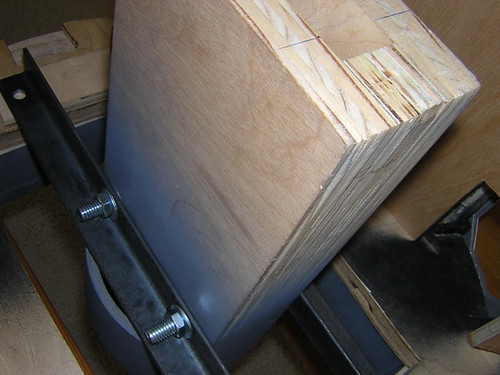
Another Coin Return, Marked Vertical Rail
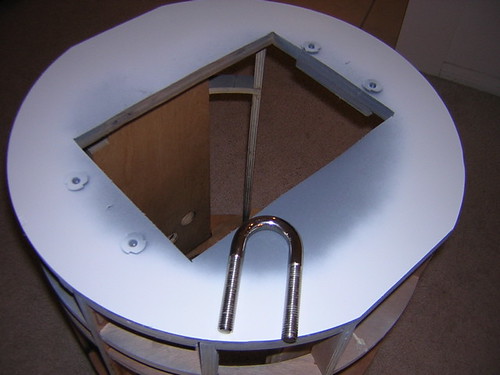
Not much progress so far this week. I made yet another coin return pocket, and again it turned out so-so at best. Once I have the coin return frame(s) cut out, I'll have a better idea as to how useable the pockets will be. I also started marking the vertical rail that connects the center leg rails on the bottom of the frame to the gas pipe up top, for drilling. A U-bolt will hold the top of this rail in place around the gas pipe that connects the legs, and its purpose is to achieve and maintain R2's 3-legged tilt. (This will be a bit clearer once installed and photographed.)
Monday, January 23, 2006
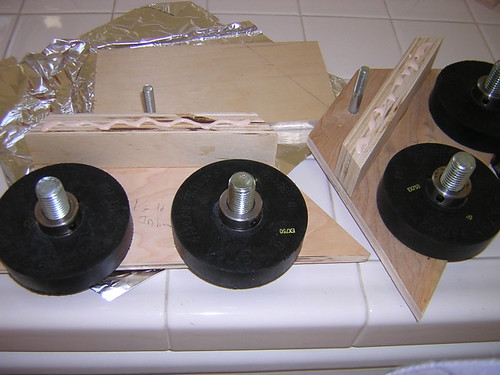
Saturday, January 21, 2006
Temp Feet, Drilled Holes for Rails and Ankles
I tried making some temporary feet to start getting R2 on all threes, but I think I made them too small, and I'll have to try again. "Measure zero times, cut many."
I finally got around to drilling the frame to support the center leg rails. The rails will sit on a couple of pieces of 1/2" plywood at the front and back of the frame. So I drilled those pieces of plywood and the frame bottom. Bolts connect the rails to the frame, t-nuts are inserted on the underside of the frame.
Finally, I drilled the holes in the ankles for the bolts that will secure the feet. The holes are 1/2", I'll insert a 1/2"->3/8" reducer for the bolt to pass through.
Thursday, January 19, 2006
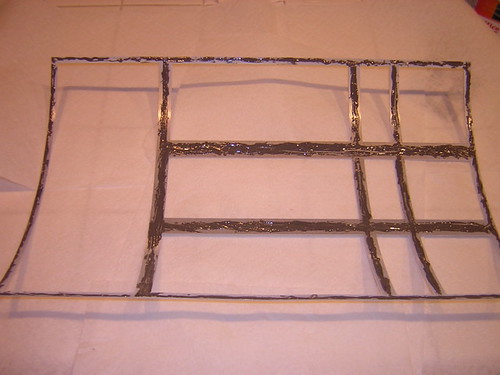
Finished JB Welding Back Door
I finished JB Welding the last three panels of the back door today. I probably overdid it with the JB Weld, but the stuff is kind of messy and hard to work with in my opinion. Still, for the back door I wanted the parts JB Welded together. Other panels on the rest of the skins will either be siliconed in or taped in.
I also fixed a vent insert that got loose in the front vents, and cut out another coin return (haven't folded it yet, too tired tonight).
I also fixed a vent insert that got loose in the front vents, and cut out another coin return (haven't folded it yet, too tired tonight).
Wednesday, January 18, 2006
More Back Door JB Welding, More Coin Returns
I JB Welded four panels on the back door (the largest and three smallest). The top panel was held in with my little paper clip clamps since it is such a large area to bond, the smaller panels are affixed with blue painter's tape on the front.

I also made two more coin returns. I've made four total, one is unusable, these three may or may not be acceptable. I will probably try building a few more until I get it right, we'll see.
I also made two more coin returns. I've made four total, one is unusable, these three may or may not be acceptable. I will probably try building a few more until I get it right, we'll see.
Tuesday, January 17, 2006
Started JB Welding Back Door
A marathon 3 1/2 hour session of JB Welding the inner and outer skins that make up the back door. Most of the time was spent cleaning up JB Weld that would slowly ooze from the seams. What a pain that was.
Gee, I sure hope I used enough clamps... (117 by my count, beat that! If you do, it probably means you are insane.)
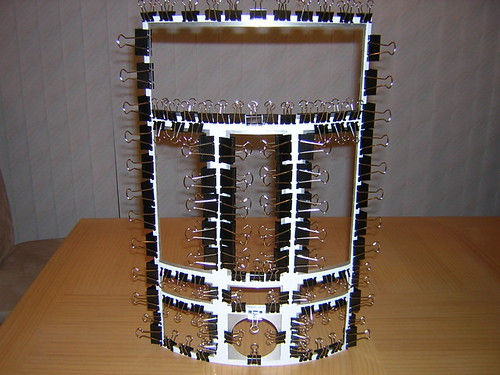
Gee, I sure hope I used enough clamps... (117 by my count, beat that! If you do, it probably means you are insane.)
Monday, January 16, 2006
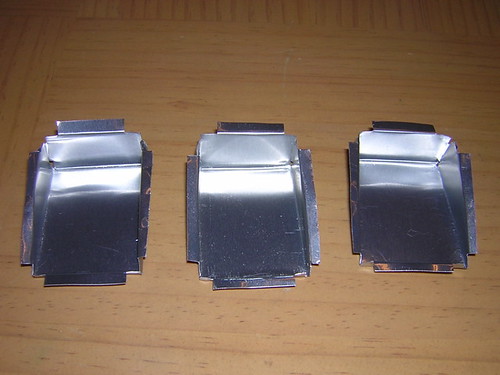
Coin Returns Try #2
More incontrovertible proof that nothing's easy when it comes to building R2. I had another try at making a coin return, and this one turned out somewhat better than yesterday's attempt. I found some thinner aluminum at Ace Hardware. It was ducting, but the coin returns are small enough that the curve doesn't really come into effect. I'm just making the inset piece, not the frame so far.
By the way, these are built using Chris Lee's extremely helpful tutorial, Making aluminum coin returns.
I have a feeling there are going to be several attempts to get them right. (It would probably help if I started working on them before 10:30pm too.)
By the way, these are built using Chris Lee's extremely helpful tutorial, Making aluminum coin returns.
I have a feeling there are going to be several attempts to get them right. (It would probably help if I started working on them before 10:30pm too.)
Sunday, January 15, 2006
Finished Painting Skins (Really), Prototype Coin Return
I finished painting my skins for real today this time, I don't see anything but white now.
I also took a shot at creating a coin return, but it didn't turn out so hot. So let's just call it a prototype. I think I need thinner aluminum. You get the good, the bad and the downright ugly here.
I also took a shot at creating a coin return, but it didn't turn out so hot. So let's just call it a prototype. I think I need thinner aluminum. You get the good, the bad and the downright ugly here.
Saturday, January 14, 2006
A Bit More Painting
I got disappointingly little done today. I realized that I had forgotten about the smaller cutout pieces on the back door that need painting, so I prepped and painted them. I also sanded and applied a couple of more coats of the primer to the legs, still trying to get the last remnants of wood grain to disappear. Later I picked up some stuff from Home Depot (more paint & primer, silver tape, t-nuts, etc.) for various activities that will need doing as I move forward.
Friday, January 13, 2006
More Parts Arrive, More Painting
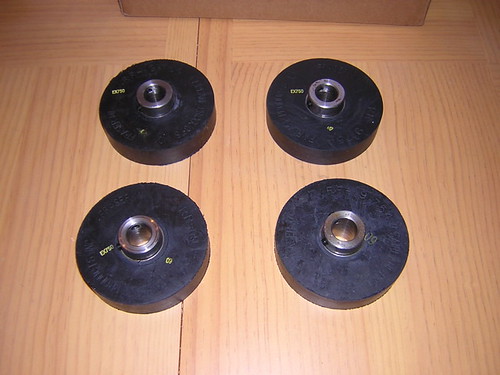
The rest of the budget feet parts and ankle bracelets that Anna sent arrived today, along with some bushings for the foot screws I purchased from McMaster Carr.
"Finished Painting Skins." Did I actually write that earlier? I should know better. I'm never finished with anything. Despite what I thought were enough coats the other day to cover the skins completely, I could see some aluminum (or primer) showing through, so I gave the skins another few coats of Rustoleum Satin White today. This mostly did the job, but I still can see some hints of metal color on a few spots. So yet more painting to come. In the meantime I set the front skins next to my frame.
"Finished Painting Skins." Did I actually write that earlier? I should know better. I'm never finished with anything. Despite what I thought were enough coats the other day to cover the skins completely, I could see some aluminum (or primer) showing through, so I gave the skins another few coats of Rustoleum Satin White today. This mostly did the job, but I still can see some hints of metal color on a few spots. So yet more painting to come. In the meantime I set the front skins next to my frame.
Wednesday, January 11, 2006
Cut Shoulder Bolts Down, Replaced T-Nut
Today wasn't too exciting (unlike all the other days...). I used the angry jigsaw blade that cut the gas pipe, to trim down the various bolts that go on my shoulder wheel in order to make room for the shoulder hub that will one day encroach on the area. (See Finished Drilling Shoulder Discs.) I also had to replace a loose t-nut in the shoulder. It took a while, but eventually I got the job done. No pictures today, too boring.
Tuesday, January 10, 2006
Finished Painting Skins
I couldn't wait until the weekend, so I finished painting the skins tonight in the garage. There's never enough ventilation... who said that?!
Sunday, January 08, 2006
Coin Slots Fitted, More White Panel Painting
Due to the way I placed the horizontal rib immediately below the coin slots on my wooden frame, I needed to sand down the resin coin slot part, and Dremel out a bit more wood from the rib itself. After that, the part fit into the skins just fine.
I also finished painting the remaining cutout panels white. I still need to paint the rest of the outer skins.
I also finished painting the remaining cutout panels white. I still need to paint the rest of the outer skins.
Saturday, January 07, 2006
Finished Center Leg Rail Drilling, Finished Front Vents
I headed back over to Kelvin's to use the drill press, to finish drilling holes in the center leg rails, and the center leg itself. I was very happy with how it turned out. I did a loose-fit:
Later on I filed the upper front vent inserts a bit, and fitted the upper and lower vents into their respective surrounds. I guess I got a bit sloppy with the Super Glue. Oh well...
Later on I filed the upper front vent inserts a bit, and fitted the upper and lower vents into their respective surrounds. I guess I got a bit sloppy with the Super Glue. Oh well...
Friday, January 06, 2006
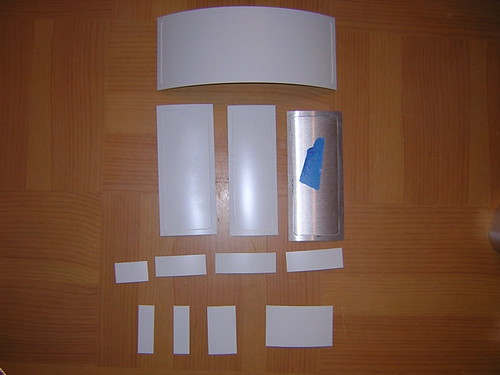
Started Painting for Real, Glued Up Front Vents
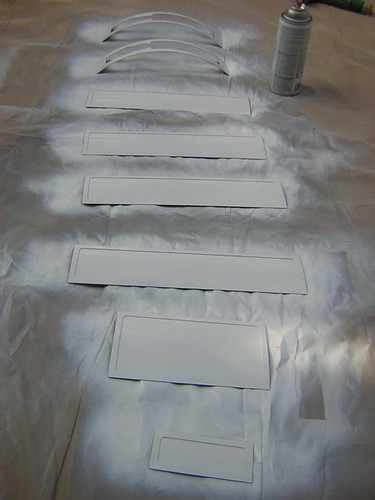
Another mini-milestone, I started painting some of the white panels today (using BriteTouch light gray primer and Rustoleum Satin White). The unpainted panel with the blue tape is to remind me that I'm not painting that particular panel on the back door, as some shots in Episode IV have this panel unpainted.
Later I glued up the internal front vents (well-camouflaged aluminum on aluminum).
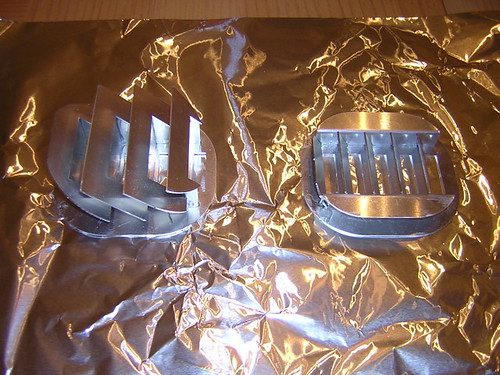
Later I glued up the internal front vents (well-camouflaged aluminum on aluminum).
Tuesday, January 03, 2006
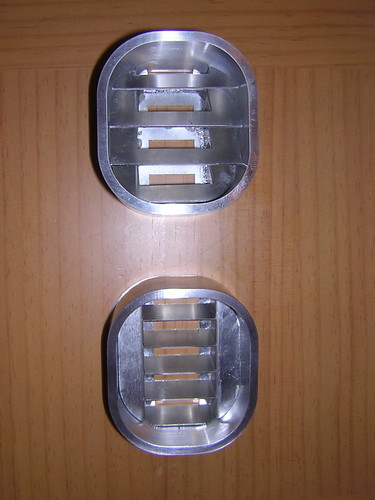
Vent Surrounds Arrive
Wayne's aluminum vent surrounds arrived today, and they look and fit great! I Scotch taped Dave's lower vent inserts in for show, but I don't have the upper vent inserts installed.
I won't be able to do any building for the next few days, but hopefully I'll have something to report during the weekend.
I won't be able to do any building for the next few days, but hopefully I'll have something to report during the weekend.
Sunday, January 01, 2006
Cut Gas Pipe, Dremeled Back Panel
I started off today by cutting the gas pipe that connects the legs to size, using a jigsaw and a really nasty blade.
Then I gave the legs a test fit, which seemed to indicate success.
Next I marked up the center leg rails for drilling, but until I can get access to a drill press, I'll hold off on those.
Finally, I Dremeled out the back door panel of the inner skin. Frankly, I was surprised how straight I cut the skins here.
I sanded the sharp edges down afterward.
Well, vacation is over, and I didn't get as far as I had hoped, but I guess I'm not too surprised. I'll get this droid on three legs sometime soon.
Subscribe to:
Posts (Atom)
