Sunday, February 28, 2010

Center Foot Shell Window Strips Glued Together

I've gone about as far as I want to go with the dome for now, as I await the front logic surround run before I go any further.

In the meantime, there's plenty of work to do on the feet, so tonight I picked up where I left off last July, and glued together the "window strips" for the center foot shell.


I used Ambroid ProWeld for this. It sets pretty quickly. Earlier I had used Testors model glue, which also seems to work ok, but didn't dry as quickly.


This should be ready to glue to the rest of the foot shell tomorrow.

Wednesday, February 24, 2010

Finished JB Welding Dome Screws (for Now)

I'm running out of thrilling revelations in describing the JB Welding of screws into the dome.

The last two went in tonight, these are for the rear logic surround.


The only other screws that might get installed would be for the front logics, but until they are manufactured and I receive them, I'll wait to decide how I want to secure them. On droid #1 they are more or less forced in from behind by my front logic assembly, no screws are required. I may well do it that way again. The PSIs will be secured in this way as well.

Tuesday, February 23, 2010

JB Welded Screws for Rear Holoprojector and Buttons

More JB Welding of screws into the dome. Tonight it was for the rear holoprojector and buttons.

I've become a believer in sanding surfaces that will be bonded together. I've been sanding the screw heads and the countersunk holes on the dome, in order for the JB Weld to form a better bond. A more rugged surface area seems to help, I do it for silicone, primer and JB Weld.


As before, JB Weld is applied to the screw head. If you use Star Wars paper plates, it works even better.


Six more screws in place.


The screws and JB Weld get a gravity-assist while drying. Sure hope this doesn't topple during the night!

Monday, February 22, 2010

JB Welded Screws for Front Holoprojector

Tonight I JB Welded four more screws into the dome. This time, the screws were for mounting the front holoprojector. I'm intentionally going slow because a) I'm lazy, and b) I'm propping the dome up afterward to allow the JB Weld to cure with the screws pointing downward, so they don't have to fight gravity. Thus, only one set of screws is being installed at a time.


I'm only applying JB Weld to the screw head. The idea is to avoid getting JB Weld on the screw threads.


Four more in place.


I had drilled one of the holes too low the other day, so there's an extra, harmless hole near this HP. It will be covered by the outer dome.


Tomorrow I should be able to do the next batch.

Sunday, February 21, 2010

Finished Drilling Dome (for Now), Started JB Welding HP Screws

Today I finished most of the hacking on the inner dome. The only thing I'm deferring until later is the cutouts for the front logic surrounds. I'm awaiting an upcoming run.

The first item of business was to finish countersinking the holes for the #4 screws that will secure the holoprojectors.


Next, I drilled a couple of "just in case" holes on each side of the two buttons on the back of the dome. I plan to use the same switches from Radio Shack on droid #2 that I used on droid #1, and these do not require mounting screws. But just in case I change my mind someday, I'll have a way of mounting an alternate set of buttons.


I needed to trim a little more space for the top of the rear logic, so I used the Dremel cutoff wheel for that.


I had put off drilling the 5/64" hole at the very top of the dome. I placed the panels on the dome, and marked and drilled the centerpoint.


After that, I located where to drill for the rear logic surround, and drilled the holes for #4 screws.


Next, I removed the dome ring and drilled the remaining holes that were too low to drill when the dome ring was still on.


My new, expensive colander.


Finally, I JB Welded four #4 1/2" in place for the top HP.


I plan to JB Weld the other screws in place during the week, and then I'll put the dome aside for a while, and probably move on to the feet.

Saturday, February 20, 2010

Started Drilling for HP Mounting

Today I started drilling the inner dome in order to mount the holoprojectors.

I had debated whether to use the mounting holes that are already on the HP cowlings, or to do what I did for droid #1 and use clips along the edges of the cowlings. In the end, I opted to use clips for a couple of reasons. First, if somehow the locations I drilled to match the holes in the cowlings were off, it could lead to problems, such as the outer dome not accommodating the inner dome's location of the HPs. Second, if I ever were to swap HPs, the holes might be in a different location, and using clips along the edge gives me more flexibility.

With that decision made, I laid out the parts on the top side of the inner dome to compare where I'd need to drill for the HP mounting, while avoiding the holes I had already drilled for future removal of the dome panels.


Next, I traced the outline of the cowling.


I located where I wanted to drill the hole for the clip. In this case (as with droid #1), the clip is a link piece for RC-25 chain. There will be four of these per holoprojector.


I will be using #4 1/2" machine screws, so I grabbed the appropriately sized drill bit and got to work.


Next, I countersunk the holes.


Eventually the screws will be JB Welded in place, but for now I did a loose fit.


I sanded down the mess inside.


Time to give it a try. Everything is looking good on the inside.


I like!


I only had time to finish one of these, I hope to get to the others tomorrow.

Monday, February 15, 2010

Painted Bottom of Frame and Skirt

It was another nice day here, perfect for painting. After lightly sanding the primer I had applied to the bottom of the frame yesterday, it was time to apply Rustoleum Satin White paint.


Three coats, and it's about as white as it's going to get.


While I was at it, I painted the skirt as well.


Eventually the legs, horseshoes, battery boxes and foot shells (once I build them) will get painted white, but those are still a little way off.

Sunday, February 14, 2010

Primer for Bottom of Frame

The weather has been particularly nice here this weekend, so I decided to take the opportunity to apply primer to the bottom of the frame. I had to pull all the parts and skins off droid #2 first. Hopefully I won't have to do that too many more times.

The underside of the droid doesn't really get seen (unless you are less than a foot tall), and even then the skirt covers most of it, but it does need painting.

I masked the t-nuts that help secure the center leg assembly. I use gray primer when preparing for white paint, so that I can distinguish the primer from the paint. Others use white primer, and I can't argue much with that approach either.


I applied three coats. I'll lightly sand tomorrow, and hopefully it'll be ready for painting.

Thursday, February 11, 2010

Started Drilling Inner Dome

So this is what tangible progress looks like. I had almost forgotten.

Tonight I started drilling the holes whose locations I had begun marking earlier in the week. I drilled with the dome ring attached, to keep the inner dome from deforming while drilling.

A step bit seems to be perfect for this job.


'

Now, repeat about 50 times.


On the inside, it looks like a bullet went through there. That mess still needs to be sanded down.


Because I drilled with the dome ring attached, I didn't get to the lowest holes on some of the panels, where the lip of the dome ring backed the inner dome. I also still need to locate, mark and drill the holes for the #4 screws that will attach the HPs and logics.

Monday, February 08, 2010

Started Marking Inner Dome for Drilling

Never underestimate the power of procrastination.

I've been stuck in very slow motion on droid #2. This hardly qualifies as building, but I started marking up the inner dome for drilling the finger holes that will allow me to push out the outer dome panels from behind, if I ever need to repaint them.

I fired up iPhoto and used the pictures from droid #1 as my reference to mark the hole locations for droid #2.


The largest holes will be 1/2" in diameter, but many will be somewhat smaller. It all depends on the amount of space behind the panel.


For this framed panel, I marked crosshairs so I would know where to mark the inner dome.


The panels are done being marked. I still need to mark where to locate the screws that will secure the HPs and logics.

Saturday, February 06, 2010

Kidspace Children's Museum Fundraiser

Tonight R2 joined members of the 501st and Rebel Legion in a fundraising auction and dinner for the Kidspace Children's Museum. The fundraiser was held in a huge tent on the grounds of a restaurant in Pasadena, CA.


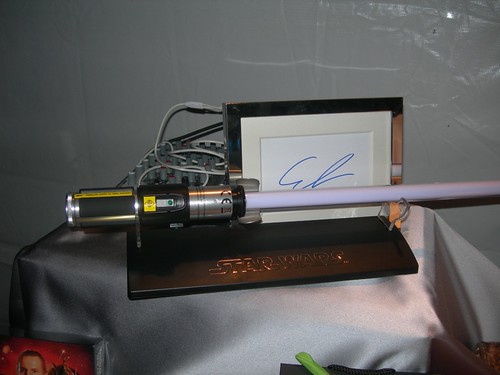
The patrons entered into an area that had many items up for auction, including a Master Replicas lightsaber with an accompanying card featuring George Lucas' signature (such as it is).


I've built R2. I've gone to Dodger fantasy camp. This is the one other thing I've always wanted to do since I was a kid.


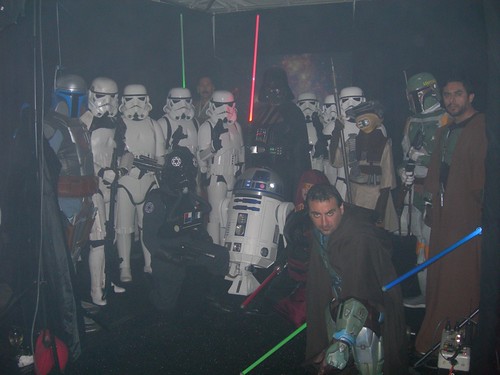
Stormtroopers manned the pathway from the registration area to the main entrance, and added a lot to the atmosphere.


(Speaking of atmosphere, if some of my pictures look foggy, that would be due to the fog machine. One neat side effect, it made the light beam coming out of R2's holoprojector look really cool!)


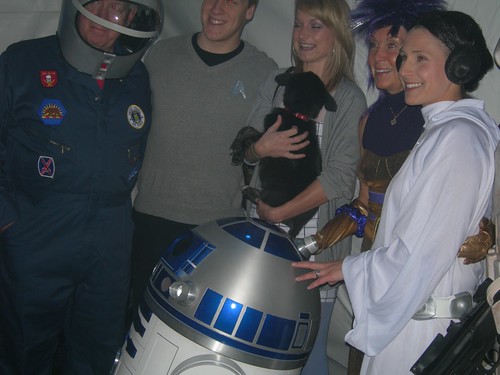
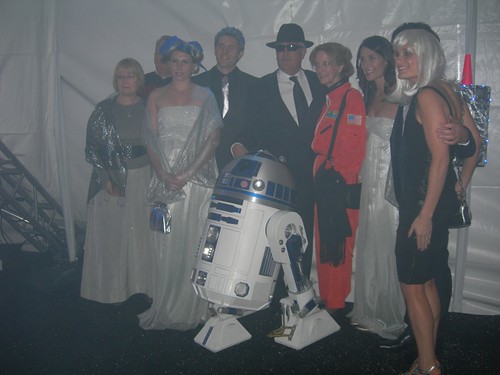
R2 was stationed near the entrance, and virtually everyone who entered stopped for a picture with him.


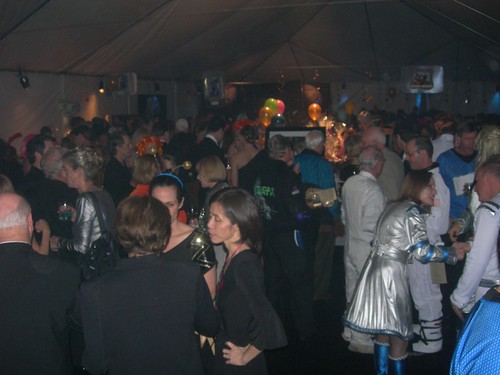
I'm guessing there were between 300-400 people in attendance.


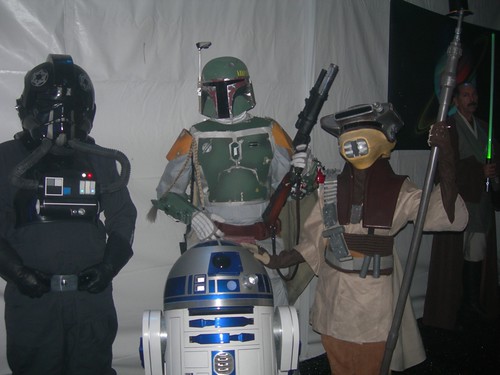
Jedi also mingled with the guests and were available for pictures.


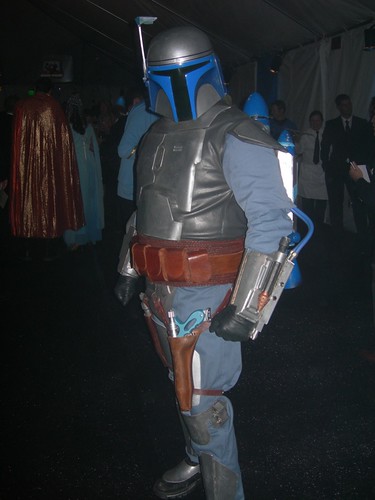
Vader, Bouschh and the Fett duo were also popular.


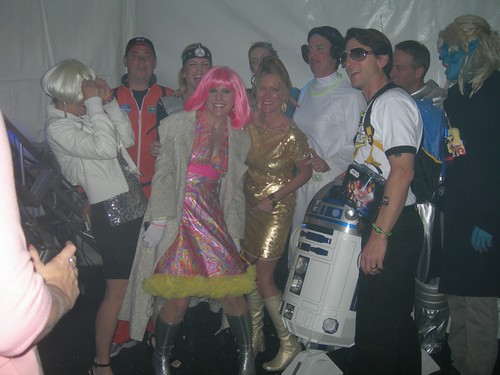
One last group picture before wrapping it up.


I don't know how much money was raised, but at $255/plate, and with a huge auction, I have a feeling things went well. (I really wish I could have stayed and bid on that Goodyear blimp ride, but once R2 was in the droidmobile, I had to leave since there was no parking nearby.)

My full photoset (plus a few grainy videos) is here.