Monday, February 27, 2006
R2LA III DVD Arrived
Yea, my R2LA III DVD arrived today. (Hey, I'm on that thing, and I shot a little bit of the leg tutorial [the primer and shoulder discs].) I guess this means I didn't get around to doing any building today...
Sunday, February 26, 2006
Dome Sanding Day 2
I sanded a few more atoms off the inner dome. I've left all the panels intact on the outer dome, so whenever I check to see how close the tops of two domes are to each other, I check the hole for the top holoprojector. I check alignment, then rotate the inner dome about 90 degrees, check alignment and rotate again, etc. to make sure I'm sanding evenly. I had to stop once the blisters took over. :(
The two domes are close, but I need to eliminate the gap altogether, or the pie panels will sit too low compared to the rest of the outer dome.
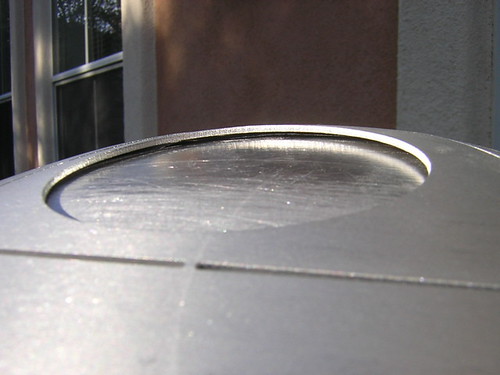
The two domes are close, but I need to eliminate the gap altogether, or the pie panels will sit too low compared to the rest of the outer dome.

Saturday, February 25, 2006
Started Sanding Inner Dome
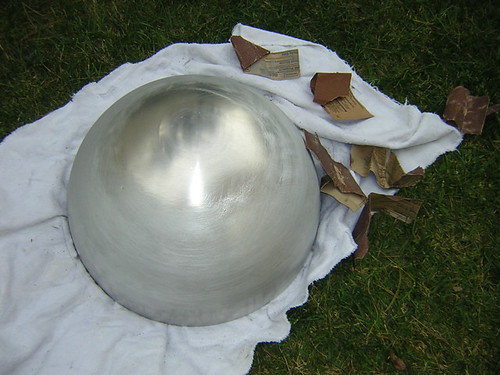
Oh boy, here we go. Each R&J dome owner gets to go through a rite of passage, sanding the outer surface of the inner dome, until it fits flush against the inside surface of the outer dome. Well, I sanded and sanded and sanded some more for several hours today, and although I think I managed to sand off a fair amount of surface, I still have a long way to go (millimeters, but still...) before the tops of the two layers meet up. I mostly sanded by hand using 60 grit sand paper, but I also used a random orbital sander for a few minutes. Tomorrow I may go back to the sander for a while. I have no idea how many days I'll be sanding...

Friday, February 24, 2006
Started Working on Dome
(Sorry for the delay, it's been a busy week...)
Today I finally started working on the dome. It was a modest effort, where I sanded the inside part of the outer dome to get rid of the flashing from the laser cuts. The outer dome does not yet sit flush against the inner dome, so some sanding somewhere still needs to take place.
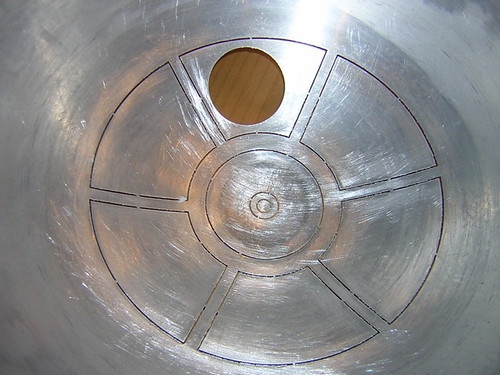
Today I finally started working on the dome. It was a modest effort, where I sanded the inside part of the outer dome to get rid of the flashing from the laser cuts. The outer dome does not yet sit flush against the inner dome, so some sanding somewhere still needs to take place.

Monday, February 20, 2006
Sanded Eye, Installed Rockler Bearing
In the morning, I sanded down the nubs on the radar eye.
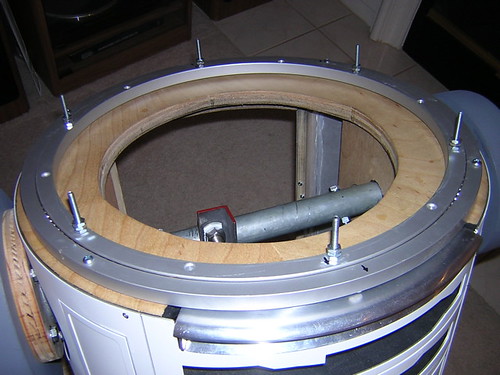
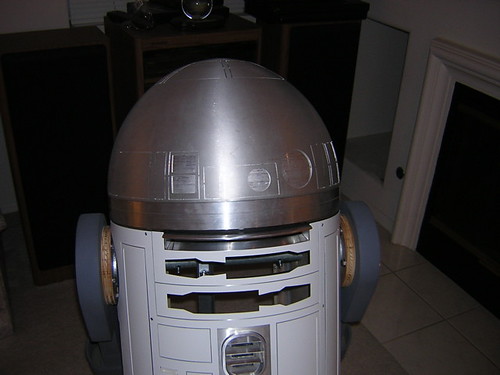
Then, it was off to Mike Senna's where Mike very kindly installed my Rockler bearing onto the top of my frame (see Rockler Bearing). This involved drilling four holes into the bearing's outer ring (and the frame underneath it), to secure it with screws to the top of the frame, along with the insertion of six screws in the inner ring that went into six corresponding holes in the dome ring, also drilled today. The fit was pretty much perfect. Now R2 doesn't have to go around headless anymore. Thanks another million, Mike!
Now I will probably sit and stare at the dome for a while, as I psyche myself up to get to work on it. It may be quiet here for a day or two.

Then, it was off to Mike Senna's where Mike very kindly installed my Rockler bearing onto the top of my frame (see Rockler Bearing). This involved drilling four holes into the bearing's outer ring (and the frame underneath it), to secure it with screws to the top of the frame, along with the insertion of six screws in the inner ring that went into six corresponding holes in the dome ring, also drilled today. The fit was pretty much perfect. Now R2 doesn't have to go around headless anymore. Thanks another million, Mike!


Now I will probably sit and stare at the dome for a while, as I psyche myself up to get to work on it. It may be quiet here for a day or two.
Sunday, February 19, 2006
Installed Side Styrene Pieces
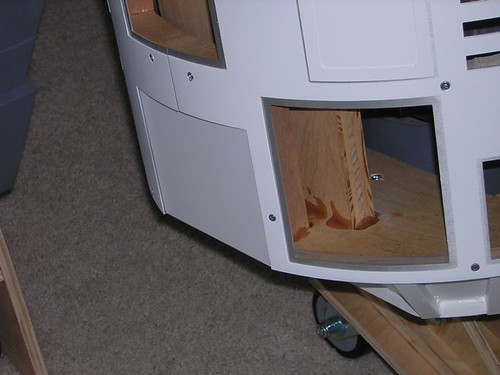
I attached the side styrene pieces that cover up the bottom part of each side today. There is a small wooden post behind the styrene that is glued to the bottom of the frame and the back of the styrene, supporting the styrene.
Hmm. I wonder what I should work on next?
Hmm. I wonder what I should work on next?

Saturday, February 18, 2006
Skirt Attached
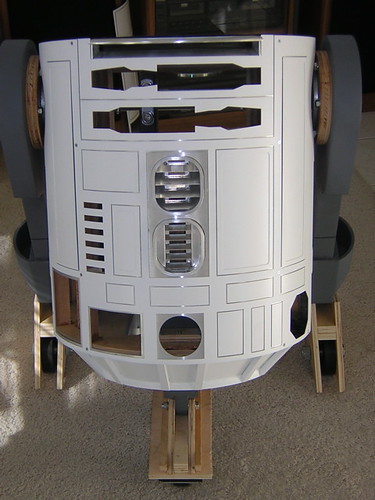
I drilled holes in the bottom of the frame today, and mounted the skirt. I think I'm going to start calling the skirt my "current skirt" because I'm not all that happy with it, and hope to have time to remake it one day. But for now it will have to do.

Friday, February 17, 2006
Painted Skirt
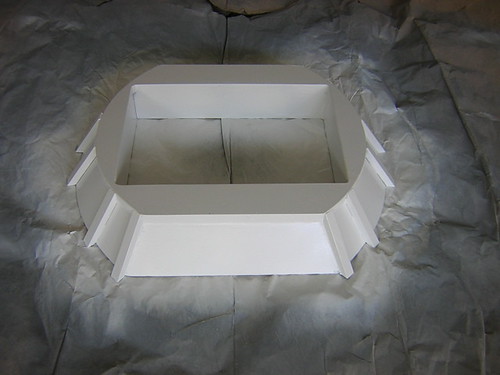
I painted the skirt white today, applying several coats of Rustoleum Satin White. I may need to come back with the white silicone and touch up a couple of areas near the ribs and various seams that can use a bit of improvement. Hopefully I'll get the skirt mounted this weekend.

Thursday, February 16, 2006
More Resin Parts, Started Gluing Horseshoes, Skirt Work
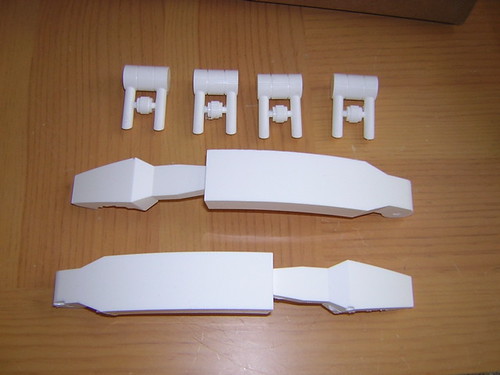
More of Keith's resin parts arrived, this time the utility arms and under shoulder details.
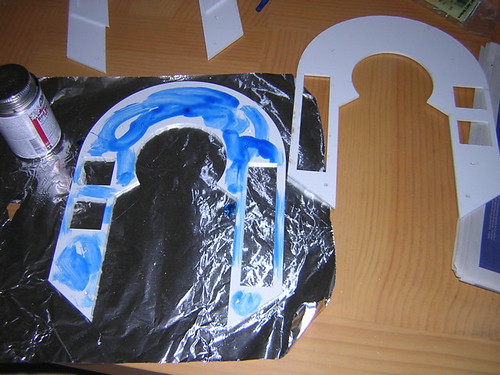
I started gluing together the A&A layered shoulders (aka "horseshoes") with blue PVC cement. I haven't glued the top-most and bottom-most layers yet. I may leave the bottom-most layer (the shim layer) unglued to facilitate repainting in the future. Even though the PVC is white, I will probably apply some primer and white paint anyway, to help cover some of the laser marks and areas where the blue PVC cement stained the PVC. I also need to paint the inner circle area silver. Note that I flipped each layer upside-down for one of the shoulders, so that the buttons and hydraulics will be oriented the same for both left and right shoulders.
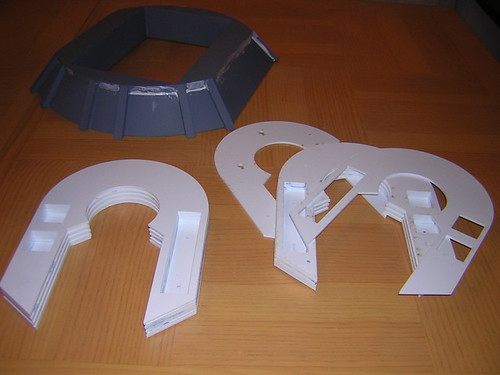
I finished up by applying some paintable white silicone to some rough areas of the skirt and smoothing it over with a razor blade. It looks messy now, hopefully when the whole thing is painted white, it will be okay. I'll know soon.

I started gluing together the A&A layered shoulders (aka "horseshoes") with blue PVC cement. I haven't glued the top-most and bottom-most layers yet. I may leave the bottom-most layer (the shim layer) unglued to facilitate repainting in the future. Even though the PVC is white, I will probably apply some primer and white paint anyway, to help cover some of the laser marks and areas where the blue PVC cement stained the PVC. I also need to paint the inner circle area silver. Note that I flipped each layer upside-down for one of the shoulders, so that the buttons and hydraulics will be oriented the same for both left and right shoulders.

I finished up by applying some paintable white silicone to some rough areas of the skirt and smoothing it over with a razor blade. It looks messy now, hopefully when the whole thing is painted white, it will be okay. I'll know soon.

Tuesday, February 14, 2006
EE Droids Arrive
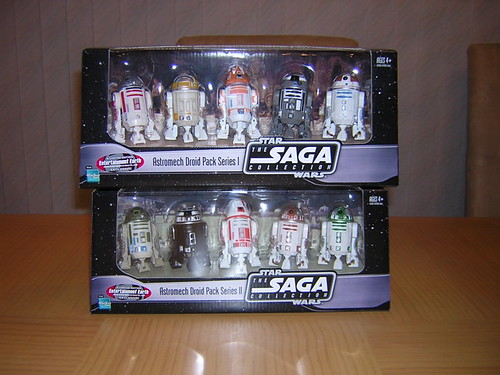
Okay, this isn't even close to building. I just got back from a business trip (weekend work included...) and have nothing else to report, so at least I can show off my newest droid collection. Hopefully I can get back to building soon!

Thursday, February 09, 2006
Yet More Skirt Primer
Another couple of passes with the spray can of primer for the skirt today. Pretty mundane.
Wednesday, February 08, 2006
More Skirt Primer
I'm getting close to painting and installing the skirt, so I applied some more primer and did some sanding to work out the remaining wood grain. The styrene part of the skirt finally got its coat of primer as well.
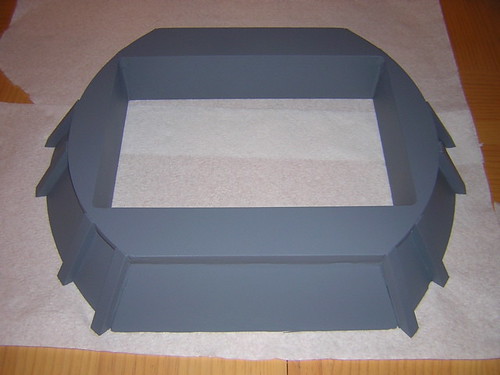
I also gave a try at cutting some of the power coupling details from aluminum sheeting, but so far all I've managed to do is confirm that I do not cut aluminum very well.

I also gave a try at cutting some of the power coupling details from aluminum sheeting, but so far all I've managed to do is confirm that I do not cut aluminum very well.
Monday, February 06, 2006
Patched Up Skirt
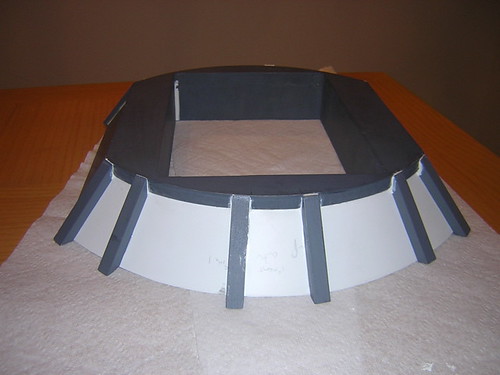
I used some white, paintable silicone to patch up gaps in the skirt, in preparation for painting.

Sunday, February 05, 2006
Back on Three Legs
I removed the blue tape this morning that held the panels in place while the silicone dried. Then I reattached the legs. That's all I had time for today. This is where I was hoping to be by the New Year. I missed it by over a month. Oh well...

Saturday, February 04, 2006
Attached Skin Panels
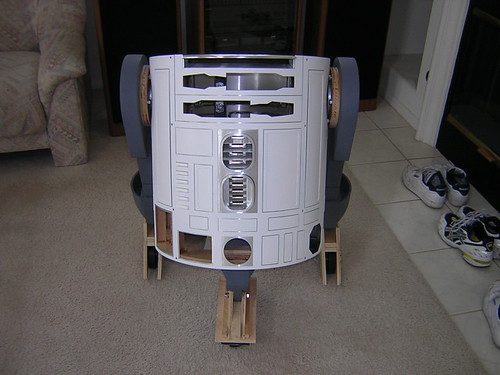
I used silicone to affix panels for the skins that will be attached permanently, and masking tape for those panels that I may want to be able to open and close on a hinge at some future date. The panels with silicone are held in with blue tape while the silicone cures overnight, and then the blue tape will come off and the legs will go back on.
Silicone was applied to the inner skin's cutout edges, then the panel was attached and taped in place. After a few hours, I went over the inside of the skins to apply silicone on the back. Those panels that are held in with masking tape are only taped in from the inside.
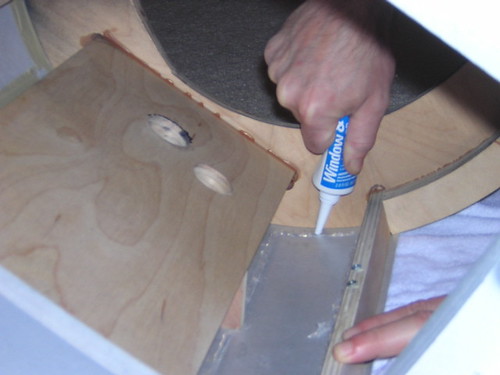
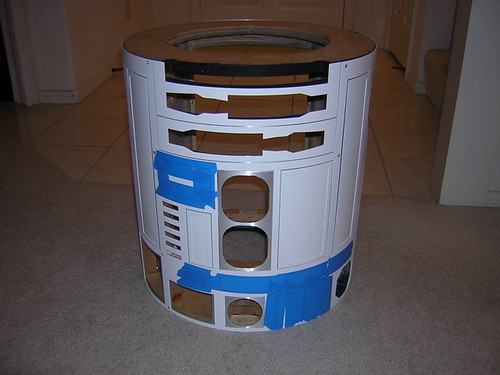
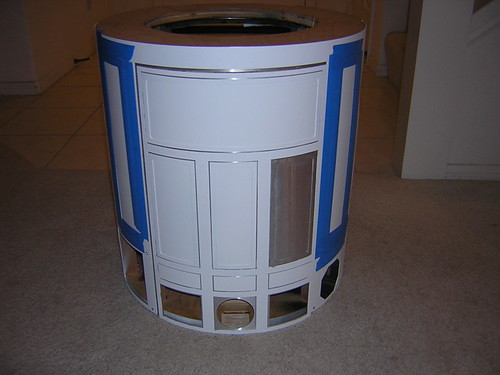
Silicone was applied to the inner skin's cutout edges, then the panel was attached and taped in place. After a few hours, I went over the inside of the skins to apply silicone on the back. Those panels that are held in with masking tape are only taped in from the inside.


Friday, February 03, 2006
Three Legs!
Finally!! Another mini-milestone, R2 is standing on his own three legs. I found that I needed to recut and redrill the vertical rail that connects the front center foot bolt to the U-bolt up top going around the gas pipe. There was not enough room to fit a socket wrench in the L joint of the rail to tighten down the U-bolt nuts. So another cut with the jigsaw, some drilling, and lo-and-behold, R2 (or the frame at least) is now standing on all threes.
The skins are currently off. What I will need to do next is take this all apart, screw down the inner and outer skins, and start gluing down the panels to the skins with silicone. Then I can put the legs back on, and R2 will start to look a bit more real.
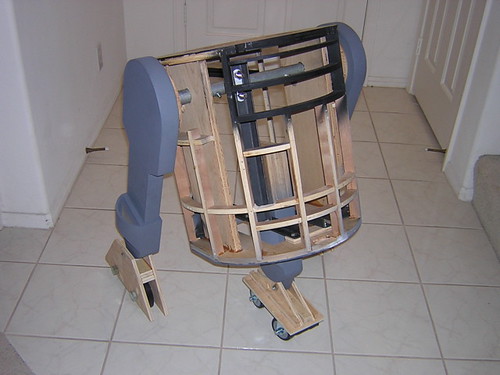
The skins are currently off. What I will need to do next is take this all apart, screw down the inner and outer skins, and start gluing down the panels to the skins with silicone. Then I can put the legs back on, and R2 will start to look a bit more real.

Wednesday, February 01, 2006
Remade Temporary Center Foot
The temporary center foot I made last weekend was too tall (I didn't consider just how tall the casters were), so I remade the foot tonight. It was a rush-job and is too ugly for pictures, but it'll show up sometime soon.
Subscribe to:
Comments (Atom)
