Friday, March 31, 2006
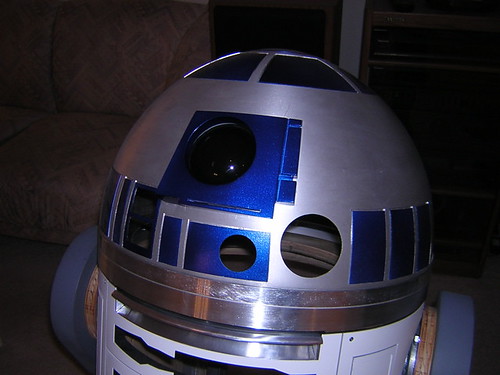
Painted Eye
I repainted the resin eye after my first failed attempt (paint started peeling). This time seems to have gone somewhat better, but I won't feel confident that the paint won't peel again until more time has passed.

Thursday, March 30, 2006
More Eye Primer, Dome Ring Work, Redid LDP
This morning I added another coat of primer to the eye, lightly sanded, and then added a final coat.
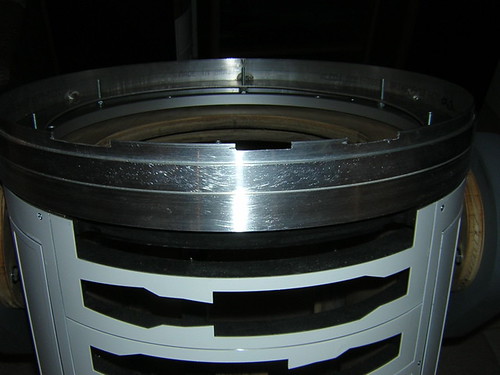
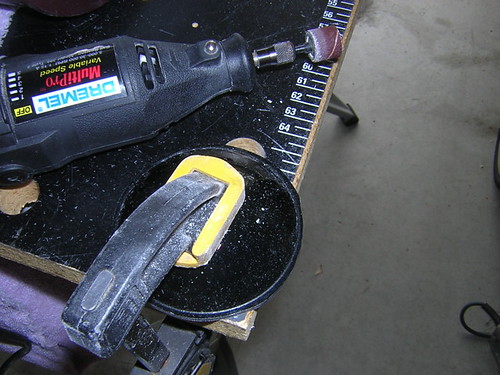
In the evening I took three bites out of the top of the dome ring, using the Dremel. These areas will provide clearance for the front holoprojector, PSI and logic display. I also spun the ring around on the bearing and lightly sanded the bottom half of the ring with 220 grit sandpaper to give it a brushed-metal look. (Yet another idea borrowed from Mike Senna.)
Lastly, I (purposefully) busted apart my aluminum large data port, because it seemed slightly lopsided to me. So I rebonded it with JB Qwik, and hopefully it will look more even now.
In the evening I took three bites out of the top of the dome ring, using the Dremel. These areas will provide clearance for the front holoprojector, PSI and logic display. I also spun the ring around on the bearing and lightly sanded the bottom half of the ring with 220 grit sandpaper to give it a brushed-metal look. (Yet another idea borrowed from Mike Senna.)
Lastly, I (purposefully) busted apart my aluminum large data port, because it seemed slightly lopsided to me. So I rebonded it with JB Qwik, and hopefully it will look more even now.
Wednesday, March 29, 2006
Primered Eye, Marked Dome Ring
This morning I applied primer to the resin eye in preparation for (re)painting. I'll apply another coat of primer, lightly sand, and apply a final coat of primer tomorrow.
I also marked a few areas of the dome ring which will need to be trimmed a bit, to better accommodate things like holoprojectors and processor status indicator lights.
I also marked a few areas of the dome ring which will need to be trimmed a bit, to better accommodate things like holoprojectors and processor status indicator lights.
Tuesday, March 28, 2006
Cleaned Up Eye, Marked Dome Panel Holes for Drilling
In the morning I cleaned up the remaining paint and primer off the resin eye, at least everything that I could reach. I'll probably try painting it again this weekend, along with the dome ring.
In the evening I marked the inner dome for drilling small holes under the painted dome panels, so that I can pop the panels off from behind, if I ever need to repaint them. I plan to bond most of the panels to the dome with 3M Very High Bond Tape, which I ordered today from McMaster-Carr (and it ain't cheap).

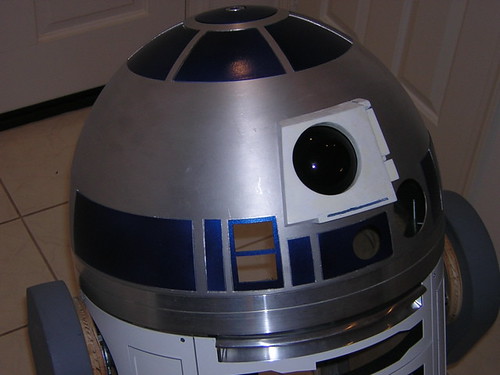
Here's a picture from yesterday, before I finished cleaning up the eye, with the dome panels temporarily taped in place. I always have to jump ahead and take a sneak peek at things like this. The flash did a poor job of lighting the panels.
In the evening I marked the inner dome for drilling small holes under the painted dome panels, so that I can pop the panels off from behind, if I ever need to repaint them. I plan to bond most of the panels to the dome with 3M Very High Bond Tape, which I ordered today from McMaster-Carr (and it ain't cheap).
Here's a picture from yesterday, before I finished cleaning up the eye, with the dome panels temporarily taped in place. I always have to jump ahead and take a sneak peek at things like this. The flash did a poor job of lighting the panels.
Sunday, March 26, 2006
Painted Dome Panels
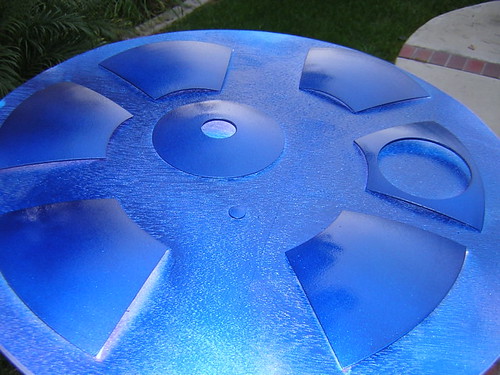
I painted the dome panels (both side and top) today. I also painted the eye, but something went wrong and the paint started to peel from the primer, so I stripped all the paint off and I will have to try again another day. Oh well.
Saturday, March 25, 2006
Attached Eye, Primed Dome Panels, Cleaned Resin
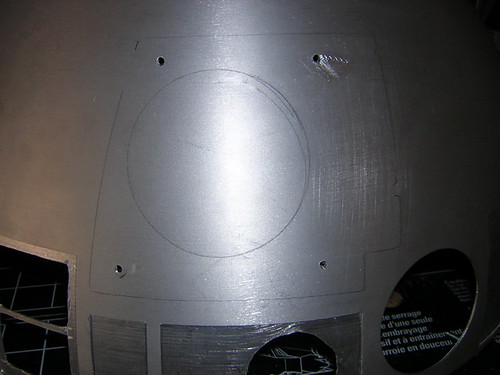
A busy day. I finally got the (yet unpainted) eye attached temporarily to the dome. I drilled the four holes I marked yesterday (yeah, the drill bit slipped on that upper-right hole, but that's okay, the mess is behind the eye). Then I taped the eye onto the dome, and from the inside of the dome lightly touched the spinning drill bit to the back of the resin eye to make a mark for each screw hole.
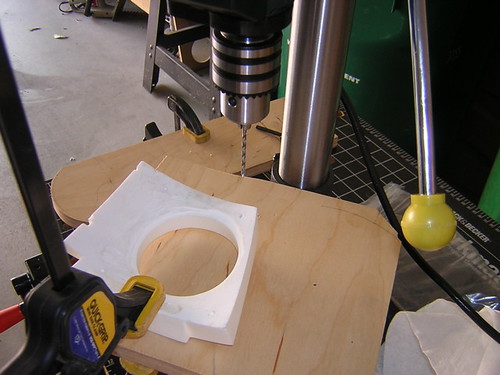
Then I used my new drill press to drill the four holes in the back of the eye, about half-way deep, roughly half an inch.
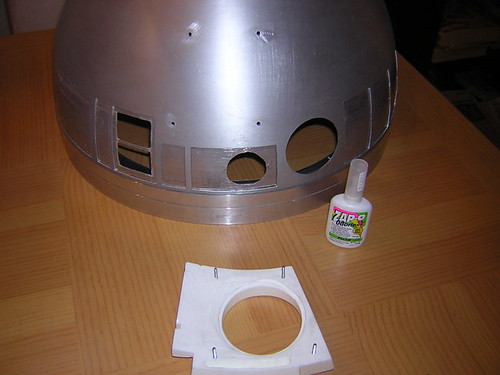
I cut the ends off of four #4-40 1" screws, and used super glue to glue them into the resin eye.
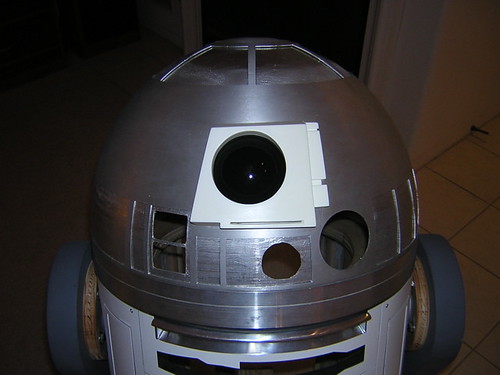
Then I gave R2 the gift of sight.
Throughout the day I worked on applying primer to all the dome cutouts that get painted, and the area of the skins that frames the front vents. (I hope I can paint them blue tomorrow, but I've got other commitments, so we'll see.)
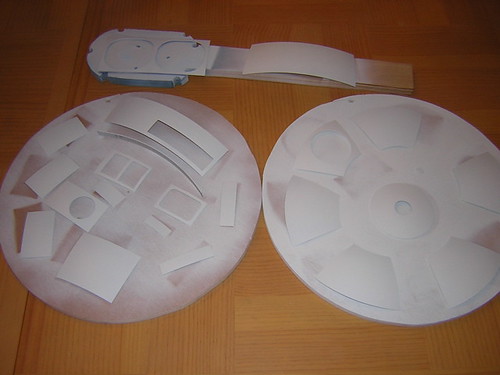
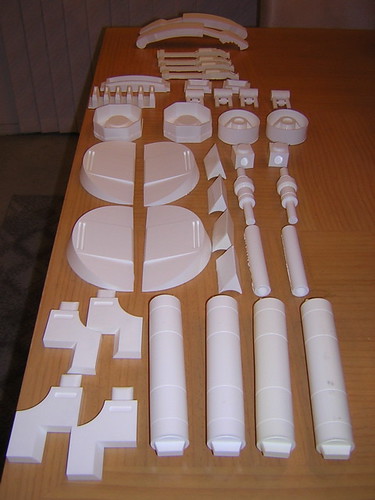
I finished the day by following Dark Jedi Keith's instructions on cleaning resin, and cleaned over 40 resin parts (a couple not shown). I foresee some painting soon, so it was time to prep them. Not all will be used, as I have some aluminum on order, but I figured I'd wash everything anyway, rather than trying to remember what has been cleaned and what hasn't.
Then I used my new drill press to drill the four holes in the back of the eye, about half-way deep, roughly half an inch.
I cut the ends off of four #4-40 1" screws, and used super glue to glue them into the resin eye.
Then I gave R2 the gift of sight.
Throughout the day I worked on applying primer to all the dome cutouts that get painted, and the area of the skins that frames the front vents. (I hope I can paint them blue tomorrow, but I've got other commitments, so we'll see.)
I finished the day by following Dark Jedi Keith's instructions on cleaning resin, and cleaned over 40 resin parts (a couple not shown). I foresee some painting soon, so it was time to prep them. Not all will be used, as I have some aluminum on order, but I figured I'd wash everything anyway, rather than trying to remember what has been cleaned and what hasn't.
Friday, March 24, 2006
Marked Dome for Eye Drilling
Using double-sided tape, I temporarily taped the eye to the dome where I want it to sit forever, and traced its outline. Then I marked the four spots that I will drill into the dome to support the eye.
After drilling these holes, I will tape the eye back on, and mark the four spots on the back of the resin eye that match the holes, and then drill four small parallel holes in the back of the resin eye. These holes need to be parallel to each other (rather than radial) so that the ends of the screws that will go through the dome won't all be pointing inward toward the center of the dome such that they won't be able to match the locations of the holes. Screws heads will be chopped off and the remaining screws will be glued into the back of the eye.
Not sure how soon all of this will happen, but hopefully not long from now. Lots more blue painting to take care of in the meantime.
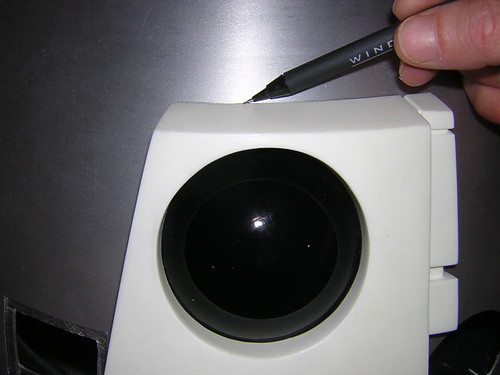
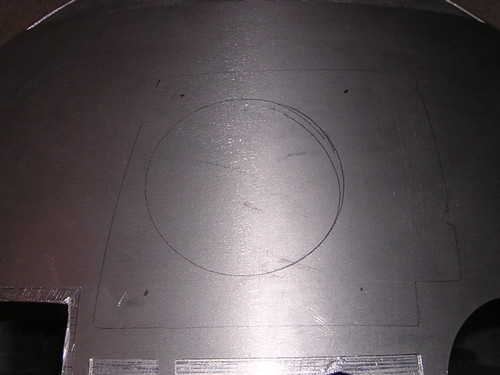
After drilling these holes, I will tape the eye back on, and mark the four spots on the back of the resin eye that match the holes, and then drill four small parallel holes in the back of the resin eye. These holes need to be parallel to each other (rather than radial) so that the ends of the screws that will go through the dome won't all be pointing inward toward the center of the dome such that they won't be able to match the locations of the holes. Screws heads will be chopped off and the remaining screws will be glued into the back of the eye.
Not sure how soon all of this will happen, but hopefully not long from now. Lots more blue painting to take care of in the meantime.
Thursday, March 23, 2006
Glued Domes Together
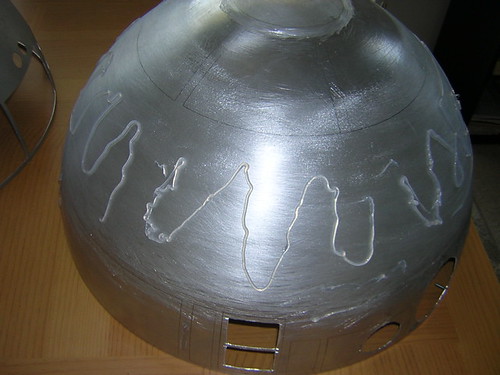
This morning I glued the inner and outer domes together with silicone. I just zig-zagged a bunch of silicone about midway up the dome, then smeared it around. I then carefully aligned and lowered the outer dome on top of the inner dome, kind of like when the Vader mask is first lowered onto Anakin in Revenge of the Sith. I got resourceful and used my vacuum cleaner as a pike on which to rest R2's head, so the dome layers would not fight gravity if turned upside down or left rightside up.
In the evening I went around the rim where the dome edges meet, and applied some more silicone along the ridge. I used 51 of those little clips to clip the dome edges together while the silicone dries overnight. (If you think that's bad, check out Started JB Welding Back Door. I bought all those clips, and by golly, I'm gonna use 'em.)
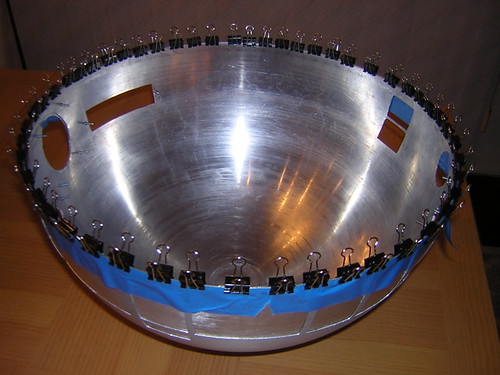
In the evening I went around the rim where the dome edges meet, and applied some more silicone along the ridge. I used 51 of those little clips to clip the dome edges together while the silicone dries overnight. (If you think that's bad, check out Started JB Welding Back Door. I bought all those clips, and by golly, I'm gonna use 'em.)
Wednesday, March 22, 2006
Painted Inner Dome PSI Area
Another mini-milestone, the first blue painting of my R2. This was on the inner dome, for the area of the rear PSI that shows through to the outside world. I needed to do this before gluing the inner and outer domes together.
Obviously I masked the rectangular area to paint. I applied a slightly modified Krider Blue, using a few coats of primer (wet sanded with 400 grit before the last coat of primer), only one coat of Rustoleum Metallic Purple and one coat of Duplicolor Anodized Blue, followed by two clearcoats.
I love the look of the purple. You can see the glitter in the spray paint stream if you have the right light and angle as you spray it on.
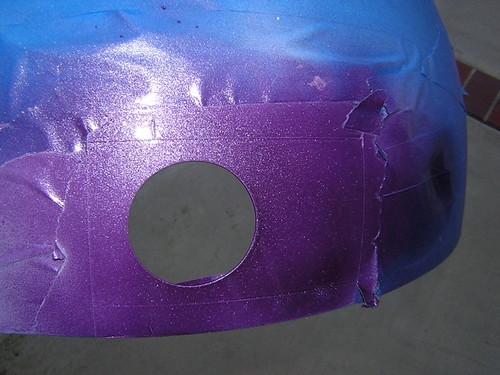
After the paint had dried all day, I removed the blue masking tape. For fun I carefully set the outer dome over the inner dome, and taped in the cutout piece that will eventually be glued in place, framing the painted area.
Next up, gluing the domes together permanently with silicone.
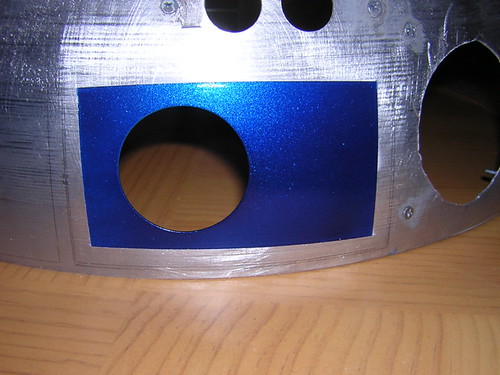
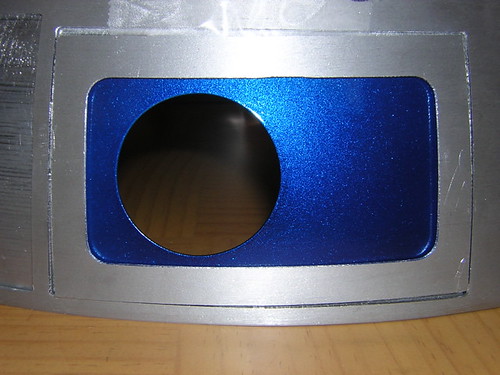
Obviously I masked the rectangular area to paint. I applied a slightly modified Krider Blue, using a few coats of primer (wet sanded with 400 grit before the last coat of primer), only one coat of Rustoleum Metallic Purple and one coat of Duplicolor Anodized Blue, followed by two clearcoats.
I love the look of the purple. You can see the glitter in the spray paint stream if you have the right light and angle as you spray it on.
After the paint had dried all day, I removed the blue masking tape. For fun I carefully set the outer dome over the inner dome, and taped in the cutout piece that will eventually be glued in place, framing the painted area.
Next up, gluing the domes together permanently with silicone.
Monday, March 20, 2006
JB Welded Screws in Inner Dome
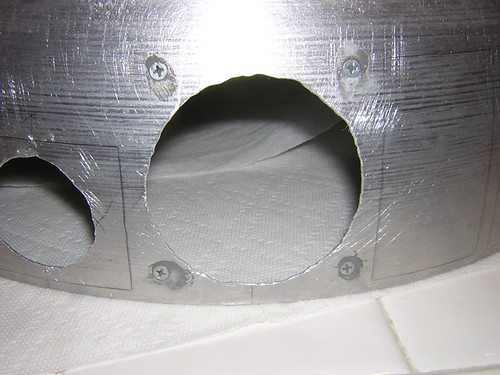
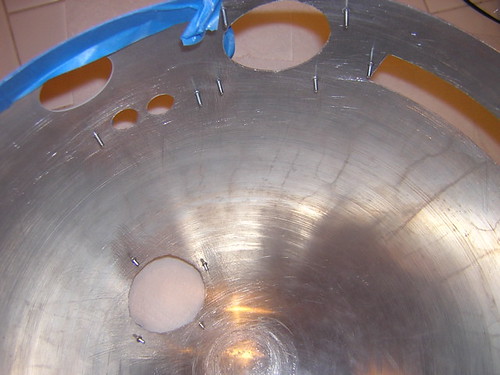
Tonight I JB Welded the screws that will hold holoprojectors, a resin surround, and some dome electronics into the inner dome. There's a total of 16 screws, all are #4-40 x 1/2".
Sunday, March 19, 2006
Dome Drilling & Primer, Paint Test
I drilled the holes for the screws that will fasten the resin surround for the large logic display (LEDs in the back of the dome). I also widened up a bit some of the holes that I had cut earlier in the week to allow some slop for when the inner and outer domes are glued together.
Next I masked the rear PSI area (perfect circle hole) and applied three coats of primer. I also did a couple more blue paint tests, one with two coats of purple followed by two coats of blue followed by two clearcoats, the other with one coat of purple followed by one coat of blue followed by two clearcoats. I think I like the 1-1-2 combo the best, so that's what I'll probably go with for the whole droid.
Next I masked the rear PSI area (perfect circle hole) and applied three coats of primer. I also did a couple more blue paint tests, one with two coats of purple followed by two coats of blue followed by two clearcoats, the other with one coat of purple followed by one coat of blue followed by two clearcoats. I think I like the 1-1-2 combo the best, so that's what I'll probably go with for the whole droid.
Saturday, March 18, 2006
Finished "Perfect Circle" and Rest of Dome Cutouts
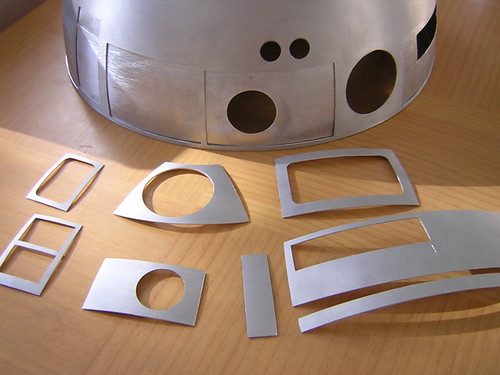
Doing the sandpaper-around-bottleneck thing, I sanded the inner dome rear PSI circle (the one that shows through to the outside world) to be about as round as I can get it. I also finished cutting out the remaining panels from the outer dome.
Next up, drilling two more holes in the inner dome for the large logic display's resin surround, JB Welding screws in place, primer for the area of the inner dome that gets painted, and another paint test or two.
Next up, drilling two more holes in the inner dome for the large logic display's resin surround, JB Welding screws in place, primer for the area of the inner dome that gets painted, and another paint test or two.
Friday, March 17, 2006
Rough Cut of "Perfect Circle"
Well, I finally got up the courage to do a rough cut of the "perfect circle," the circle on the inner dome that shows through to the outside world. I hadn't been this anxious since I drilled the holes in the inner frame for the gas pipe connecting the arms. If I had botched this, it would have pretty much ruined my dome, so a lot was riding on it.
It turned out okay, certainly good enough that I can now start using a bottle neck with sand paper to sand it down to a round circle. Cutting out all the other circles in the dome first was good practice for this one. I'm glad that's behind me, I can breath a bit easier.
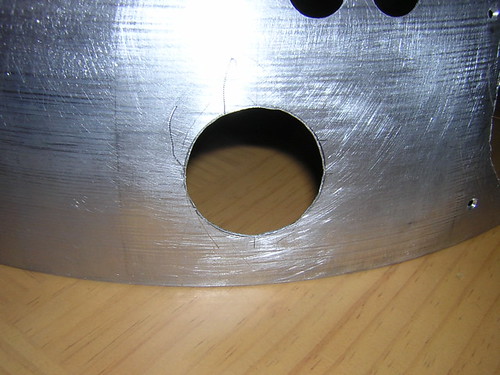
It turned out okay, certainly good enough that I can now start using a bottle neck with sand paper to sand it down to a round circle. Cutting out all the other circles in the dome first was good practice for this one. I'm glad that's behind me, I can breath a bit easier.
Wednesday, March 15, 2006
More Dome Cuts
Tonight I cut out the two button holes with a tapered drill bit, and the rectangular holes where the LEDs show through using a Dremel with a cutoff wheel.
I'm telling you, that tapered bit is awesome! I only wish they made them in HP diameter size.
One more hole to go, the "perfect circle" that I'm stalling on. I have a carbide burr bit on order from McMaster Carr for smoothing down the rough edges, and I want to test it out on existing holes before I tackle that last hole. Mike Senna said he used a bottle neck with sand paper wrapped around it to finish his off, I'm sure I'll do the same.
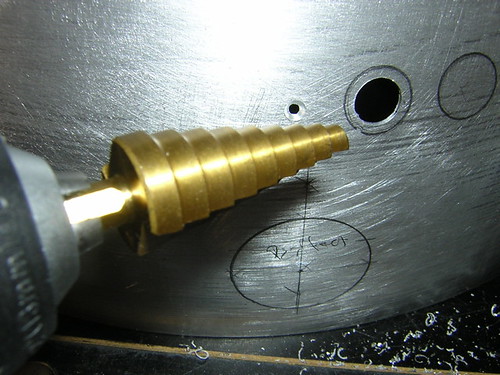
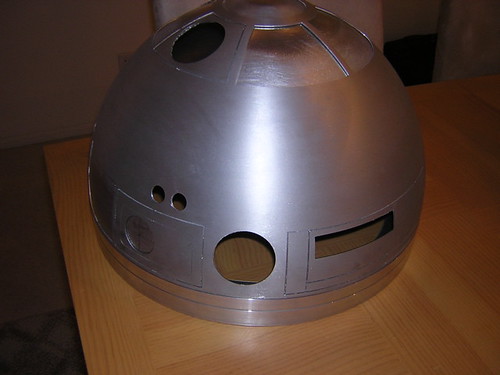
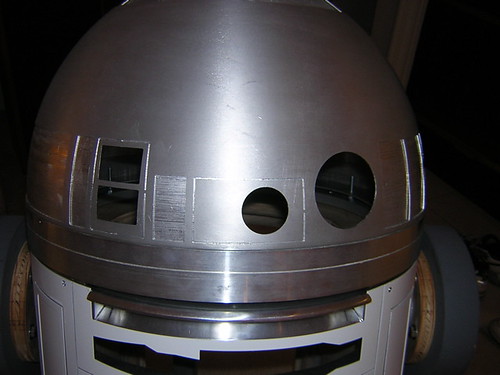
I'm telling you, that tapered bit is awesome! I only wish they made them in HP diameter size.
One more hole to go, the "perfect circle" that I'm stalling on. I have a carbide burr bit on order from McMaster Carr for smoothing down the rough edges, and I want to test it out on existing holes before I tackle that last hole. Mike Senna said he used a bottle neck with sand paper wrapped around it to finish his off, I'm sure I'll do the same.
Tuesday, March 14, 2006
Drilled Out Three More Holes in Dome
More drill abuse. I drilled the circumference of three more holes in the dome tonight. Not pretty, but they'll do the job. One of the upcoming inner dome circles will have to be perfect, as there is no counterpart on the outer dome. I will probably have to take a different approach on that one.
This would go a lot faster if I had a shotgun.
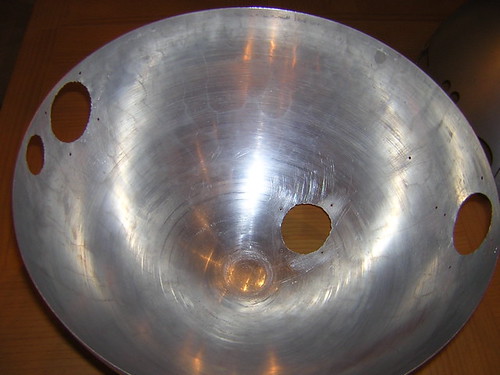

This would go a lot faster if I had a shotgun.
Monday, March 13, 2006
Cut Out Top HP Hole
I cut out the top holoprojector hole in the inner dome tonight. At first I tried using a hole cutter for a drill press (twisting by hand that is, no drill), but I could see that was going to take forever. So next I turned to the brute-force method, using a drill (11/64" bit) to cut small holes around the circumference of the hole.
I'd classify this somewhere between "butcher" and "massacre." I'll come back with the Dremel later and try to smooth this out. I've already started, but obviously there's a long way to go. It appears to have had a happy ending, complete with cutout on top for a crown.
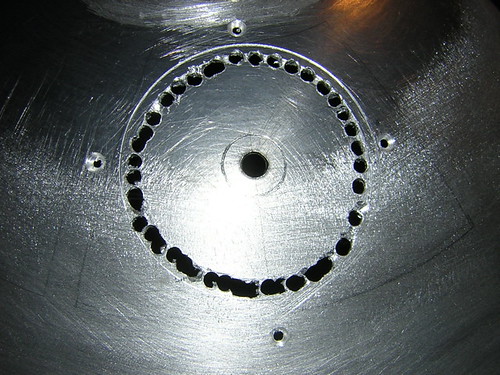
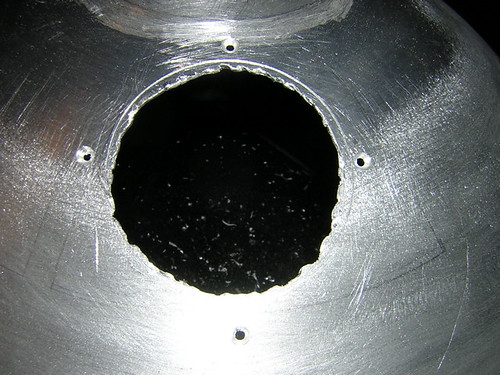
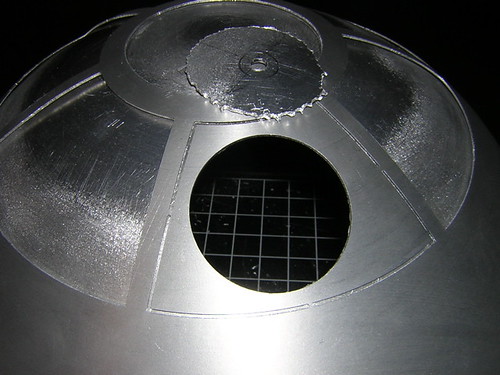
I'd classify this somewhere between "butcher" and "massacre." I'll come back with the Dremel later and try to smooth this out. I've already started, but obviously there's a long way to go. It appears to have had a happy ending, complete with cutout on top for a crown.
Sunday, March 12, 2006
Drilled Inner Dome
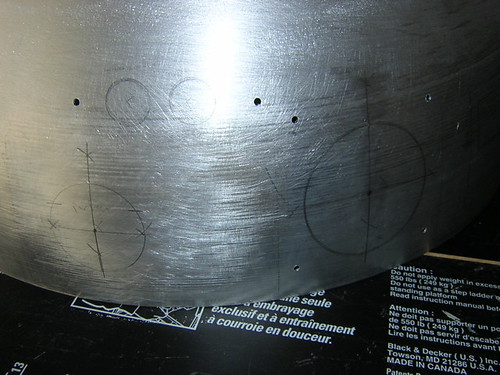
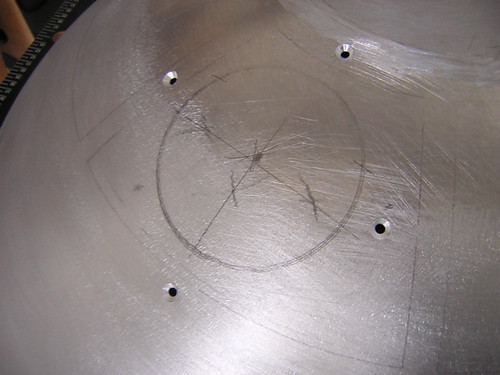
I got pitifully little done today. I started drilling and countersinking holes in the inner dome, to insert screws that will point inward into the dome (Mike Senna's idea). The purpose of these screws is to provide something for dome electronics and holoprojector holders to grab onto on the inside. Inserting and JB Welding the screws now will make life easier later. (You can also see that I dusted off a little high school geometry and did a sloppy geometric construction to try to find the center of various circles.)
The reason I got so little done today is that Harbor Freight had a drill press on sale for $39.99, so I took time out to go shopping. I've really needed a drill press for this project, so I finally got one. I should have done this on day one. Watch, now I'll hardly ever use it...
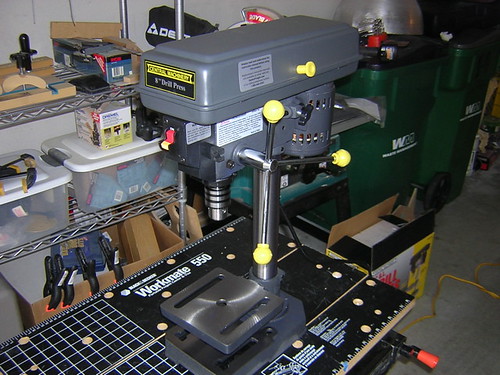
The reason I got so little done today is that Harbor Freight had a drill press on sale for $39.99, so I took time out to go shopping. I've really needed a drill press for this project, so I finally got one. I should have done this on day one. Watch, now I'll hardly ever use it...
Saturday, March 11, 2006
Eye & Lens Work, Prepped Dome for Cutting
I Dremeled out a groove in the back of the eye to better accommodate the lens.
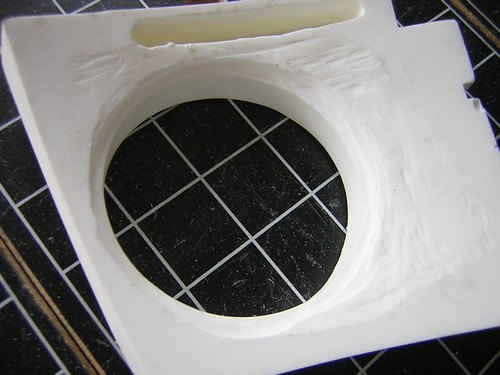
Then I Dremeled down the lip of the lens a bit to fit it into the groove in the back of the eye.
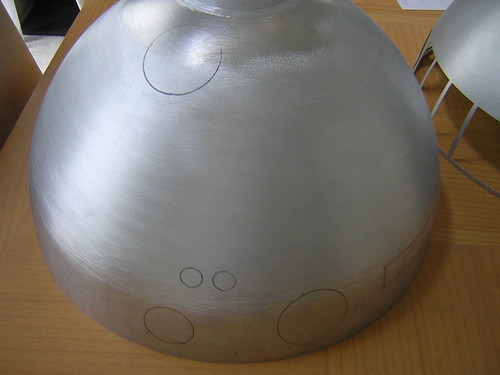
Finally, I marked up the areas of the inner dome that need o be cut to allow things like holoprojectors and lights to pass through to the outer dome. I hope to start cutting tomorrow, but I won't start until I'm sure I know what I'm doing and how I'm going to do it.
Then I Dremeled down the lip of the lens a bit to fit it into the groove in the back of the eye.
Finally, I marked up the areas of the inner dome that need o be cut to allow things like holoprojectors and lights to pass through to the outer dome. I hope to start cutting tomorrow, but I won't start until I'm sure I know what I'm doing and how I'm going to do it.
Thursday, March 09, 2006
Finished Sanding Eye
I finally finished sanding the back of the eye tonight, so the eye rests pretty snug on the dome. I also lightly sanded the surface of the eye in preparation for primer. Sorry, nothing more exciting than that.
Wednesday, March 08, 2006
Still Sanding the Eye
Mr. Sandman continues to antagonize the radar eye. More of the exact same as yesterday, except I only had a few minutes this morning to sand the back of the eye before I had to run to work. We took my dad out for his birthday tonight, so not much got done today.
Wow, according to the SiteMeter at the bottom of the page, there are a lot of people making sure I don't start slacking! :)
Wow, according to the SiteMeter at the bottom of the page, there are a lot of people making sure I don't start slacking! :)
Subscribe to:
Posts (Atom)
