Sunday, June 10, 2012

Almost Destroyed Droid

There is a ritual amongst R2 Builders known as "dumping your droid." It is a ritual to be avoided.

It's something I think about in the back of my mind from time to time, almost as if I believe it's just a matter of time before my droid tips over and crashes. I almost did it once while crossing R2 across a street that had a huge crack. It was scary seeing him teeter.

So I was a little surprised today when I finally managed to dump my droid, not at an event or crossing a street, but while driving in my car.

I was driving alone (well, with R2) in the Honda Element, returning from the ICAN bowling event this afternoon on the freeway, when suddenly the cars in front of me started braking. So I braked semi-hard, although nothing approaching a skid or screech. That's when I heard a loud commotion in the back of the car, felt a thud, and the next thing I knew, the droid was upside-down, with its blue utility arms near my right elbow. This is not where they belonged.

Normally the droid is held down with four bungee cords that are anchored in the Element. This has worked great for 5+ years. It would have worked great again today too, had I not forgotten to attach the two bungee cords that keep the droid from continuing to travel forward when the brakes are applied.

Of course, I'm thinking all sorts of horrible thoughts immediately after this happened. I can't survey the damage while I'm driving on the freeway, so I'll just have to wait for about another hour before I get home.

All the while I'm thinking about the four 5 pound batteries that must have gone flying, and the damage they may have done. I also realize the droid probably fell over the dome (covered with a thick towel) that was resting on the floor behind it. And I realize my droid lift crane is back there, to provide another obstacle. At that point I decided I'd better just concentrate on driving as best I could.

I finally got home and parked. Here's the view I saw of the droid the whole drive home.


It would almost be comical if it wasn't my droid. In fact, I can't deny it. This does look comical.


Once I got out of the car I had a better look at how the droid was situated. It was remarkably stable in this position, it didn't budge the rest of the drive.


The dome was covered with the mint green towel on the floor of the Element. Basically, the droid did a backflip and rolled over the dome before coming to rest.


I carefully removed the dome out from under the droid. My heart kind of sank when I saw this.


I managed to get the droid out of the car and back upright, and on into the house. Here is a better look at the back door damage.


I sent Mike Senna a picture and spoke to him on the phone. He feels reasonably confident that this is fixable. I sure hope so.


I surveyed the rest of the droid for damage. The dome has a small paint chip where one of the Rockler bearing screws must have dug in as it rolled. It also knocked out the top holoprojector, but that is easily fixed. As for the paint chip, I'll probably just color that in with marker, because if I repaint it I'm not sure how good of a match I'll have with the other panels. There is also a small indentation in the area of the paint chip that should be easy to pull back into shape.


I checked the rest of the body. It was in surprisingly good shape, all things considered. There is a small indentation on the skins just to the right of the door frame, near one of the mounting screws.


Other than that, the body is pretty much okay, as far as I can tell. The insides seem okay too, although I haven't done an exhaustive review of the electronics yet.


So, that is a major bummer, but it could have been much worse. I'm really unhappy with myself for forgetting to secure two of the four bungee cords that keep the droid anchored. I have a feeling I won't be forgetting to do that again anytime soon.

I hope to get together with Mike in the near future to see if he can use his super-human metal-bending skills to help heal the back door. In the meantime, I'll be alternating between depression and relief.

In lieu of comments and flowers, please send back door panels. :-)

ICAN Bowling Charity Event 2012

R2 returned to Canoga Park Bowl for the International Child Abuse Network's fundraiser to help fight child abuse and promote prevention education.


Folks paid $15.00 for lunch and two games of bowling. All proceeds went towards the charity.


Attendees also bid on auctioned items, and participated in a raffle.


The stars of the show were the characters, of course. We had a good representation, with Chewie, Boushh, Ewoks, a Jawa, three stormtroopers, a TIE pilot, a Royal Guard, and of course Darth Vader, joining R2.


I was planning to have R2 sit this year out when it came to bowling, but he gave it a shot, by popular demand.


He should have stayed off the lanes. Six tries, six gutter balls. Frankly, I'm amazed they even let us do this!


The Stormtroopers had much better luck.


A lot of money was raised once again this year, and I imagine R2 will be back next year, with or without his bowling shoes.

Saturday, June 09, 2012

Cutting Engine Turned Aluminum Strips for R5 Dome

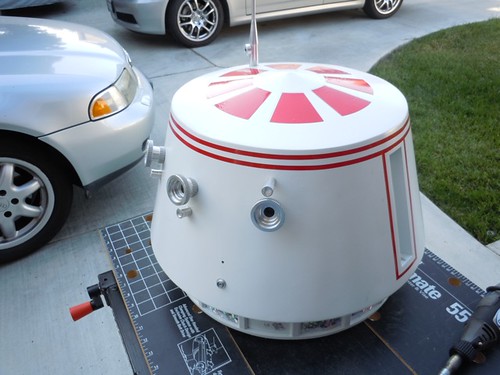
The R5-D4 dome I purchased uses holographic gift wrap paper as the reflective material in the neck rings slots. While there is a little debate as to what was actually used on the R5-D4 dome in A New Hope, to my eye it looks like engine turned aluminum in the reference photos.

Years ago, one of the local R2LA guys offered strips of engine turned aluminum, suitable for the neck ring rectangles on the R5-D4 dome. I acquired some, and needed to cut the rectangles to the proper size.

I went into work to abuse the office paper cutter. There are sixteen of these aluminum segments to cut. They are approximately 1-11/16" x 2-7/16", but each one needs to be cut to the exact size of the corresponding "window" in the neck, as the spaces vary ever so slightly.


I cut each piece slightly large, and then trimmed it to size as I iteratively fit and cut the piece to match its spot on the dome. I numbered each piece as I went.


After about two hours of this, I had all sixteen pieces cut to the proper size.


Along with a bunch of scrap.


I plan to use 3M VHB tape to attach the panels to the dome, after I remove the holographic paper. I am debating whether to drill small holes behind the panels so that I can poke them out from the inside of the dome, if I ever need to remove them for dome repainting. I probably will drill the holes.

Thursday, June 07, 2012

R5 Dome Work for Aluminum Struts

Dremel with flexible extension cable: Check.


R5 Dome: Check.


Kelvin: Check.


Tonight I went over to my friend Kelvin's place to work on getting the aluminum struts fitted into the R5 dome. The dome arrived with some resin struts already in place, but since I purchased the COM8 aluminum R5 dome kit a while back, I figured I might as well use the aluminum pieces.

The resin pieces were held in place with small nails at the top and bottom. We pulled those out.


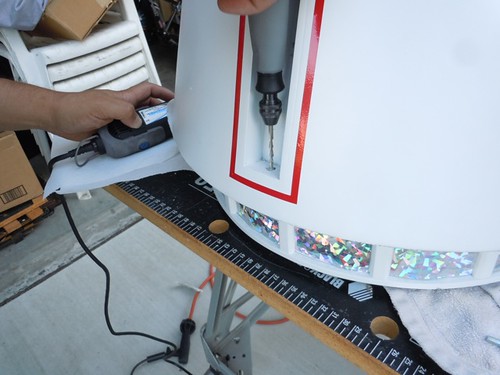
Next, Kelvin used the flexible Dremel attachment to widen the nail holes, to accommodate #10-32 machine screws that will be used to secure the aluminum struts. The Dremel chuck won't take a 0.190 drill bit, so he had to use a smaller bit and do his best to create a clean circle.


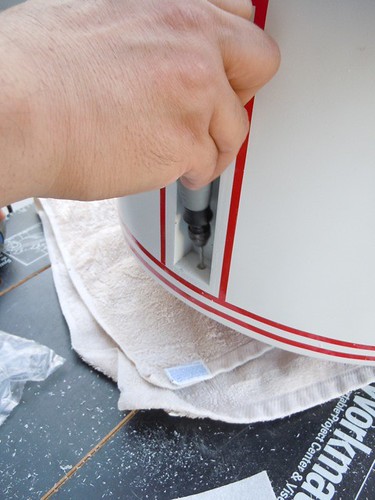
After we widened the bottom holes, we flipped the dome over and worked on the top holes. Note that the Dremel does not fit completely into the breadpans, so the holes are slightly angled, which is suboptimal, and will require a bit more cleanup work later.


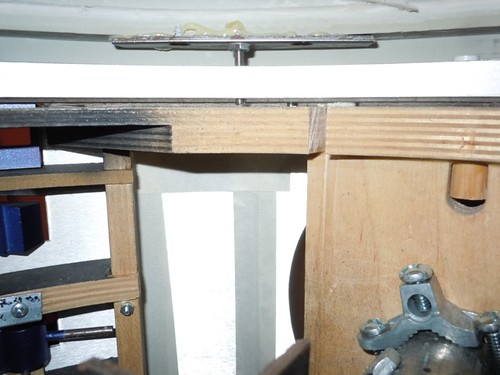
The aluminum struts are just a hair too long to fit into the breadpans, so we used a trick Mike Senna showed me for the left and right struts. We wrapped some tape around the top of the shaft, inserted it into a drill press, and then used sand paper on the bottom to shave a few fractions of a millimeter in length.


For the rear strut, there was enough material to remove that we decided to use the belt sander.


And that's where we left things. The struts now fit into the breadpans, but the holes need to be cleaned up a bit to be more vertical, since they were drilled at an angle. I hope to get to that shortly.

Sunday, June 03, 2012

Matching Rockler Bearings

This may get confusing, probably because I'll do a poor job of explaining what I'm doing and why, but here goes...

Today I addressed a bit of a Rockler bearing conundrum that I faced when swapping the R2 dome and the R5 dome.

Recall that I've mounted the dome ring screws for the R5 dome onto the R5 dome ring itself. They point down from the dome and go through the corresponding holes on the Rockler bearing. This was done to avoid having a problem where screws pointing up from the Rockler bearing would otherwise poke through the R5 neck ring.


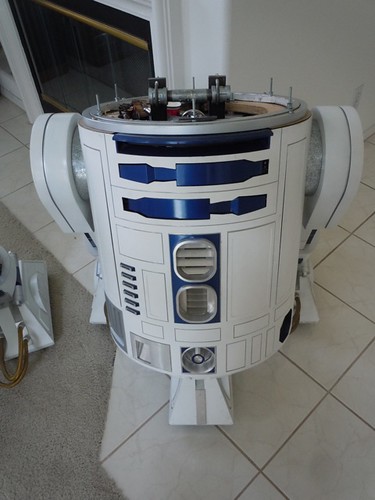
Conversely, the R2 dome expects the dome screws to be mounted in the Rockler bearing pointing up, as seen here with droid #1


One option when swapping the domes is to remove the Rockler bearing and the six dome screws whenever I swap from the R2 dome to the R5 dome, and then reverse the process when going back to the R2 dome. That's not so bad in and of itself, but it potentially means keeping track of nut positions that help to raise the R2 dome above the skins.

Rather than deal with that, I figured that if I could get my hands on an extra Rockler bearing, I could then have one dedicated to the R2 dome with the screws affixed to it, and the other dedicated to the R5 dome without the dome screws. I was fortunate enough to acquire a spare Rockler bearing (without having to buy it).

The only trick is getting the four screw holes in the outer ring of the new bearing to match up to the original bearing. These four holes are used for the screws that hold the bearing onto the wooden frame.

The more I thought about matching the hole pattern for the frame, the more I figured if I was going to the trouble of drilling Rockler bearings, I might as well make all three bearings fit exactly the same on both droids. So I pulled the Rockler bearing off of droid #1 to use as a template for drilling holes into the other two bearings.

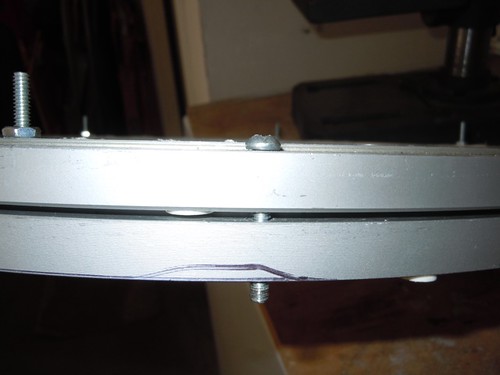
First I affixed the six dome screws onto the inner ring of the original bearing for droid #2, and then I slid the bearing for droid #1 on top of it.


Each bearing has four holes drilled into its outer ring, to secure it to the frame with screws. Unfortunately, these holes are not in identical locations on each droid, but I'm about to make them so. By luck, one of the four outer ring holes did match up with each ring, so I slipped a screw through the hole to help lock the outer rings together.


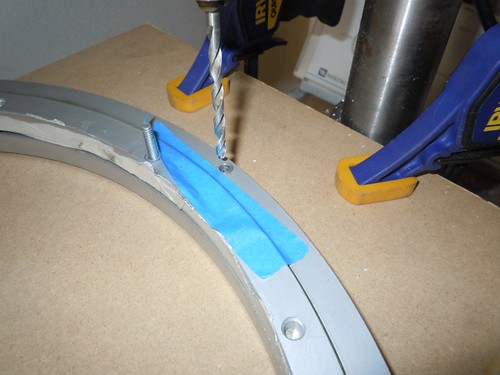
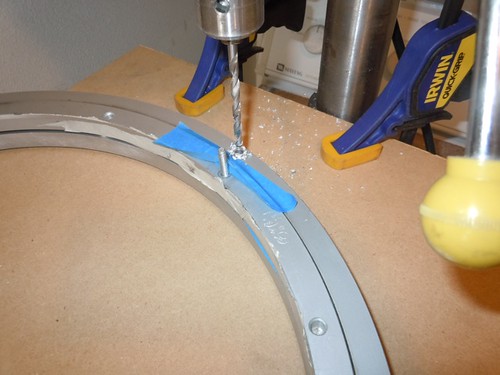
I checked and double-checked that the four hole locations for droid #1's bearing wouldn't interfere with anything on droid #2's bearing. After convincing myself that all was well, I started drilling. I covered the four hole locations of the lower bearing's race way with masking tape, and also used a piece of tape for the upper bearing as well, as I drilled.


I repeated the process for each hole location. The outer ring on droid #2's bearing now has seven holes, versus the original four. Three holes are new, one was recycled.


Once the holes were drilled, I took the original bearing for droid #2, and placed it back on droid #2's frame, placing screws in the original four locations. This locked the bearing onto the frame in the proper position, nice and centered on the frame.


I used a hand drill to drill the three new locations in the wooden frame, using the new holes in the Rockler bearing as a guide.


Three new holes in droid #2's frame, plus the original four.


I repeated the process for the new Rockler bearing for droid #2, and that also went very well. I also verified that both the bearings for droid #2 fit on droid #1's frame.

Now all my bearings are interchangeable. This is good, because as of now droid #2 is not yet remote controlled, so if I want to dress up droid #1 as R5-D4, I'll be able to do so with a lot less hassle. Plus, not all bearings are created identically, and sometimes getting dome screws to match up between domes that were drilled for different bearings can be quite a challenge.

I told you it could get confusing.

Over 90,000 Served

This morning, Victor's R2D2 Building Diary hit the 90,000 visit mark. The mythical winner hails from Lexington, Kentucky.


Time to update the stats.

It took 1 year, 10 months and 24 days to get to 10,000. It took another 1 year and 17 days to get to 20,000. It took another 11 months and 19 days to get to 30,000 visits. It only took another 7 months and 15 days to get to 40,000. It took an additional 5 months and 1 week to get to 50,000. Slowing down, it took an additional 6 months and two days to get to 60,000. It took almost exactly 5 more months to get to 70,000. It took 5 months and 10 days to get to 80,000. Finally, speeding up a bit, it took an additional 4 months and 19 days to get to 90,000.


Next stop, 100,000!

Saturday, June 02, 2012

Installed R5 Eyes and Antenna

Today I worked on installing the COM8 R5 eyes and antenna on my R5-D4 dome.

The eyes are drilled and tapped for a pair of #10-32 screws. The dome has a single hole pre-drilled in the center for each eye, but I'll need two holes on either side of each eye to match the screw pattern.

I used a piece of tape and punched holes in it with a screw to get the pattern for the screw holes in the dome.


I then transferred the tape to the dome so I could start drilling.


I used a 7/64" drill bit to drill pilot holes first.


After drilling the six pilot holes with the 7/64" bit, I went back with the wider 0.191" drill bit to accommodate the #10 screws that hold the eyes in place.


The two screws per eye do a good job of securing the eyes to the dome. If I were really meticulous, I would sand a curve into the back of each eye to match the dome profile, but I've grown lazy in my old age. And it's pretty hard to tell from any normal distance that there is a 0.1 millimeter gap.


A view from the inside. Lots of #10 screws holding things in place.


The antenna is also held on with a #10 screw, and a large washer.


Getting a little closer to the finish line.


I still need to work on attaching the aluminum struts in the dome breadpans, and the material that goes in the neck ladder. I also plan to drill a second Rockler bearing, so I won't have to go through the hassle of undoing dome screws when I swap between the R2 dome and the R5 dome.

Friday, June 01, 2012

R5 Panel Test

Well, the red R5-D4 panels that I painted yesterday had dried sufficiently that I decided to do a loose fit on the droid, at least for the panels that go on the front.

While the two vertical panels can rest in their frame pieces, the utility arm cutouts require some adhesive to go over the blue arms. Pulling a page from Mike Senna's playbook for the millionth time, I used museum putty, which is normally intended to help valuable stuff from falling over in case of an earthquake or similar shaking.


I put just a little bit on each end.


Well, he's starting to look a lot more like R5-D4.


Of course, the dome is missing most of the accouterments. I have the COM8 aluminum dome parts, and I need to drill a few holes to attach the main eyes, and I'll need to do a little more work to get the aluminum struts into their breadpans. I also need to attach the antenna, and replace the metallic paper on the neck ring with the real stuff.

Why do I have a feeling that will take at least as long as it took to get to this point?