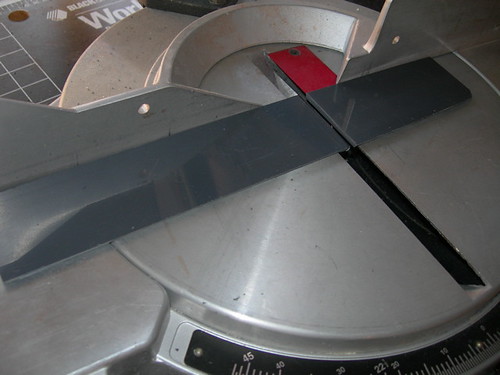
First, I cut a spare strip of PVC to size.
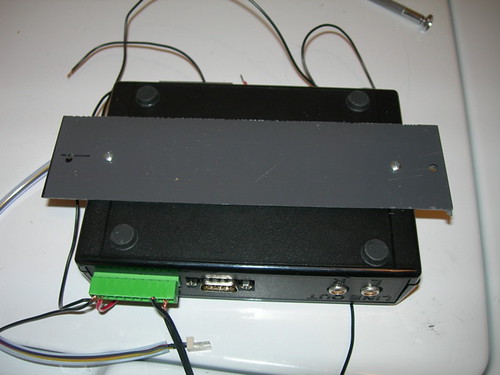
Then I attached the PVC strip to the enclosure by drilling holes in the strip that match where the pre-existing screws on the bottom of the enclosure go. Now the PVC strip gets screwed onto the back of the enclosure. I also drilled a couple of mounting holes on the ends of the strip, so that I can mount the enclosure onto one of the wooden vertical planks of my frame.
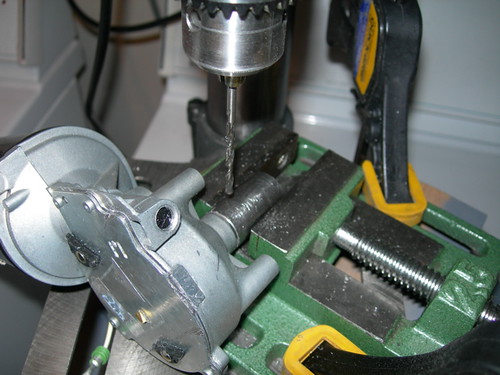
Next came a part of the drivetrain build that I had been fretting over for quite a while, the drilling and pinning of the shaft adapters to the Saturn motor shafts. It turned out that I had nothing to worry about, it was not as hard as I thought it would be.
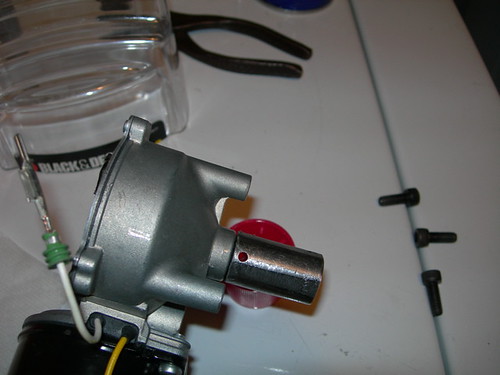
I clamped down the shaft adapter in my drill press vise, and then secured the vise to the table. When I was sure that the drill bit was ready to go dead-center through the shaft adapter and shaft, I fired up the drill press and slowly drilled a 1/8" diameter hole through it all.
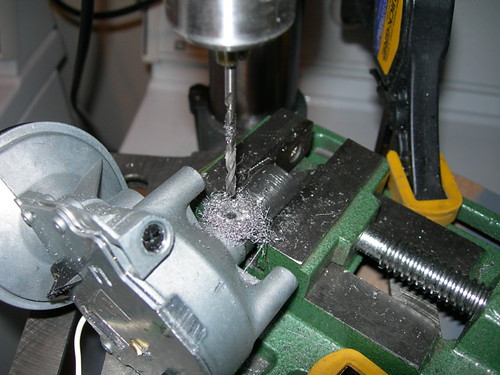
I got the hole just where I wanted it, toward the very bottom of the shaft adapter, near the thickest part of the motor shaft, and right through the middle.
In all, I drilled the two foot motor shafts, and the dome drive motor shaft. I still need to drill another hole in the dome drive shaft adapter to secure the dome drive scooter wheel to it. I'll deal with that soon.
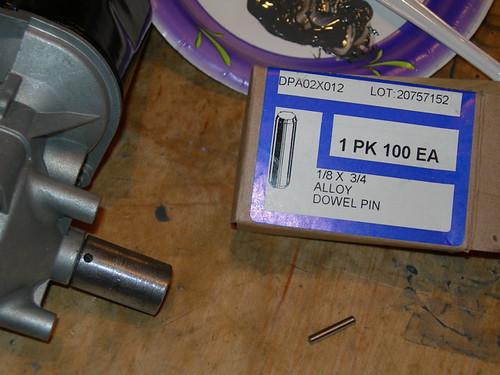
Next, I JB Welded a 3/4" long, 1/8" diameter steel pin into each hole. The steel pins are from McMaster-Carr, and only come in quantities of 100. The pin will secure the shaft and shaft adapter together, so that the two won't shear when the motor torque kicks in.
It's important to secure the pin to the thickest part of the motor shaft, as the threaded area of the shaft has been shown to be too thin and/or weak to handle the stress when running the motors at 24 volts.

And with that, my scratch-built Heath & Alex drivetrain is done! I'll put it all back together again once the JB Weld has dried.

3 comments:
I can't wait to see R2 rolling around on those drives !!!
I meant to ask you: Did'nt you have a set of Krider's outer feet?
If so, Was there a reason you did'nt use them?
Calvin
Calvin,
Your memory is correct, I do have a set of outer budget feet. I had planned to use them, but I didn't have easy access to (or experience using) a welder to finish the tack welds.
I managed to talk Mike into making a couple of sets of PVC feet for our droids. I helped a little with the build, but Mike did at least 90% of the work (I was always around).
I still have the budget feet, as I just might make another droid and just might use them.
-Victor
Victor,
Congrat's on finishing the foor drive system.
100 pins... I can see it now, an official R2 builders offering of 1/8" x 3/4" steel dowel pins. $1 each or 10 for $1.00. shipping extra... get em while they are hot...
If you need any other pins, they can be bought at Ace harware in any quantity and various sizes.
Hope to see you guy's Saturday.
Matthew
Post a Comment