
Friday, September 30, 2005
Tape-Ease Cylinder Cut
Finally! The Tape-Ease cylinder was cut with a band saw, and now I can finish he lower part of the legs. I need to cut one of the ends of the cylinder at a 55 degree angle, and then cover it with MDF. I also (what else?) did more sanding and puttying of the legs. Although you'd think the legs would be mostly putty and sand paper by now, they're not.

Thursday, September 29, 2005
More Leg Work
The leg work never ends. In my quest for as smooth a finish as possible, I did another round of sanding and gooping of putty. Will sand again tomorrow. "Will this suffering never end?"
Wednesday, September 28, 2005
Dome Arrived!
September 28. That date never meant much to me. School starts... brush fire season... days get shorter... But September 28, 2005 now ranks as an annual holiday, for today is the day I received my dome! The box was somewhat beat up, but thankfully the contents were in excellent condition, with no damage whatsoever. I was expecting a known defect at the top of the dome, but that was not present. All in all, a very happy day!

Tuesday, September 27, 2005
Sanded Cylinder Holder, Purchased Protractor, More Leg Work
I (hopefully) finished sanding the grooves in the ankle cylinder holders. Went to Home Depot, looking for wood hardener and a protractor. Found both, but the wood hardener (Minwax) had all but a skull and crossbones on it warning how many ways it could harm you. Since it said it was mainly for rotting wood, I passed. Wrapped up by going over the legs with Plastic Wood one more time, for (again hopefully) a final sanding. I still may refill in the groove in the legs and try again for better alignment, haven't decided.
Monday, September 26, 2005
Sanded Cylinder Holder, Purchased Router Table
Spent a little time after work sanding a groove into the Ankle Cylinder Holder, as called out by the blueprints. Will hopefully wrap that up tomorrow. Also bought a router table and adapter for the Porter Cable router at Sears.
Saturday, September 24, 2005
R2LA III
What can I say? R2LA III at Mike Senna's place was a blast! It was the Superbowl of R2 events (this is coming from a guy who missed C3). Over 40 people showed up, six complete R2s, lots of veterans, some newbies (ahem), and a helicopter fly-over! Loved every minute of it. Thanks Mike and Amy!

Saturday, September 17, 2005
LEDs Arrive
The blue and white LEDs I purchased from a seller on eBay arrived today. Hard to tell if the LED below is blue or white due to the camera flash! (It's blue, by the way. Everything but the LED looks awful without the flash, so I went with the flash pic). Also picked up a multimeter.

Wednesday, September 14, 2005
Lights Are Blinking!
Hooray! I started touching a multimeter to the power connectors, and found a bad solder joint on the 9-45v pin. Using a thumbtack (temporarily) completes the connection, and LEDs are blinking!
Tuesday, September 13, 2005
Finished Soldering Prototype LEDs
The good news: I finished soldering up the PIC flasher kit. The bad news: Nothing blinks. I have absolutely no idea what's wrong. More than likely I have one or more bad solder points. I've tried powering the thing with a single 9v battery and also four D cells in series, no luck. Very discouraging, and right now it looks like six hours and twenty bucks down the drain. (I know, the picture below shows two empty IC sockets, but they have since been populated correctly.)

Monday, September 12, 2005
Started Prototyping LEDs
Today I dusted off what little soldering experience I have, and started soldering my PIC flasher circuit that I ordered from Carl's Electronics. Soldering was a bit sloppy, but I think I haven't shorted any leads yet. I had to stop when I found that the package swapped 8 of one resistor type with what should have been 1 of another. I have two more kits to work with, but this was a good stopping point anyway.
I also picked up a soldering iron stand and desolder bulb at Radio Shack.

I also picked up a soldering iron stand and desolder bulb at Radio Shack.
Sunday, September 11, 2005
Recut groove
After somewhat botching the alignment of one of the grooves on the left leg yesterday (and subsequently filling the groove in with putty), I recut the groove to better align with the adjoining edges.
I also bought a soldering iron, solder, battery case, breadboard, 555 timer and wire at Radio Shack.
I also bought a soldering iron, solder, battery case, breadboard, 555 timer and wire at Radio Shack.
Saturday, September 10, 2005
Leg Grooves, Cut Tapease Cylinder
After several days of sanding and puttying the legs to get them smooth, I cut grooves into the legs where they belong. Well, almost where they belong. They don't all align perfectly, so I am going to fill at least one groove back in with putty and try again to get them to align.
I also practiced cutting the Tapease cylinder. My technique and results show more practice is needed. All in all a pretty disappointing day, as my results fell far short of the goal.

The LED kit arrived from Carl's Electronics. I had ordered three kits.

I also practiced cutting the Tapease cylinder. My technique and results show more practice is needed. All in all a pretty disappointing day, as my results fell far short of the goal.
The LED kit arrived from Carl's Electronics. I had ordered three kits.
Sunday, September 04, 2005
Putty, Sanding Legs
Worked DAP Plastic Wood into leg grooves and little holes in the plywood, and gave the legs a sanding after it dried.
Saturday, September 03, 2005
Cut Cylinder Holders
Today I built of the easier parts to construct, the ankle cylinder holders, which look like little wedges underneath the ankle cylinders. Not even picture-worthy.
Also picked up some replacement gas pipe at Lowe's. The good news is that the 3/4" pipe fits cleanly into the 1" pipe. The bad news is there was an elbow joint stuck on the 1" pipe, and since it's the only one that made a good fit, I had to buy it like that (and pay about two bucks for the elbow) and now I have to figure out how to get it off!
Also picked up some replacement gas pipe at Lowe's. The good news is that the 3/4" pipe fits cleanly into the 1" pipe. The bad news is there was an elbow joint stuck on the 1" pipe, and since it's the only one that made a good fit, I had to buy it like that (and pay about two bucks for the elbow) and now I have to figure out how to get it off!
Thursday, September 01, 2005
Keith's Resin Parts Arrive
Keith Henry's excellent resin parts arrived. First and foremost, the radar eye (shown with Azman's lens), along with another set of ankle cylinders and wedges, and the ankle details. Thanks, Keith!

Tuesday, August 30, 2005
Finished Gluing Left Leg
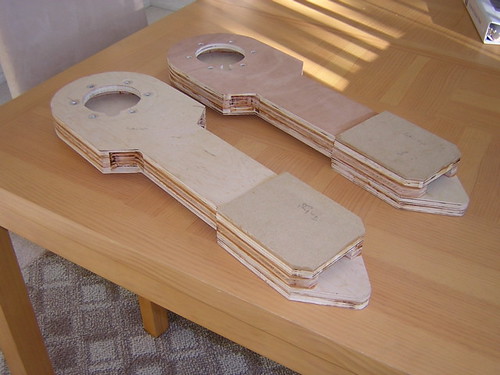
I finished gluing the last layers of the left leg today. They don't look like much, but hopefully once they're sanded and painted they will look like real R2 legs. One day I'll find out how to cut the Tape-Ease cylinder, and at that point I can prime and maybe even paint the legs. Also ordered Pat's aluminum shoulder hubs. Also spent a frustrating evening at Home Depot trying to fit together 3/4" gas pipe into 1" gas pipe with no luck. May try the same exercise at Lowe's.
Monday, August 29, 2005
More Resin Parts, Finished Gluing Right Leg
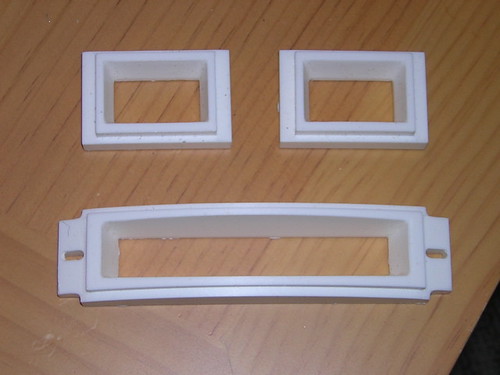
Azman's front and rear logic display surrounds arrived today. (Keith's parts were shipped today.) These frame the LEDs on R2's dome. The small ones go on the front, the larger one in the back. But why not make a face in the meantime?
I also finished gluing the right leg today! I started gluing the left leg's main outboard layers. Should be done tomorrow.
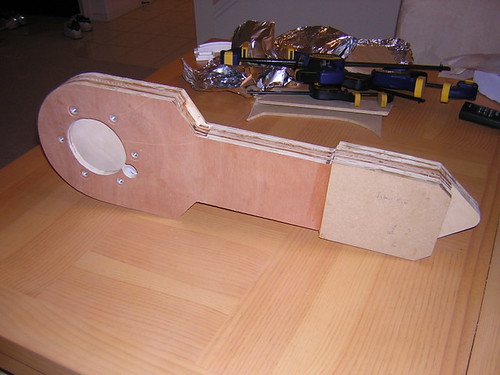
I also finished gluing the right leg today! I started gluing the left leg's main outboard layers. Should be done tomorrow.
Sunday, August 28, 2005
Drilled Wire Holes, Started Gluing Right Leg Main Layers
I drilled holes out of the shoulder discs and inner-most shoulder area of the right leg to facilitate the electrical wires that will run from inside R2's body, down to the motors in the feet. I also began gluing the two outboard main leg layers on the right leg. Made a stop at Home Depot to pick up some more sand paper, DAP Plastic Wood, and an extra 5/16"x2" bolt to replace one of the existing bolts whose threads didn't seem to be quite right. Not picture-worthy (again).
Saturday, August 27, 2005
Rounded Shoulder Disc, Installed Tee-Nuts
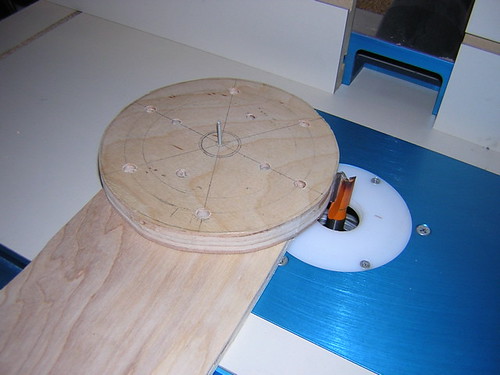
I finally had a chance to go over to Kelvin's today and use the router table to smooth out the edge for the (now) circular shoulder disc. After that I used his drill press to drill six holes into each shoulder for the tee-nuts, which I later installed at home.
At this point, I still need to drill some holes for the wires that lead to the motors, and then glue up the leg layers. I also need to figure out how to saw the Tape-Ease cylinder.
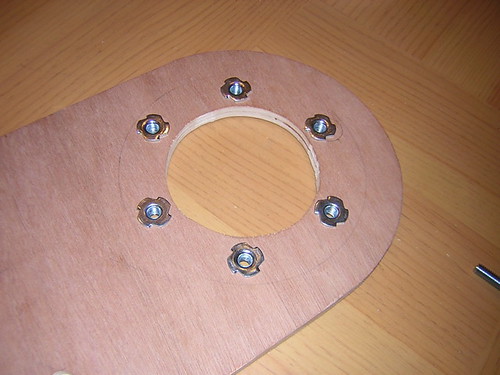
At this point, I still need to drill some holes for the wires that lead to the motors, and then glue up the leg layers. I also need to figure out how to saw the Tape-Ease cylinder.
Friday, August 26, 2005
Finished Drilling Shoulder Discs
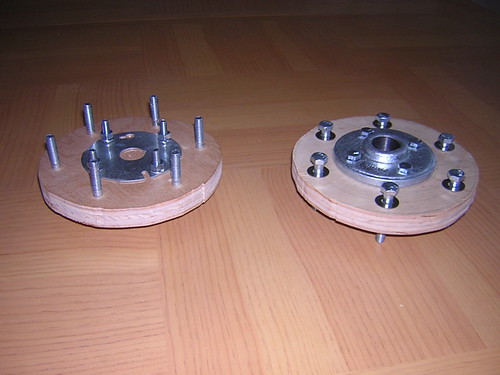
I drilled six 5/16" holes in each of the two shoulder discs, so the drilling is complete. Still need to route the discs into a smooth circle, and drill the holes for the t-nuts in the legs.
Subscribe to:
Posts (Atom)
