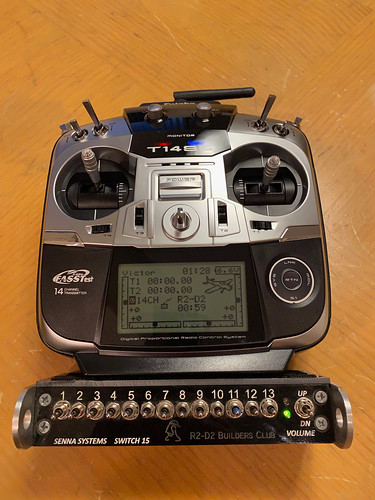
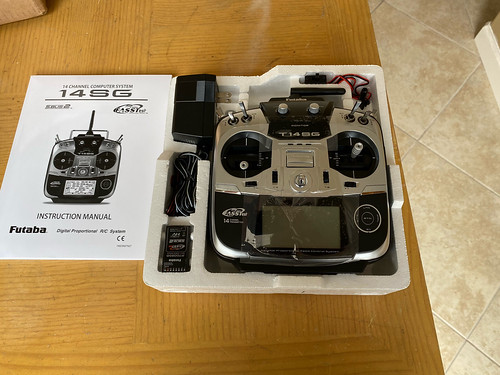
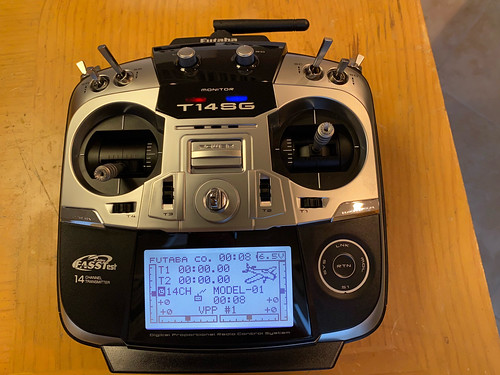
Today I was able to finish getting the Sabertooth 2x12RC speed controller installed on droid #1. I needed some 1/2" nylon stand-offs to ensure good ventilation under the speed controller, so with those in hand, I used some 3/4" #4 wood screws to finish the installation.
Next, I calibrated the speed controller with my transmitter. Setting DIP swithes 5 and 6 on the 2x12RC allows the controller to be trained on the minimum, neutral, and maximum values for the joystick settings, and those setting can be saved.
Only channel 4 is needed for dome rotation. The model name "2x12RC" indicates it is a 2-channel, 12 amp Remote Control speed controller. I've found that if I leave the second channel disconnected from the receiver, the dome tends to drift and the controller supplies a very small amount of voltage to the dome motor (under one volt). So little voltage is supplied, that the motor doesn't actually turn; instead it simulates a stall condition, causing the speed controller, wiring and motor to get pretty hot.
I found that if I attach the second channel from the speed controller to an unused channel on the receiver, AND if I disable the corresponding channel on the transmitter, then this problem goes away completely. In this case, I attached the second channel from the speed controller to channel 3 on the receiver, and then disabled channel 3 on the Futaba 14SG transmitter.
In the case of droid #2, I'm using the Futaba 10CAG transmitter, which doesn't allow channel 3 to be disabled, so I had to use channel 5 on the receiver and disable that channel on the transmitter.
Monday, June 28, 2021
Saturday, June 26, 2021
Installed New Dome Speed Controller on Droid #1
After 14 years of fine service, I decided it was time to retire my poor-man's dome controller on droid #1. That controller worked by having a servo horn directly bump snap switches. The wiring allowed the dome motor to turn full speed in one direction or the other (or not at all), but there was no variable-speed capability. The Dimension Engineering Sabertooth 2x12RC will handle that duty now.
Thank you old dome controller, you served me well.
The Sabertooth 2x12RC can output 5 volts to the receiver, but I already have a switching battery elimination circuit powering my receiver (and capable of supplying more amperage), so I disconnected the positive and negative voltage lines from the connectors going to the receiver, and applied some shrink tubing to the metal ends. The yellow signal pin stays in the plastic connector.
I started to install the speed controller on droid #1. It will go over the hole that accommodated the servo motor on the old dome controller. While I think this hole would probably provide sufficient ventilation, I decided that I wanted to put the speed controller on stand-offs just to be sure. So I need another day to get those set up.
Sorry to leave you hanging, 2x12RC. Not for long.
Sunday, June 13, 2021
Attached Senna Switch 15 to New Transmitter
Today I got around to attaching the Senna Switch 15 box to the bottom of droid #1's new Futaba 14SG transmitter. This just required a mating piece of Vecro.
I need to route the connector and cable so it doesn't get underneath the transmitter when I lay it face-up on a table. For now I'll just use blue painter's tape, but in the long run I'll probably glue the plastic connector to the PVC case.
Saturday, June 12, 2021
Speed Controller Adjustments for Droid #2, Power for Switch 15 for Droid #1
With droid #2 inheriting droid #1's transmitter/receiver, I needed to recalibrate the Sabertooth 2x32 speed controller settings to match those sent by the 10CAG transmitter. I never did calibrate this transmitter with the Sabertooth 2x32 speed controller on droid #1, instead using trim values to make adjustments. With Dimension Engineering's DEScribe software, I can tune the speed controller so that its expected min/neutral/max servo pulse settings match what the transmitter is sending, and zero-out those trim values once and for all.
Nominally, the minimum servo pulse setting should be 1 millisecond, the neutral/idle position should be 1.5 milliseconds, and the maximum servo pulse setting should be 2 milliseconds. Using the DEScribe software and the associated Device Monitor application, I can see that these values sent by my transmitter for the steering and throttle channels are actually a bit outside those values. I jotted down what the Device Monitor application reported for each of those settings, and used DEScribe to program them as the expected values. (This will be need to be done for droid #1 and its new radio as well.)
Next, I worked on getting power to Mike Senna's Switch 15 box for droid #2. The electronics in this box run on 3.3 volts. There's a voltage regulator in the box that can downstep 6-28 volts to 3.3 volts. The trainer port in the back of the Futaba trasmitters provides power on the middle two of its six pins (negative on the center-top pin, positive on the center bottom pin). In the case of the Futaba 10CAG transmitter, 9.6v are supplied on these pins when the transmitter is turned on. I purchased some connectors for the trainer port a while back, so I grabbed my last spare and soldered it up.
Good to go, for droid #2 at least. I actually already had this set up for droid #2, but the trainer port on the new Futaba 14SG transmitter was somewhat finicky in accepting the old connector cable I made for droid #1, so I transferred the cable for droid #2 to droid #1, and made this new cable for droid #2.
Also note that since the new Futaba 14SG transmitter for droid #1 runs on a nominal 6.0 volts, and that's the minimum that the voltage regulator in the Switch 15 box is rated for, I plan to replace that regulator with one that matches the 14SG's voltage.
Thursday, June 10, 2021
Installed New Receiver in Droid #1
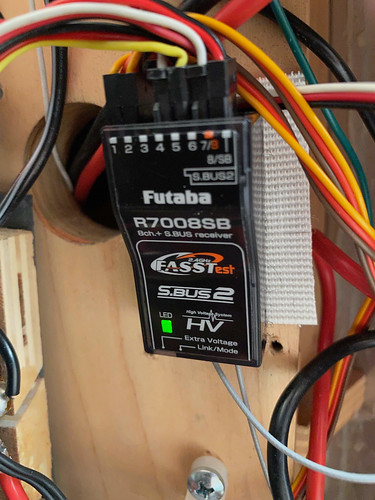
Today I installed the new Futaba R7008SB receiver on droid #1, to go along with the new 14SG transmitter. This meant pulling out the old R6014HS receiver.
For whatever reason, I use Velcro to mount my receivers, so the new receiver needed some Velcro applied to the back.
And, in it goes. Its footprint is somewhat smaller that its predecessor's. (I wrote "predecessor" because I was too lazy to retype R7008SB. Except I just typed that, and more. Plus, predecessor has more characters than R7008SB.)
Likewise, I swapped out the old R6008HS receiver (that does not support fail-safe settings on all channels) on the electronics panel on droid #2. That receiver will go into retirement. I swapped in the "predecessor" from droid #1.
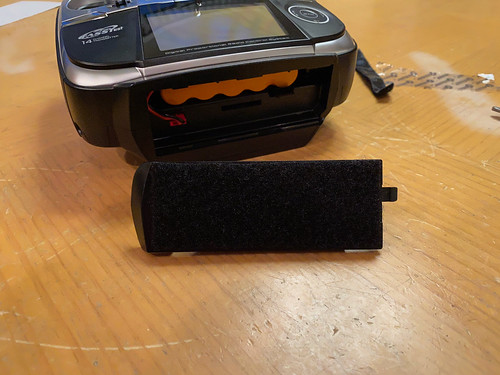
I still need to attach Mike Senna's Switch 15 box that I use to trigger sounds and other functions on droid #1. This gets Velcroed to the bottom of the transmitter. The battery cover is on the bottom of the transmitter as well, but that's ok. I will simply slide the Switch 15 box to remove the battery cover.
Just a bit more work to do.
For whatever reason, I use Velcro to mount my receivers, so the new receiver needed some Velcro applied to the back.
And, in it goes. Its footprint is somewhat smaller that its predecessor's. (I wrote "predecessor" because I was too lazy to retype R7008SB. Except I just typed that, and more. Plus, predecessor has more characters than R7008SB.)
Likewise, I swapped out the old R6008HS receiver (that does not support fail-safe settings on all channels) on the electronics panel on droid #2. That receiver will go into retirement. I swapped in the "predecessor" from droid #1.
I still need to attach Mike Senna's Switch 15 box that I use to trigger sounds and other functions on droid #1. This gets Velcroed to the bottom of the transmitter. The battery cover is on the bottom of the transmitter as well, but that's ok. I will simply slide the Switch 15 box to remove the battery cover.
Just a bit more work to do.
Monday, June 07, 2021
New Transmitter/Receiver for Droid #1
Today droid #1 received a new gift in the mail, a Futaba 14SG transmitter and R7008SB receiver.
Back in 2007, I purchased droid #1's initial transmitter, a Futaba T9CAP. This radio had a 75MHz, FM-based transmitter. I later purchased a 2.4GHz conversion kit for it, but that conversion kit did not support fail-safe settings on all channels (only channel 3, throttle on an R/C plane). I later purchased a Futaba 10CAG transmitter and associated receiver, and I've been using that for droid #1, while the T9CAP was passed on to droid #2. I decided that I wanted both droids to have full fail-safe capabilities on all channels, plus I wanted a more modern transmitter, so I purchased the 14SG.
I'll work on getting this installed on droid #1 soon.
Subscribe to:
Posts (Atom)