
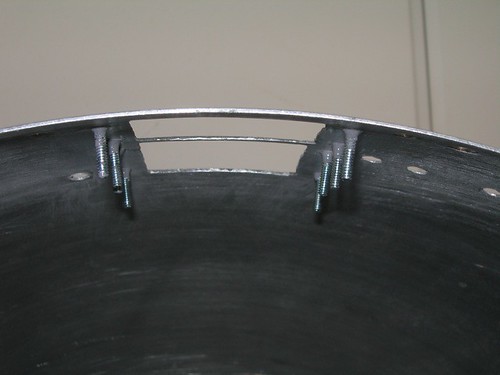
The first step is to sand the holes in the dome, along with the screw heads, to provide extra surface area for the JB Weld to grab onto.

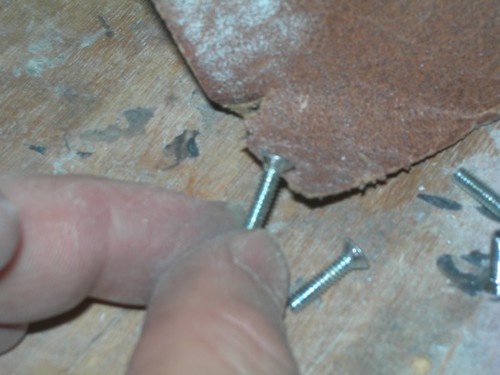
Then, it's a simple matter of applying JB Weld to the screw heads and putting them in place.
If some of the JB Weld overlaps the threads too much, I'll use a utility knife later to scrape it off.
Hoping we won't have an earthquake overnight as this dries.

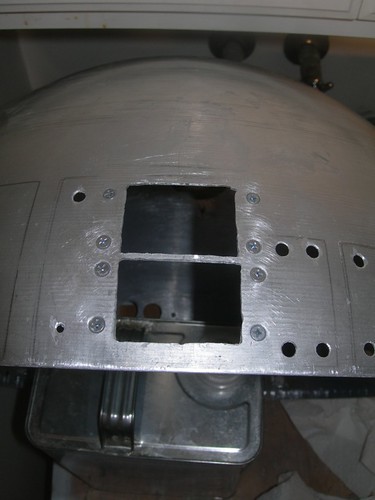
So... one more thought on all this. I won't know if the screws are all pointing in the perfect direction to mount the front logic surrounds until tomorrow. They very well might not. If they don't, I am tempted to just whack the screws out with a hammer, cover the holes with JB Weld, sand it smooth and paint it silver, and abandon screwing the front logic surrounds in place.
I didn't screw the front logic surrounds in place on droid #1, instead, they are pressed into place from behind. If I'm not successful with today's approach, then I'm going to back out and do it the same way as with droid #1.

1 comment:
Sorry to hear the screws didn't work out Victor. I actually am at that point too on the dome. When I counter sunk the holes for the front logic surrounds, they peek out a little when the outer dome is on. I may have to break out the evercoat as well!
-Eric
Post a Comment